D
Deleted member 11167
“Knowing yourself is the beginning of all wisdom.”
- Joined
- Dec 6, 2020
- Posts
- 2,711
- Reputation
- 3,804
Introduction
If u want to make yourself look better in pics without resorting to morphing then this guide should be able to help you.
There are many factors that go into how a picture of you will look so this guide will be split up into categories for easier reading.
Distance/Focal point
What is usually called lens distortion is pretty simple to optimize and a lot of you should know about it already, Ideally what you want to do is to take the picture in the mirror or hold out the camera as far from you as possible to minimize the distortion effect.
Now there are ways u can use distortion to benefit you but I will talk about that later on. this is just about the distance of the camera from your face, and the focal point plays a part in how extreme the distortion can get. take some pics from different distances to familiarize yourself with how it works.

Most phone cameras have a low focal point so using a proper 50mm+ DSLR camera should optimize your looks in this aspect.
Angle
In this section, I will talk about the angles you want to choose for what the strengths of your face are. And which ones u want to avoid.
the most common angles are the front, 3/4, side profile, and then there's everything in between and from different latitudes (high and low)
rear 3/4 is also a thing too but it's more of a lookism meme and no nonautistic really take pics from this angle but I'm going to talk about it anyway.
Front
Symmetry matters the most here either from high or low, as well as general face ratios if the photo is taken directly head-on. The eye area can be haloed from a slightly higher angle by giving the illusion of lower set eyebrows, shorter pfh, and more supraorbital hooding, at the expense of making your lower third or chin look weaker. A high angle may also expose a far forward protruding nose and it will cover your lip or philtrum in the picture, so don't go too far. In general, pretty boys go for this higher angle front - 3/4 picture approach because it shows off their nice youthful eye area and hairline. From a lower angle the nostrils become exposed, the eye area will look significantly worse, the emphasis will be more on the general bone structure and chin/jaw height will look greater. A direct front is considered the least frauded angle, not accounting for physical techniques which are discussed further down this thread.
3/4
OGEE CURVE. Yes, that's what this angle is all about, generally, this angle is used by girls, as they're the ones with zygos most of the time. It can be a pretty aesthetic angle for guys if you have the curve but if you don't it doesn't matter because most guys who take selfies from this angle are gay, although if you have a shit 3/4 watch out for candids and try to look directly at whoever is looking at you because u don't want them seeing your laterally lacking cheekbones. Chin width, mouth, nose, upper orbitals, and forehead also are shown a lot in this angle.

Side profile
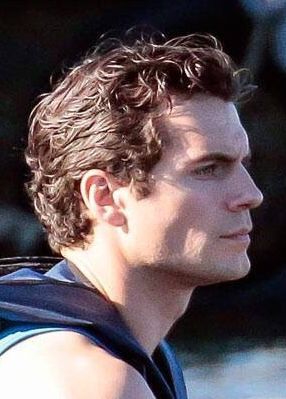
This one is getting a lot more popularity nowadays. Lighting aside, zygos don't matter all too much here, or symmetry or width in general. Guys with strong ramus, mandible, chin, and brow ridge will look good in this angle, and a good nose with a high set bridge is also needed for optimal aesthetics. This is a pretty forgiving angle for most guys but a lot of the times people get exposed hard in candids and look ugly, it will be from this angle. Not being recessed is very important to look up to par here. Another point to add is when taking pics from this angle you want your face to be turned slightly more towards to camera, not so its a 3/4 but just enough so that it adds a bit of forwarding growth illusion, as facing in the opposite direction will make you look extremely flat.
Rear 3/4
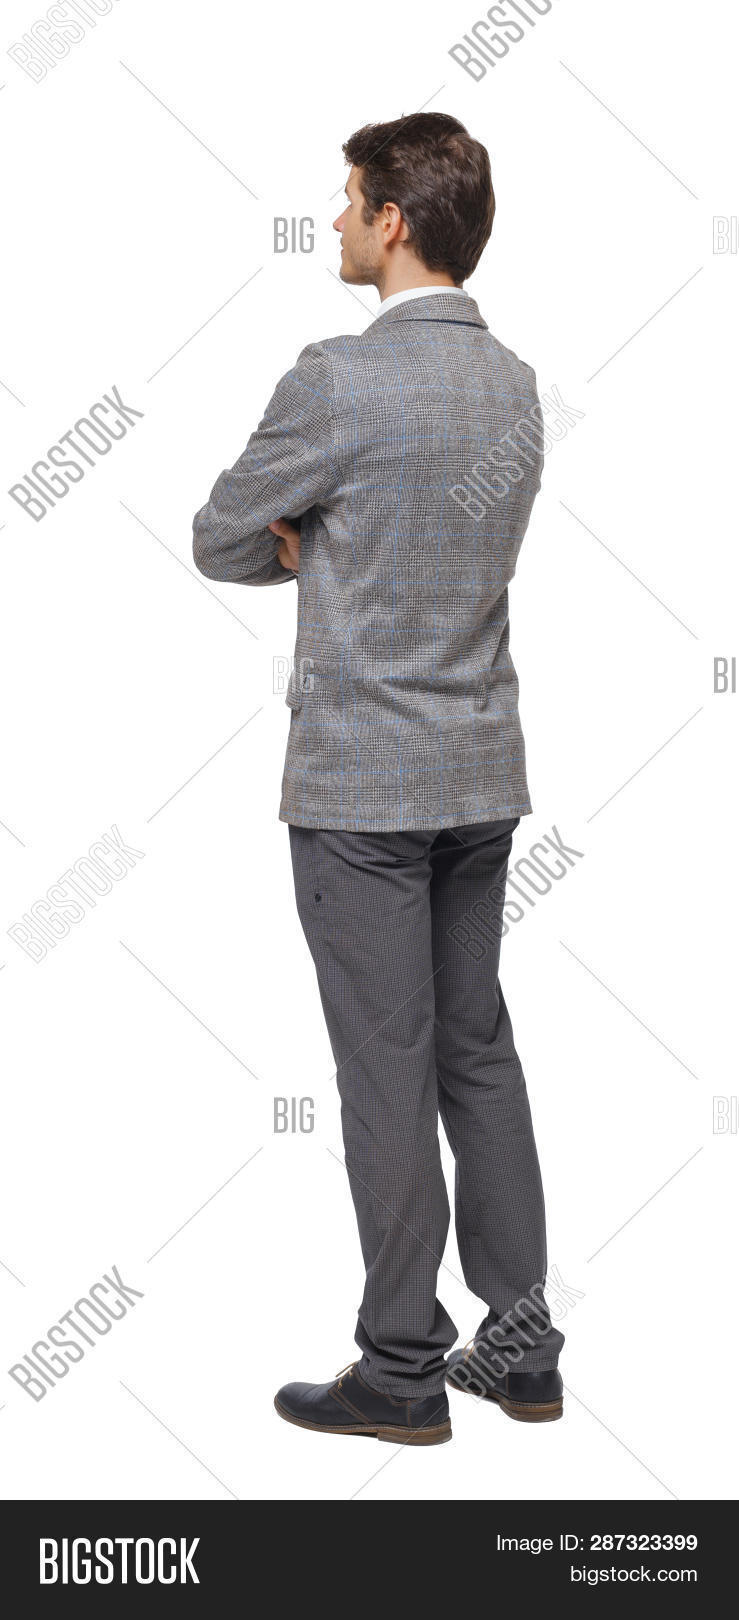
The most brutally insane angle there is, barely any pics are taken this way, but in real life, a lot of the viewers on you will be from this angle. there are 4 things that need to be in tip-top shape for you to look good here, its BROW, ZYGOS, RAMUS, CHIN. and then their hyoid, nose even, and mouth which also could fuck things up by sticking out. Also, you need a wide neck and posterior neurocranium for optimal looks here. Or else you will look narrow.
Lighting

This one becomes increasingly more important the uglier you are because what the lighting does is create shadows on your face depending on the shape of your face, so if u have an ugly face u will have ugly shadows. It doesn't matter all too much for good looking people but there are some standard 'good' lightings that will make most guys look their best. in general, wherever the light is, that's the area of the face that u need to look good for an optimal shadow/contour. So if u have an over protruding nose or bulging eyes don't go for lighting that is on either side of you because it will show, bug eyes also get exposed pretty hard from a low lighting angle. Backlighting is good if u have decent lateral orbitals, zygos, jaw, and hollow cheeks and doesn't rely much on facial features.
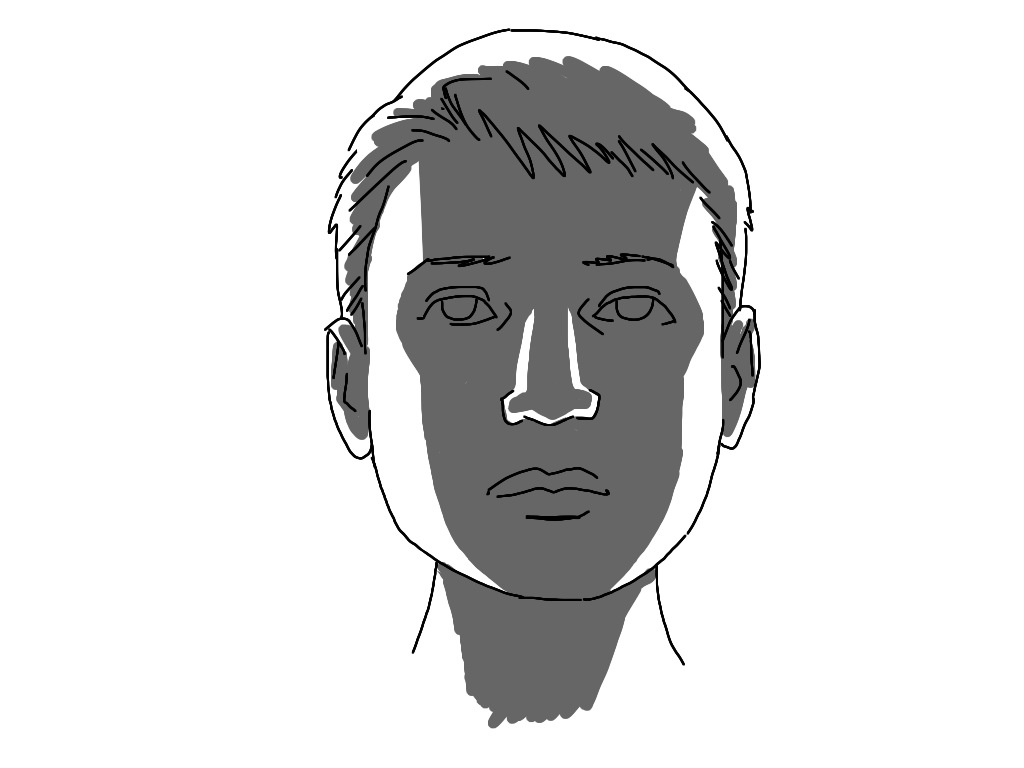
High or overhead lighting works well if you have a strong brow ridge but you also need good infraorbital or else the shadow cast on your eyes will be too tall and will expose your recessed undereye/maxilla. a way to prevent this is leaning your head slightly back and this will also let your chin catch some light so it doesn't look recessed. you can also lean forward but make sure that if you do it you're nose gets zero light at all because if your nose gets light but your chin/jaw doesn't it will show that u have a rat/bird face with a recessed lower third.
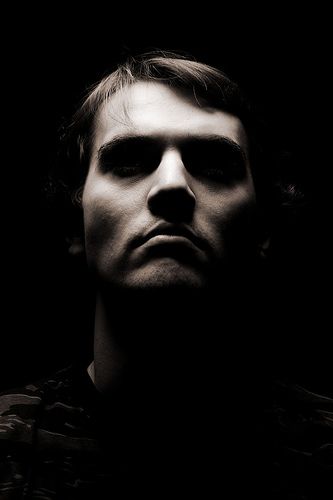
You also need high set zygos if you want to pull this off or else you will be exposed from a side profile if the light falls too low on your face.
Direct front lighting is the best choice if you have no real strengths or weaknesses on your face, same with dim-lit altho that works better if you want to look like a dark triad guy. Overall even lighting is generally the best choice if u don't know what you are doing but most times out in public it will be the Sun VS you and u won't get the opportunity of being indoors where there are lights shining from every angle.
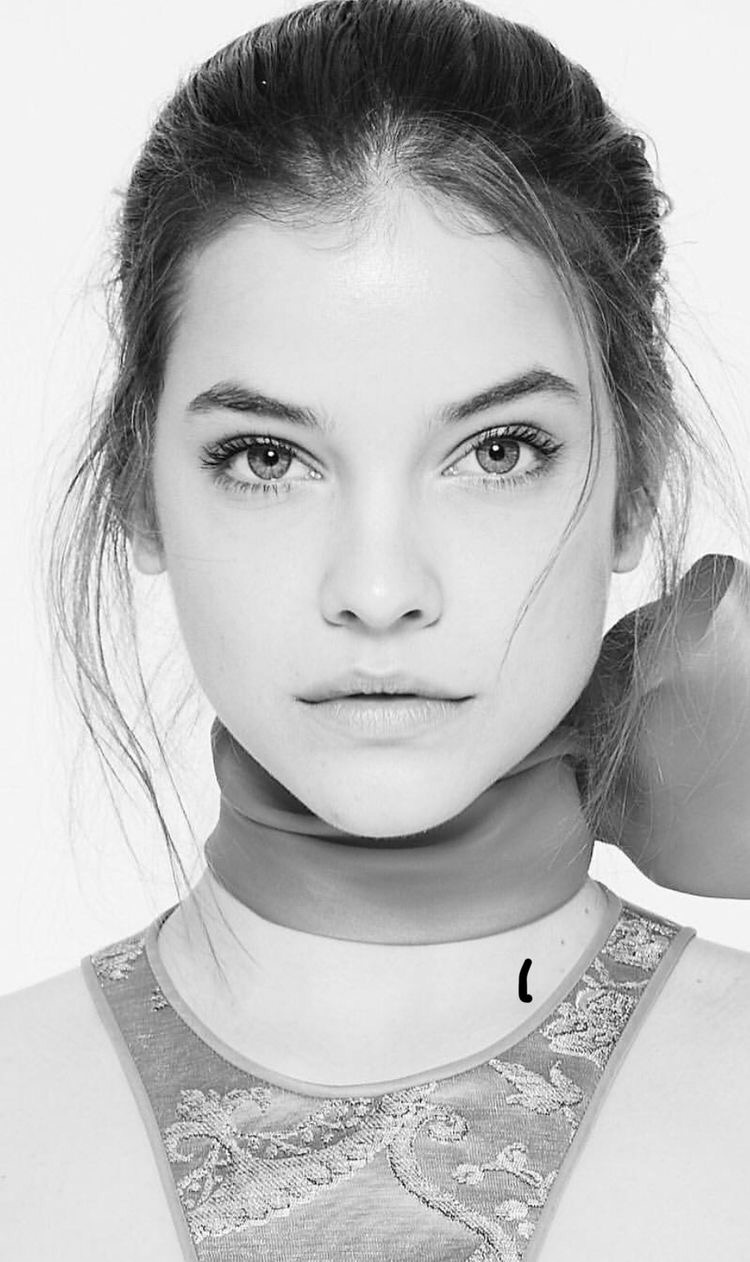
It also must be stated that you can use lighting on one side of your face and this works well if you are asymmetric and need asymmetric lighting to work into it

Lighting can either work for or against you, by highlighting your good traits and exposing your weak ones.
Physical techniques
1.Masseter flex - this is when you flex your masseter muscles, many beginners or retards think this can only be done with closed clenched teeth but if you work on your mind-muscle connection you can do this whenever and unilaterally.
2.Squint - this is when you flex the muscles around your eye area and lower your eyebrows. this is a very sensitive fraud and should be practiced enough so you don't go overboard and look like a retard with it. sometimes u want to not even squint at all and try to look relaxed as possible if u don't have any upper eyelid exposure.
3.Lower eyelid/zygo raise - this can be done either with or independently from a squint, although most beginners will not be able to tell the difference between these two. what this achieves is raises the fat from your malar or cheek and puts them higher up on your zygos. this is very important for when light is on your zygos/under eyes and you need to have a high set look.
4.Cheek Suck - the trick with this is not to make your lips look retarded while doing it. try to suck from the posterior end of your cheeks, not the anterior where your lips are. along with a masseter flex, this can give almost anyone a hollow cheek effect, this combination works well in backlighting where only those parts of the face will be highlighted.
5.Chin graft - I don't see many people doing this but when I do it's obvious as fuck, seems like nobody but me has mastered it. what you are doing is forcing your chin to protrude by putting suction on your lower lip. now this may cause your chin to look more triangular and pointy and this is usually fine from a side angle but from the front or 3/4, it's very noticeable. if you master this technique however you can make it look un-noticeable from every angle and even do it with an open mouth (hard difficulty) or talking (impossible difficulty).
6.Open-jaw (downward jutt) - if you are lacking in mandible height this one is going to help u out a lot. basically, you just want to not let your teeth touch together and let your jaw hang down, it will give you some ramus and chin height and a taller skull overall. just be careful not to chew food while around others or u will get brutally exposed.
7.Forward jutt - pretty standard it's when you push your mandible forward so you get an underbite, this can usually only be done slightly unless you're in a front angle you can get away with more. this however does make your ramus appear further forward so you aren't really increasing mandible length and it could look a bit off if your ear is set a lot far back than your ramus.
8.Kiss Lip - if you have a vertical philtrum and want to get it more curved or forward sloping u can do a slight kissing expression with your upper lip to achieve this effect. doesn't matter at all from a front angle but inside it helps.
9.Looking slightly up - what this does will make your lower eyelid very horizontal and eliminate almost all upper eyelid exposure u might have. the opposite of this is looking down which most times is a death sentence and will cause NCT especially if you have supra-lateral orbital fat and long eyelashes.
10.Smile (as an excuse for other frauds) - self-explanatory. smiling with a clothed mouth lets u easily squint, jutt, graft, pretty much whatever u want. also pulling stupid faces in general usually in group pics is a good excuse to squint or pull a really angry dark triad masculine-looking face. just make sure you standing far ahead of others though or u will look like a joke (group pic tip in general).
11.Pushing your scalp skin down - you can do this by putting your hand on the back of your head and pushing up, the skin on your forehead will then be forced down on your face, giving u a superior brow ridge and lower set eyebrows.
12.Invisible occiput - this is done when your head is tilted down and jutted forward, it will give u the illusion of a flat occiput. meant for side profile mirror pics.
13.Leaning Over - makes your neck and traps look bigger. even normies are abusing this method to shit and I've seen girls make jokes about it.
Camera distortion
A crucial part of frauding that many don't know about is how the angle of the camera or phone itself can be used to create positive distortion effects. most people only know about the distance effect but there is a lot more to cover
Turning the phone to the side or landscape camera - will make the picture seem wider. Good for narrow skulls but will make your skull look shorter. if ur gonna take a pic of just your eye area though I don't see why you wouldn't do this because it reduces PFH and adds PFL.
Tilting the phone or camera forward - will place you in the higher part of the pic and you will seem vertically extended
Tilting the phone or camera backward - The lower part of the pic will be vertically extended and the upper half will be vertically shortened
Twisting the camera right - puts you on the left side of the screen (asymmetry)
Twisted the camera left - puts you on the right side of the screen (asymmetry)
make sure u arent twisting the camera unless you are doing side profile then u might want a slight right and obvious back tilt (lower third height increase).
Taging some people who wanted to be tagged: @Grimba @$tackThatMoney @warpsociety @Blue @SkinjobCatastrophe @rrrrrr8526
Disclamer:This thread was originally posted on LOOKISM.NET by the user called sin. I took it from there and improved some formating and grammar if you would like to read the original link is down below.Although you would need to be registered user on LOOKISM tho.
 lookism.net

If u want to make yourself look better in pics without resorting to morphing then this guide should be able to help you.
There are many factors that go into how a picture of you will look so this guide will be split up into categories for easier reading.
Distance/Focal point

What is usually called lens distortion is pretty simple to optimize and a lot of you should know about it already, Ideally what you want to do is to take the picture in the mirror or hold out the camera as far from you as possible to minimize the distortion effect.
Now there are ways u can use distortion to benefit you but I will talk about that later on. this is just about the distance of the camera from your face, and the focal point plays a part in how extreme the distortion can get. take some pics from different distances to familiarize yourself with how it works.

Most phone cameras have a low focal point so using a proper 50mm+ DSLR camera should optimize your looks in this aspect.
Angle
In this section, I will talk about the angles you want to choose for what the strengths of your face are. And which ones u want to avoid.
the most common angles are the front, 3/4, side profile, and then there's everything in between and from different latitudes (high and low)
rear 3/4 is also a thing too but it's more of a lookism meme and no nonautistic really take pics from this angle but I'm going to talk about it anyway.
Front
Symmetry matters the most here either from high or low, as well as general face ratios if the photo is taken directly head-on. The eye area can be haloed from a slightly higher angle by giving the illusion of lower set eyebrows, shorter pfh, and more supraorbital hooding, at the expense of making your lower third or chin look weaker. A high angle may also expose a far forward protruding nose and it will cover your lip or philtrum in the picture, so don't go too far. In general, pretty boys go for this higher angle front - 3/4 picture approach because it shows off their nice youthful eye area and hairline. From a lower angle the nostrils become exposed, the eye area will look significantly worse, the emphasis will be more on the general bone structure and chin/jaw height will look greater. A direct front is considered the least frauded angle, not accounting for physical techniques which are discussed further down this thread.
3/4
OGEE CURVE. Yes, that's what this angle is all about, generally, this angle is used by girls, as they're the ones with zygos most of the time. It can be a pretty aesthetic angle for guys if you have the curve but if you don't it doesn't matter because most guys who take selfies from this angle are gay, although if you have a shit 3/4 watch out for candids and try to look directly at whoever is looking at you because u don't want them seeing your laterally lacking cheekbones. Chin width, mouth, nose, upper orbitals, and forehead also are shown a lot in this angle.

Side profile
This one is getting a lot more popularity nowadays. Lighting aside, zygos don't matter all too much here, or symmetry or width in general. Guys with strong ramus, mandible, chin, and brow ridge will look good in this angle, and a good nose with a high set bridge is also needed for optimal aesthetics. This is a pretty forgiving angle for most guys but a lot of the times people get exposed hard in candids and look ugly, it will be from this angle. Not being recessed is very important to look up to par here. Another point to add is when taking pics from this angle you want your face to be turned slightly more towards to camera, not so its a 3/4 but just enough so that it adds a bit of forwarding growth illusion, as facing in the opposite direction will make you look extremely flat.

Rear 3/4

The most brutally insane angle there is, barely any pics are taken this way, but in real life, a lot of the viewers on you will be from this angle. there are 4 things that need to be in tip-top shape for you to look good here, its BROW, ZYGOS, RAMUS, CHIN. and then their hyoid, nose even, and mouth which also could fuck things up by sticking out. Also, you need a wide neck and posterior neurocranium for optimal looks here. Or else you will look narrow.

Lighting


This one becomes increasingly more important the uglier you are because what the lighting does is create shadows on your face depending on the shape of your face, so if u have an ugly face u will have ugly shadows. It doesn't matter all too much for good looking people but there are some standard 'good' lightings that will make most guys look their best. in general, wherever the light is, that's the area of the face that u need to look good for an optimal shadow/contour. So if u have an over protruding nose or bulging eyes don't go for lighting that is on either side of you because it will show, bug eyes also get exposed pretty hard from a low lighting angle. Backlighting is good if u have decent lateral orbitals, zygos, jaw, and hollow cheeks and doesn't rely much on facial features.

High or overhead lighting works well if you have a strong brow ridge but you also need good infraorbital or else the shadow cast on your eyes will be too tall and will expose your recessed undereye/maxilla. a way to prevent this is leaning your head slightly back and this will also let your chin catch some light so it doesn't look recessed. you can also lean forward but make sure that if you do it you're nose gets zero light at all because if your nose gets light but your chin/jaw doesn't it will show that u have a rat/bird face with a recessed lower third.

You also need high set zygos if you want to pull this off or else you will be exposed from a side profile if the light falls too low on your face.
Direct front lighting is the best choice if you have no real strengths or weaknesses on your face, same with dim-lit altho that works better if you want to look like a dark triad guy. Overall even lighting is generally the best choice if u don't know what you are doing but most times out in public it will be the Sun VS you and u won't get the opportunity of being indoors where there are lights shining from every angle.
It also must be stated that you can use lighting on one side of your face and this works well if you are asymmetric and need asymmetric lighting to work into it

Lighting can either work for or against you, by highlighting your good traits and exposing your weak ones.
Physical techniques

1.Masseter flex - this is when you flex your masseter muscles, many beginners or retards think this can only be done with closed clenched teeth but if you work on your mind-muscle connection you can do this whenever and unilaterally.
2.Squint - this is when you flex the muscles around your eye area and lower your eyebrows. this is a very sensitive fraud and should be practiced enough so you don't go overboard and look like a retard with it. sometimes u want to not even squint at all and try to look relaxed as possible if u don't have any upper eyelid exposure.
3.Lower eyelid/zygo raise - this can be done either with or independently from a squint, although most beginners will not be able to tell the difference between these two. what this achieves is raises the fat from your malar or cheek and puts them higher up on your zygos. this is very important for when light is on your zygos/under eyes and you need to have a high set look.
4.Cheek Suck - the trick with this is not to make your lips look retarded while doing it. try to suck from the posterior end of your cheeks, not the anterior where your lips are. along with a masseter flex, this can give almost anyone a hollow cheek effect, this combination works well in backlighting where only those parts of the face will be highlighted.
5.Chin graft - I don't see many people doing this but when I do it's obvious as fuck, seems like nobody but me has mastered it. what you are doing is forcing your chin to protrude by putting suction on your lower lip. now this may cause your chin to look more triangular and pointy and this is usually fine from a side angle but from the front or 3/4, it's very noticeable. if you master this technique however you can make it look un-noticeable from every angle and even do it with an open mouth (hard difficulty) or talking (impossible difficulty).
6.Open-jaw (downward jutt) - if you are lacking in mandible height this one is going to help u out a lot. basically, you just want to not let your teeth touch together and let your jaw hang down, it will give you some ramus and chin height and a taller skull overall. just be careful not to chew food while around others or u will get brutally exposed.
7.Forward jutt - pretty standard it's when you push your mandible forward so you get an underbite, this can usually only be done slightly unless you're in a front angle you can get away with more. this however does make your ramus appear further forward so you aren't really increasing mandible length and it could look a bit off if your ear is set a lot far back than your ramus.
8.Kiss Lip - if you have a vertical philtrum and want to get it more curved or forward sloping u can do a slight kissing expression with your upper lip to achieve this effect. doesn't matter at all from a front angle but inside it helps.
9.Looking slightly up - what this does will make your lower eyelid very horizontal and eliminate almost all upper eyelid exposure u might have. the opposite of this is looking down which most times is a death sentence and will cause NCT especially if you have supra-lateral orbital fat and long eyelashes.
10.Smile (as an excuse for other frauds) - self-explanatory. smiling with a clothed mouth lets u easily squint, jutt, graft, pretty much whatever u want. also pulling stupid faces in general usually in group pics is a good excuse to squint or pull a really angry dark triad masculine-looking face. just make sure you standing far ahead of others though or u will look like a joke (group pic tip in general).
11.Pushing your scalp skin down - you can do this by putting your hand on the back of your head and pushing up, the skin on your forehead will then be forced down on your face, giving u a superior brow ridge and lower set eyebrows.
12.Invisible occiput - this is done when your head is tilted down and jutted forward, it will give u the illusion of a flat occiput. meant for side profile mirror pics.
13.Leaning Over - makes your neck and traps look bigger. even normies are abusing this method to shit and I've seen girls make jokes about it.
Camera distortion

A crucial part of frauding that many don't know about is how the angle of the camera or phone itself can be used to create positive distortion effects. most people only know about the distance effect but there is a lot more to cover
Turning the phone to the side or landscape camera - will make the picture seem wider. Good for narrow skulls but will make your skull look shorter. if ur gonna take a pic of just your eye area though I don't see why you wouldn't do this because it reduces PFH and adds PFL.
Tilting the phone or camera forward - will place you in the higher part of the pic and you will seem vertically extended
Tilting the phone or camera backward - The lower part of the pic will be vertically extended and the upper half will be vertically shortened
Twisting the camera right - puts you on the left side of the screen (asymmetry)
Twisted the camera left - puts you on the right side of the screen (asymmetry)
make sure u arent twisting the camera unless you are doing side profile then u might want a slight right and obvious back tilt (lower third height increase).
Taging some people who wanted to be tagged: @Grimba @$tackThatMoney @warpsociety @Blue @SkinjobCatastrophe @rrrrrr8526
Disclamer:This thread was originally posted on LOOKISM.NET by the user called sin. I took it from there and improved some formating and grammar if you would like to read the original link is down below.Although you would need to be registered user on LOOKISM tho.
Comprehensive frauding guide
if u want to make youself look better in pics without resorting to morphing then this should help you there are many factors that go into how a picture of you will look so this guide will be split up into categories Distance/Focal point: what is usually called lense distortion this one is...
Last edited:


