RSzeiS
Bronze
- Joined
- Oct 31, 2022
- Posts
- 254
- Reputation
- 240
Planning of orthognathic surgery
1. Introduction
The key to proper planning is a precise diagnosis. To come to that diagnosis clinical examination, cephalometry, and standardized photography. Above that 3D-imaging (CT, 3D-reformatted CT, 3D-photography, 3D-models) may be indicated for complex asymmetric cases. Besides that, the expectations of the patients and the potential risks of the surgical procedures must be seen as well.2. Facial proportions
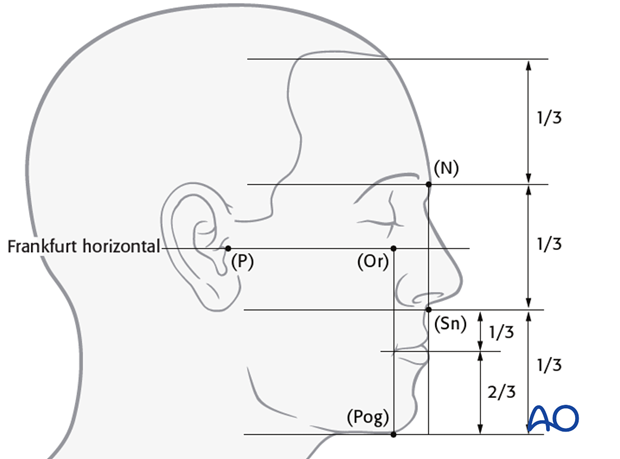
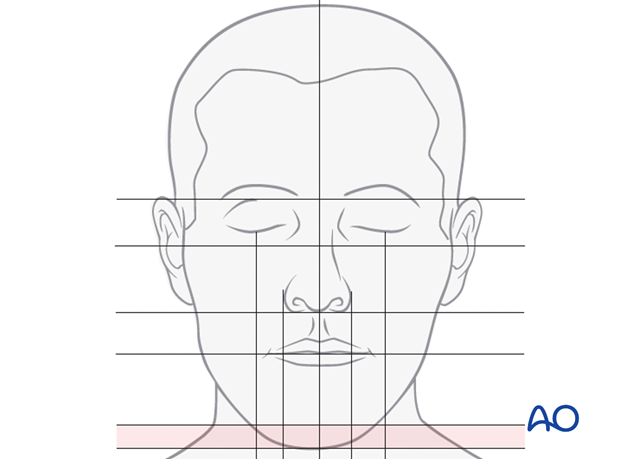
The facial height is divided in three main thirds. The upper facial third goes from the hairline to the glabella, the middle third from the glabella to the base of the columella, and the lower third from the columella third to the deepest point of the chin prominence. The lower third is subdivided in an upper third from the columella base to the lip commissure and two lower thirds from the lower lip to the chin.The Frankfurt horizontal is an important line for facial measurements and goes through the porion (P) to the orbitale (Or). A vertical line can be drawn from the nasion (N) to and through subnasale (Sn). The most anterior chin point pogonion (Pog) is located slightly posterior to that line.
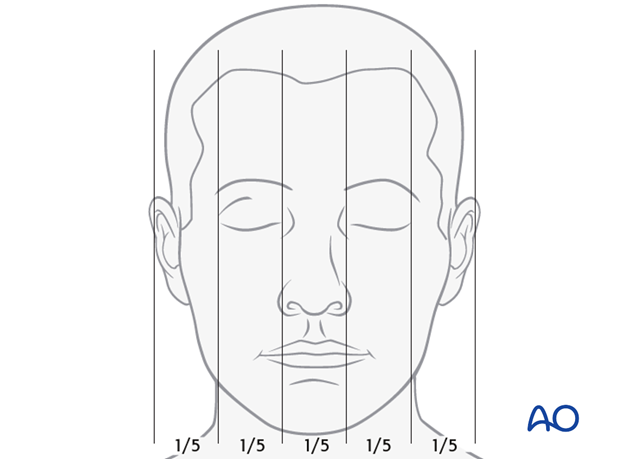
To analyze facial widths and symmetry, the face can be divided in to fifths according to the drawing.
3. Clinical examination
With the clinical examination the facial proportions, the balance, and the movements of the face are evaluated.
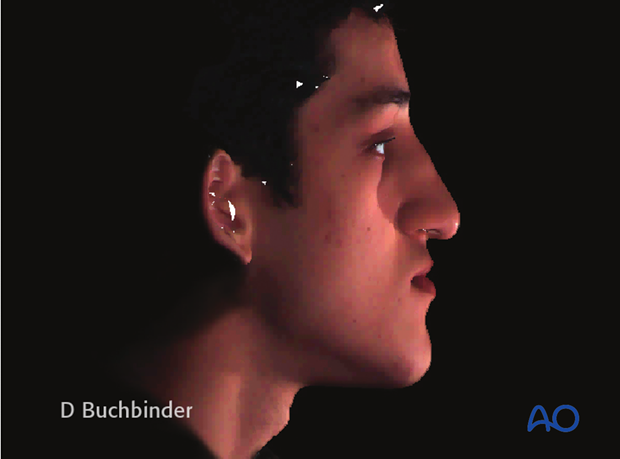
Profile evaluation
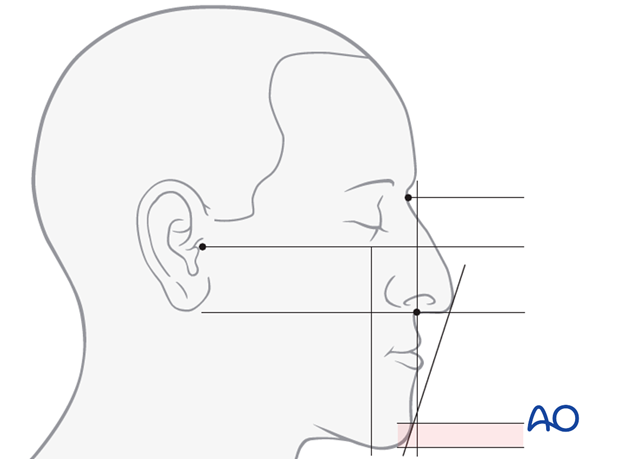
Looking to the profile the following items are of importance:
- antero-posterior position of the maxilla
- antero-posterior position of the mandible
- nasal size
- contours of the cheeks
- lip support/lip competence
- size of the mandibular angle (illustrated)
- facial soft tissues (amount, tension)
Frontal view (en face) evaluation
The following items are of importance:
- Facial midline
- Symmetry
- Muscle activity of the lower lip and chin
- Tooth to lip relationship
- Lip length
- Facial contour
- Head to body proportion
Documentations of findings
It is recommended to record the clinical findings on standardized documentation sheets. Standard digital photography (profile, frontal view, three quarter view, bird's eye view) are taken and attached to the clinical documentation. Standard photos, especially profile pictures, are necessary to do a profile outcome prediction.
4. Cephalometry
Cephalometry is done to evaluate the proportions of the facial skeleton and to compare an individual patient with norm.Standard skeletal analysis is based on plain X-Rays taken in the sagittal and frontal plane. Typically the X-rays are analyzed with the help of computer based programs. Protocols for analysis differ to some extent.
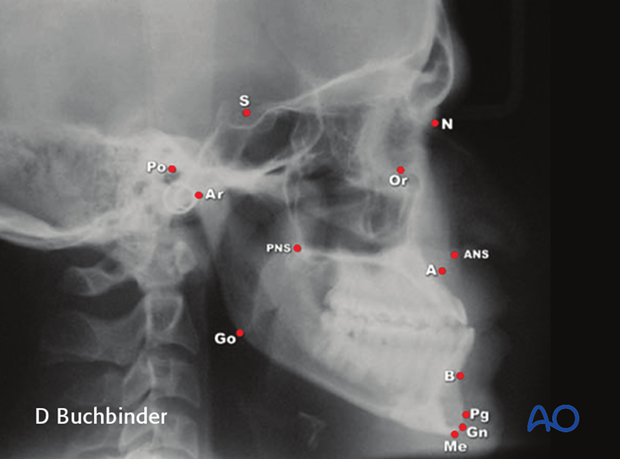
All of them are based on reference points, lines, and angles which are marked on the X-ray.

Today programs are developed to perform 3D cephalometry based on 3D reformatted CT scans.

5. Model analysis
Plaster of Paris models from the maxilla and mandible are taken and the actual centric occlusion of the patient is recorded. The models are oriented in a semi adjustable articulator after facebow transfer.The models allow to analyze the:
- occlusion
- shape of the dental arches
- position
- size and shape of the teeth
- position of the jaws in relation to the skull base

Usually two sets of models are used. One is kept to analyze and document the preoperative situation. The second set of models is used to perform mock surgery.
6. Mock surgery and fabrication of splints
Based on the results of the clinical and cephalometric analysis, a problem list and treatment plan are generated. The mounted models can then be moved into the planned position for correction of the skeletal disorder. Keeping in mind that treatment of facial bone abnormalities is usually a combined endeavor for both surgeon and orthodontist, this position has to be agreed upon by both parties.It is important that all movements become visible in a three dimensional fashion. This can be achieved using reference lines scribed on the models before performing the movements.
The models are fixed in the new positions with wax or glue.
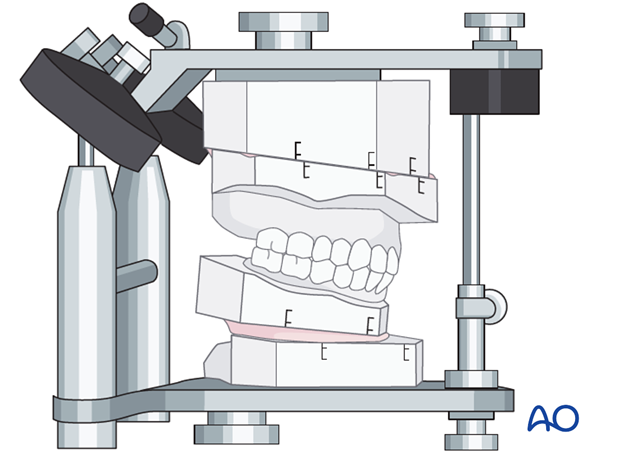
Mock surgery is performed to mimic the planned surgical procedure. It is also a powerful tool to demonstrate the treatment plan to the patient. Finally the reoriented models after mock surgery are used to fabricate the surgical splints that will be used in the operating room to reposition the osteotomized segments.
Mock surgery can also be performed using individual stereolithographic models. This is indicated for severe and mostly asymmetric deformities.
Fabrication of splints
Splints are made of acrylic and used in orthognathic surgery to intraoperatively position a mobile osteotomized jaw against the other stable jaw before an internal fixation procedure is performed. In case of two-jaw surgery two splints need to be fabricated. The first one is used after osteotomy of the first jaw as an intermediate splint, the other one after the second jaw has been osteotomized as a final splint. Usually the two splints are colour coded to avoid confusion.
7. Profile prediction
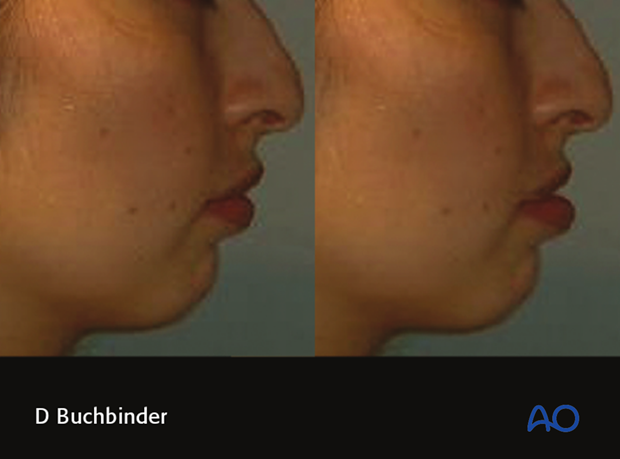
Planning is based on the clinical examination, evaluation of pictures and cephalometry. In order to visualize profile changes, X-Rays and pictures can be superimposed in commercially available planning software. If the bone is moved the soft tissues will follow (not in a 1:1 ratio) and a virtual image of the surgical result is created. The virtual images may be used to discuss treatment outcomes and alternatives with the patient.These pictures show the predicted soft tissue changes following mandibular advancement.
8. 3D-Virtual planning
A cone beam or fan CT-scan is obtained and a virtual 3D-model of the patients skull is generated.The mandible is segmented (defined) in preparation for performing the virtual osteotomies.

A cephalometric analysis is performed. A problem list is then generated.
Using the clinical exam and skeletal problem list, a treatment plan is formulated.

A soft tissue overlay can be helpful in the analysis of the deformity.

3D Virtual osteotomy planning
The planned osteotomies (Le Fort I and BSSO in this case) are defined using the osteotomy wizard in the software.The virtual model can be manipulated in 3 dimensions to ensure that the osteotomy lines are accurately represented.

The segmented Le Fort I is repositioned per the proposed plan. The maxilla can be moved in all planes (anterior/posterior, superior/inferior, lateral with or without rotation).
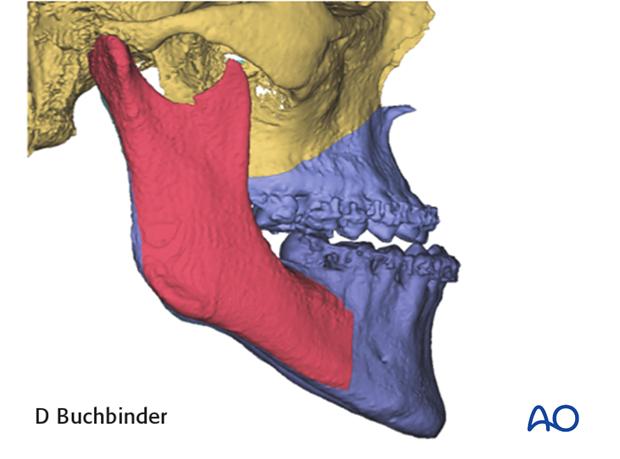
A virtual intermediate splint can then be designed and later printed using CAD-CAM technology.
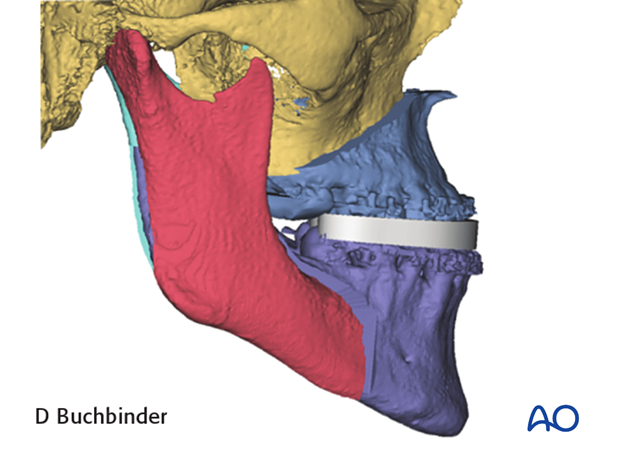
The intermediate splint is removed and the distal segment of the mandible positioned to the planned final occlusion.
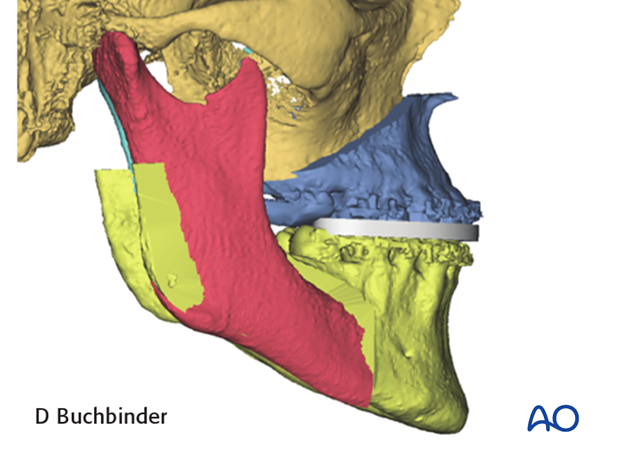
A virtual final splint can then be designed and later printed using CAD-CAM technology.
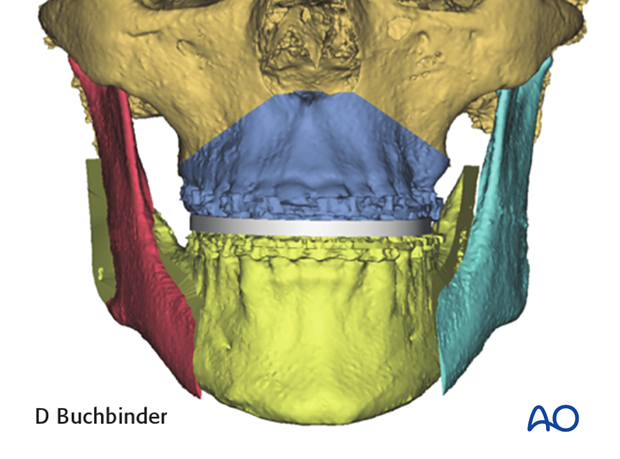
3D virtual profile prediction
Planning is based on the clinical examination, evaluation of pictures and cephalometry. In order to visualize profile changes, the virtual 3D-models and 3D pictures can be superimposed in commercially available planning software. If the bone is moved the soft tissues will follow (not in a 1:1 ratio) and a virtual image of the surgical result is created. The virtual video may be used to discuss treatment outcomes and alternatives with the patient.