







Fynn

Aren’t you tired of fighting?
- Joined
- Mar 2, 2026
- Posts
- 8,816
- Reputation
- 19,245
Ultimate Hairmaxxing Guide
(2026 Edition)
this is a guide about how to improve your hair the best you can,
for some its water for other it's maybe not idk,
just read through it and improve what you can.
(2026 Edition)
this is a guide about how to improve your hair the best you can,
for some its water for other it's maybe not idk,
just read through it and improve what you can.
I used AI for definitions and descriptions because I'm not very good at that sort of thing in English, as English isn't my first language; otherwise, half the explanation wouldn't be understandable.
mainly just how you cut the hair.
still like 90% of this thread is typed by me.
mainly just how you cut the hair.
still like 90% of this thread is typed by me.
Everything inculuded in this Guide
1. Understanding your hair
2. Hair Care and Hair Growth
3. Hairsryles and Styling
4. Cutting your own Hair
2. Hair Care and Hair Growth
3. Hairsryles and Styling
4. Cutting your own Hair
Chapter 1
Understanding your hair
before you buy any products or anything like that,
you should first understand your hair.
Many people waste their money
because they buy things that aren't ideal for their hair or that are barely effective.
Hair Types
Understanding your hair
before you buy any products or anything like that,
you should first understand your hair.
Many people waste their money
because they buy things that aren't ideal for their hair or that are barely effective.
Hair Types
| Type 1 | Straight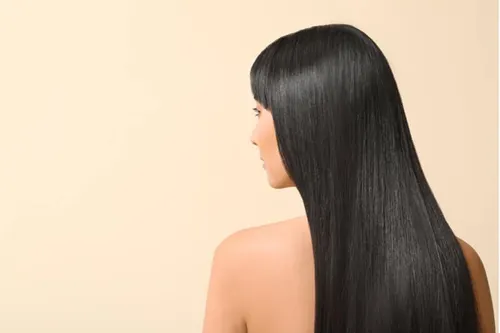
|
| Type 2 | Wavy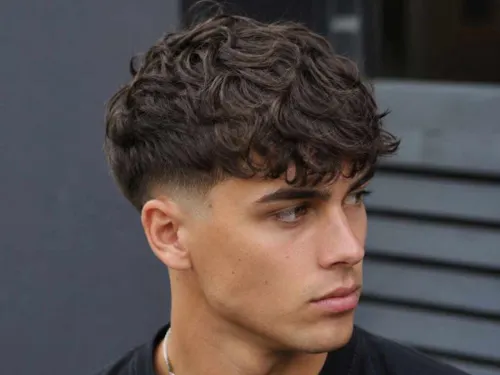
|
| Type 3 | Curly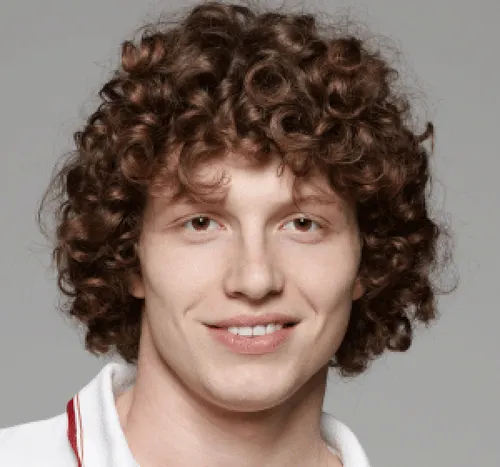
|
| Type 4 | Coily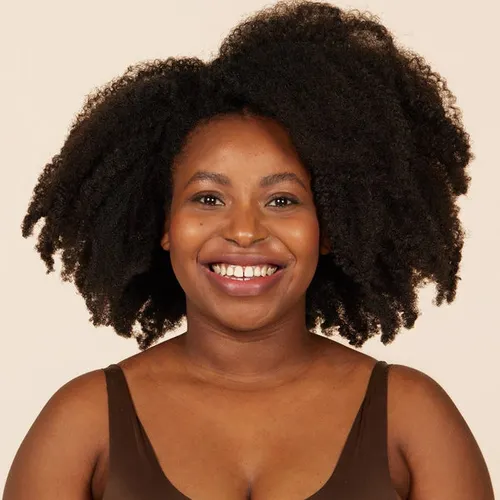
|
obv every hair type requires different products
and styling techniques.
best hair cuts for each hair type:
| Hair type: | Haircut: |
| straight hair | french crop side part |
| wavy hair | textured fringe modcut |
| curly hair | curly fringe taper with curls |
| coily hair | dreads twist out |
(cant add more pics sorry)
Hair Density
Hair Density refrers to how dense or how much hair you have.
| Type 1 | Low Density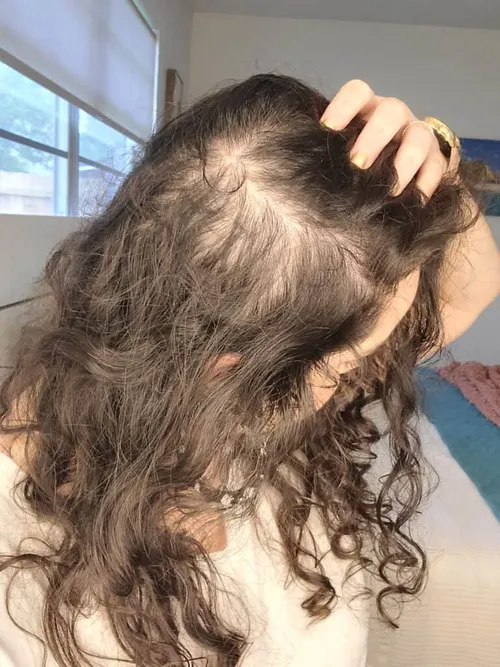
|
| Type 2 | Medium Density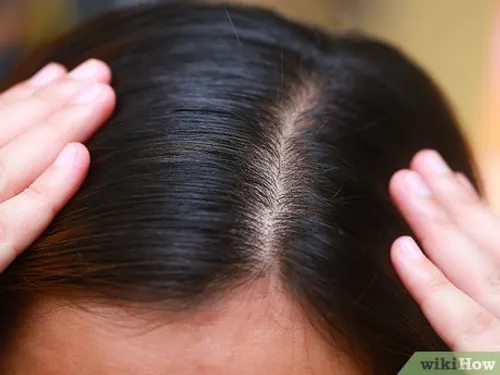
|
| Type 3 | High Density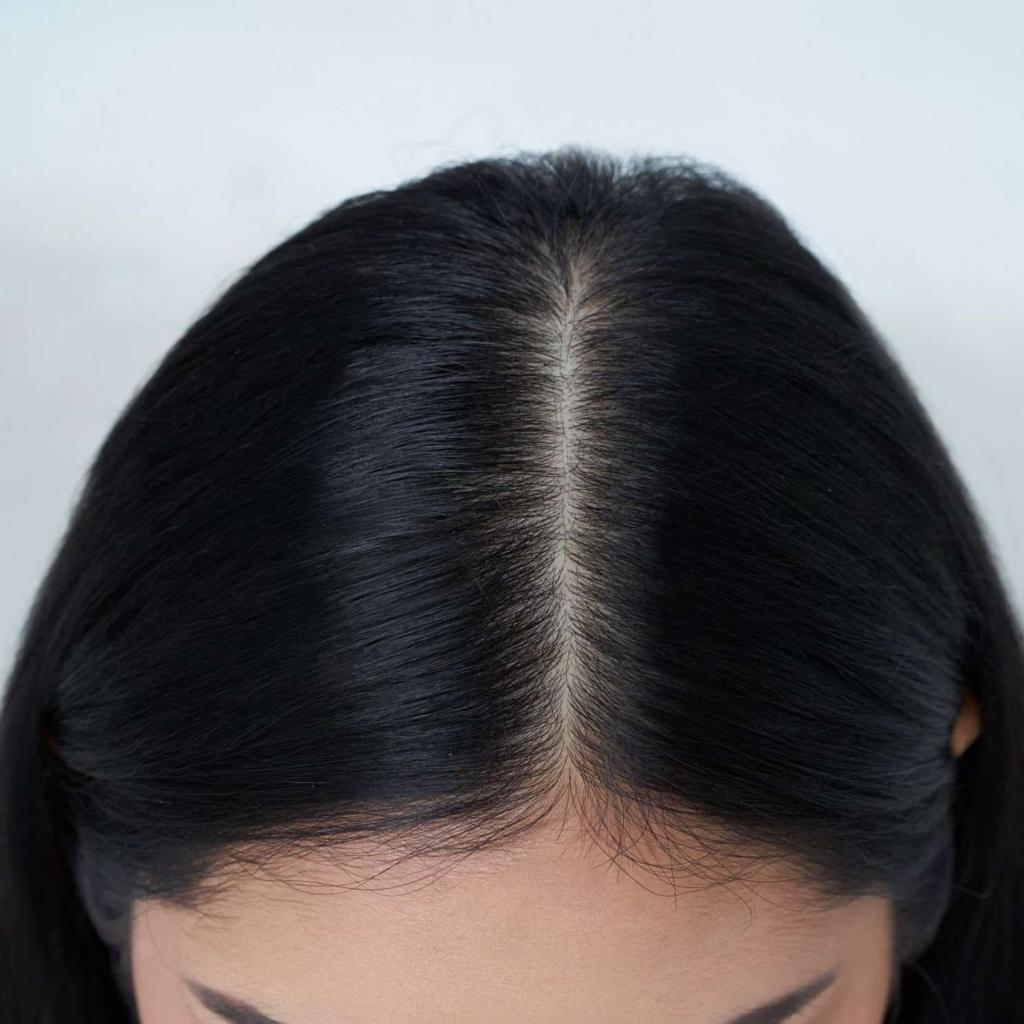
|
(Medium to high density does from the looks near to no differents)
High density allows for fuller styles.
best haircuts for high density:
slick back
middle part
textured quiff
(cant add any pics sorry)
While low density is characterized by short and very textured haircuts.
best haircuts for low density:
frenchcrop
crew cut
shorte side part
(cant add any pics sorry)
Hair Thickness
Thickness refers to the diameter of each strand.
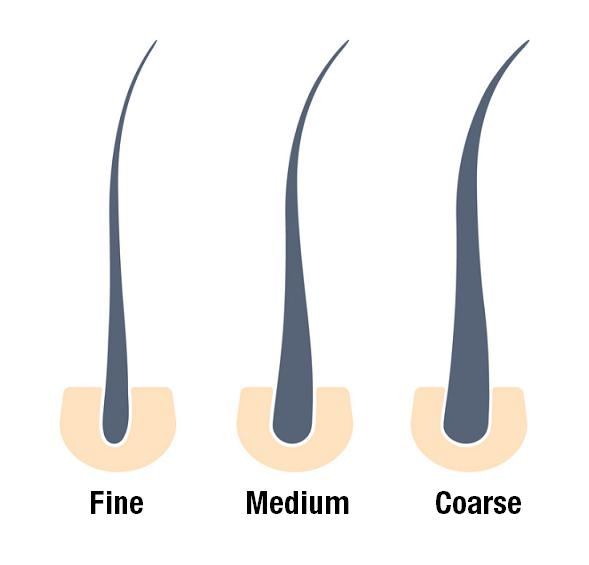
| Type 1 | Fine |
| Type 2 | Medium |
| Type 3 | Thick |
Fine hair is easy to straighten and style.
(cant add any pics sorry)
Thick hair is harder to straighten and style.
(cant add any pics sorry)
Hair Porosity
Hair porosity says how good or bad your hair
absorbs moisture like water or other fluids
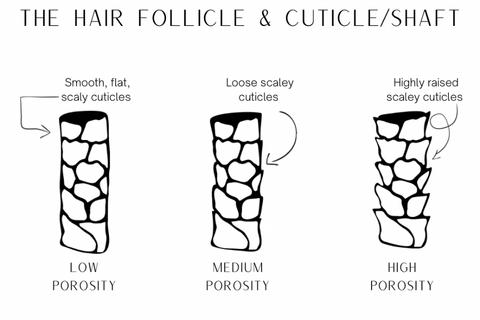
| Type 1 | Low Porosity |
| Type 2 | Medium Porosity |
| Type 3 | High Porosity |
Low Porosity hair struggles to absorb products
High Porosity hair struggles to keep the moisture
Scalp type
Scalp type says alot about what products you should buy.
| Type 1 | Oily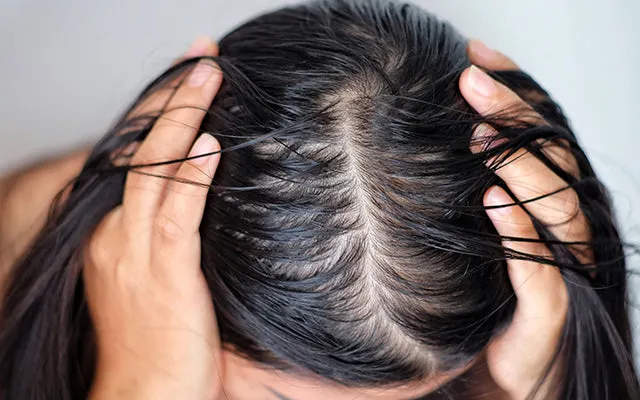
An oily scalp produces excess sebum (natural oil), causing hair to become greasy more quickly and increasing the likelihood of product buildup. how to get rid of it: wash hair with shampoos designed for oily scalps, dont apply conditioner to the scalp but more on the mid and ends of the hair, avoid touching your hair all the time cuz it can transfer oils from hand to scalp, wash it out thoroughly to prevent left over prduct, limit heavy styling products like oils waxes gready pomades. |
| Type 2 | Normal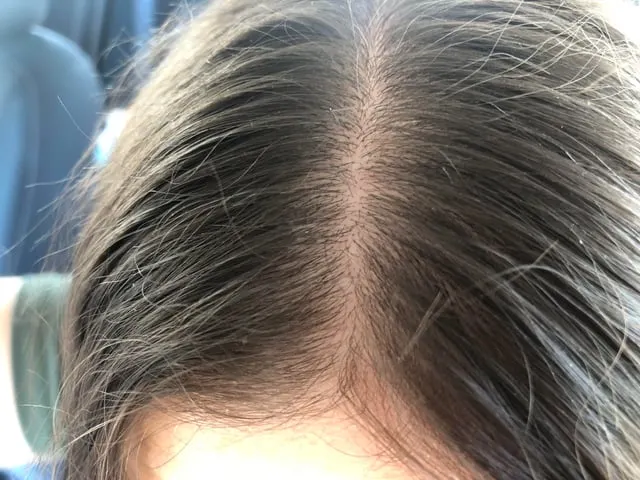
A normal scalp produces a balanced amount of sebum, keeping the hair healthy without becoming excessively oily or dry. how to maintain it: use a gentle shampoo and conditionor(sulfate-free, fragrence-free, pH-balanced, less alc), avoid chemicals or heat, styling product build up should be to a minimum, good diet(protein, iron, zinc, omega 3 fatty acids, vitamin d, biotin, vitamins a c and e), protect your scalp from exessive sun expose(when sun bathing or anything). |
| Type 3 | Dry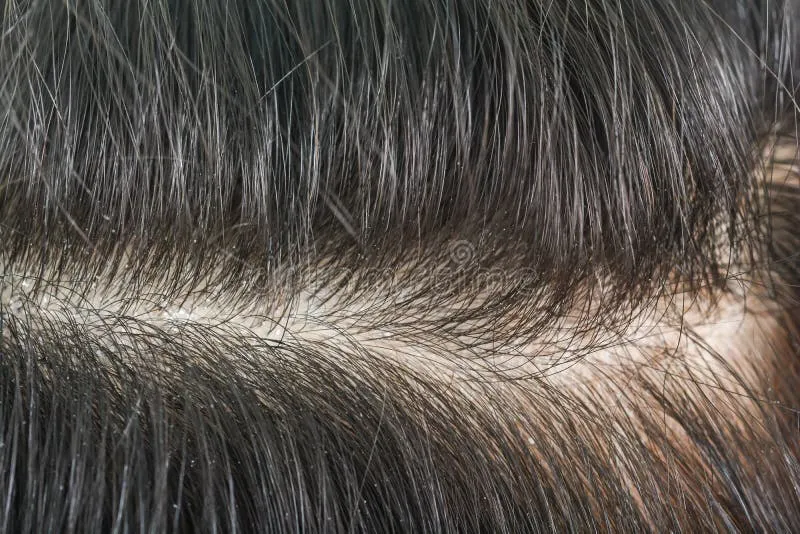
A dry scalp produces too little sebum, often leading to tightness, itchiness, and small dry flakes. how to get rid of it: use moisturizing and sulfate-free shampoo, wash hair with lukewarm water not hot, avoid over washing your hair, use a hyderrating conditioner after every wash, apply hair oil if needed, drink enough water. |
| Type 4 | Sensitive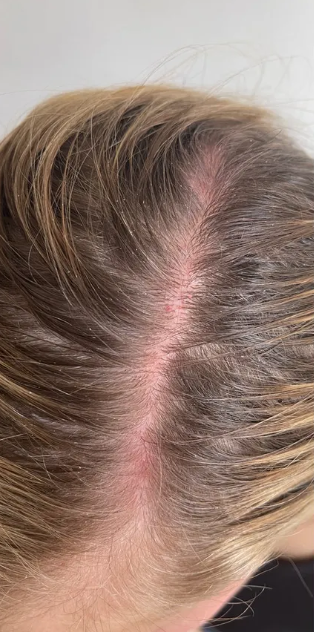
A sensitive scalp is irritates easly by products or environmental factors, often causing red scalp skin, itching, or discomfort. how to get rid of it: aviod useing fragrance shampoos, ingredients like sulfates, alcohol, wash with lukewarm water(dont wash it with hot water), avoid the use of chmical treatments(perm, bleaching, dyeing). if none of that helps seek out a dermatologist. |
Healthy Hair comes from a Healthy Scalp.
Chapter 2
Hair Care and Hair Growth
Shampoo
You should use a Shampoo based on you scalp
not your haircut/hairstyle.
Hair Care and Hair Growth
Shampoo
You should use a Shampoo based on you scalp
not your haircut/hairstyle.
| Oily scalp | If your scalp is oily you should cleanse it more frequently what shampoo is good for oily scalps: shampoos that are formulate to remove exess sebum while helping maintain scalp balance. 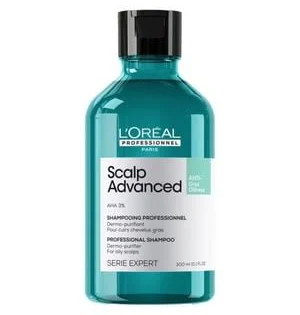
|
| Dry scalp | if you scalp is dry you should use a moisturizing shampoo what shampoo is good for dry scalps: Dry scalp shampoos are designed to hydrate the scalp relieve irritation and maintain the skins natural moisture barrier. 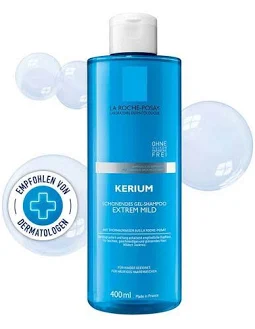
|
Use a clarifying shampoo occasionally if you use heavy styling products.
A clarifying shampoo is a deep cleansing shampoo designed to remove excess oil
product buildup hard water minerala chlorine and
other impurities that regular shampoos may leave behind.
(only use those once every 1-4 weeks)
Conditioner
Conditioner reduces friction, improves softness, and helps prevent breakage.
cationic conditioning agents Ingredients like behentrimonium chloride, behentrimonium methosulfate (BTMS), and cetrimonium chloride bind to the negatively charged hair surface, smothung the cuticle and reducing friction. Silicones – Dimethicone, Amodimethicone, and Cyclopentasiloxane form a thin protective film that makes hair smoother, shinier, and less prone to tangling and breakage. fatty alcs cetyl alc, Cetearyl Alc, and Stearyl Alc soften and lubricate the hair while improving slip. (These are moisturizing, not drying alcohols.) Humectants Glycerin and Panthenol attract moisture, improving softness and flexibility. Natural oils and butters Ingredients like argan Oil, coconut Oil, shea Buttter, and Jojoba Oil help lubricate, soften, and protect the hair shaft.
you should apply your conditioner mainly to the mid lenths and ends
rather than your scalp
the Ends need it most the mid-lengths and ends have expeienced the most washing, brushing, heat, and environmental damage. your scalp produces natural oil Sebum naturally moisturizes the roots, so most niggas don't need conditioner there. Prevents weighing hair down applying conditioner to the scalp can make hair look greasy or flat, especially if you have fine or oily hair.Reduces buildup: Keeping conditioner off the scalp helps minimize product buidup, which can leave the hair feeling heavy.
Washing Frequency
there isnt one rule on how freqenency you wash your hair.
| Oily hair | if your hair is oily you should wash it more frequent Why?: if your hair is oily you should wash it more often bc exess sebum builds up on the scalp and hair which ,akes it look greasy and increasing the likelihood of buildup. |
| Dry or curly hair | if your hair is dry or curly you shound wash it less freuent Why?: if your hair is dry or curly you should wash it less frequently bc the natruals oils take longer to travel down your hair shaft so you dont need to wash the oils that take longer after a shorty time away. |
Wash often enough to keep your scalp comfortable without stripping it excessively.
Drying your Hair
Avoid aggressively rubbing your hair while its wet or dry with a towel.
Instead:
Gently squeeze out the water
Pat dry with a microfiber (not nessasery) towel
or soft cotton T-shirt.
Use heat protection before blow drying
| Drying hair with a towel | |
| Drying hair with air drying | |
| Drying hair with blow dryer |
Hair Growth
Hair growth maily depends on genetics
health and time.
but you can support healthy hair growth by:
Eating enough protein
Getting sufficient sleep
Managing stress
Treating scalp conditions before they get bad
Avoding unnecessary heat and chemical damage
Chapter 3
Hairsryles and Styling
Choose a Hairstyle That fits you
The perfect haircut for you depens on:
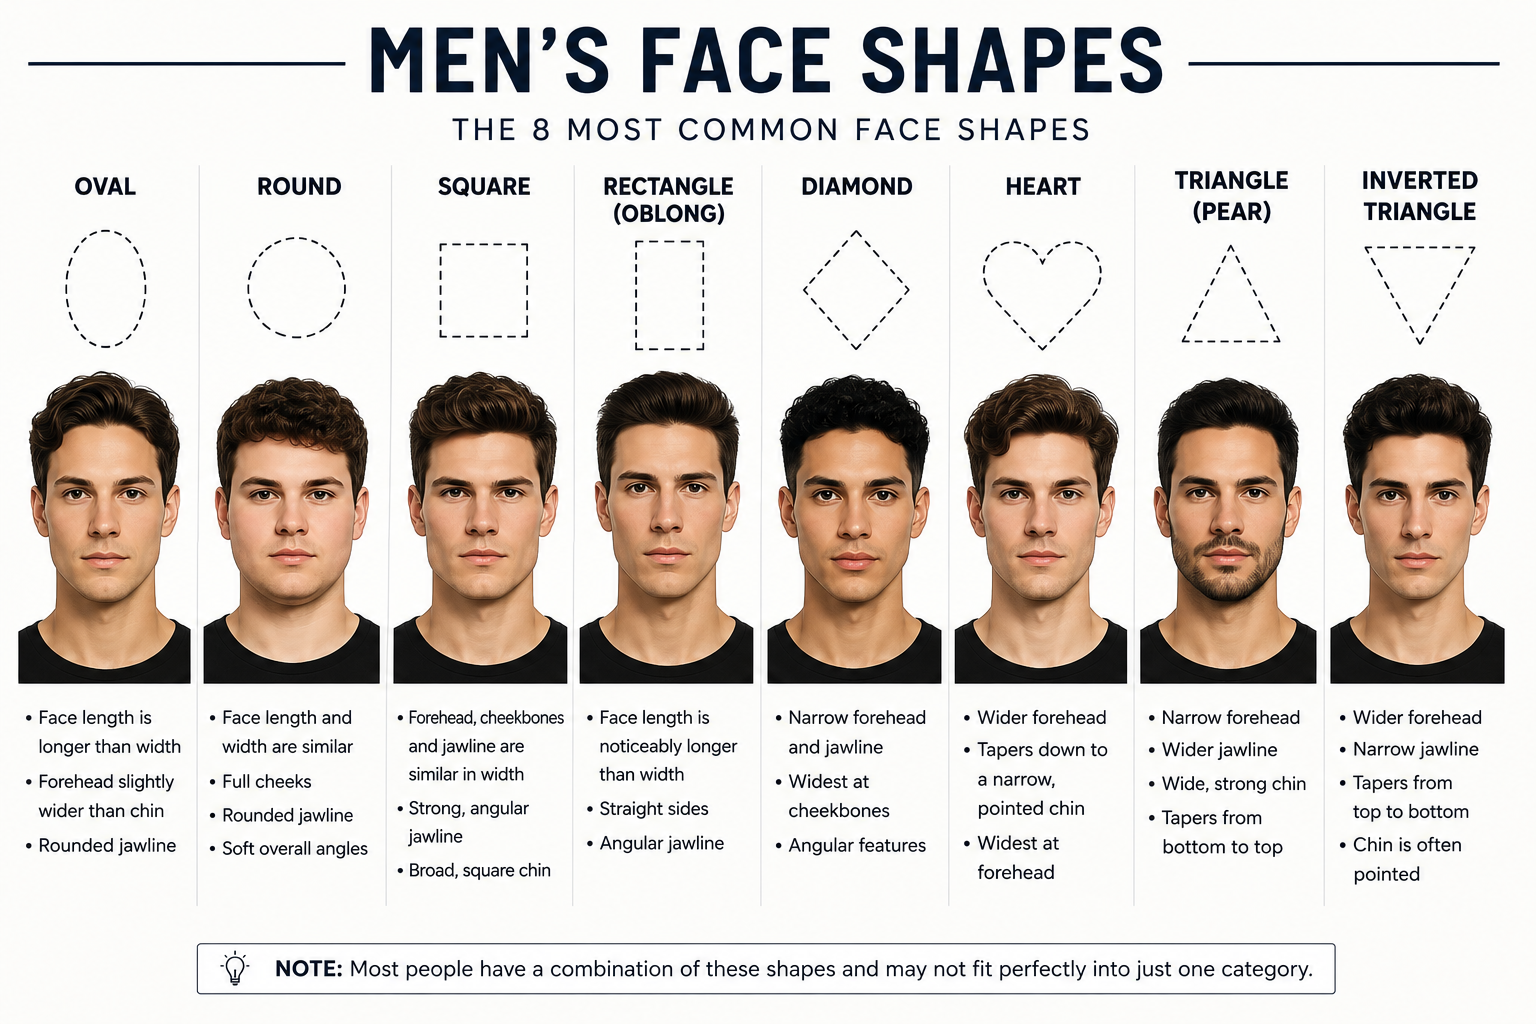
Your Face shape
Hairsryles and Styling
Choose a Hairstyle That fits you
The perfect haircut for you depens on:
Your Face shape
| Face Shape: | Best haircut for it: |
| Oval | Textured Quiff |
| Round | Mid Fade |
| Square | French Crop |
| Rectangle | Side Part |
| Diamond | Textured Fringe |
| Heart | Textured Fringe |
| Triangle | Side Part |
| Inverted Triangle | Textured Crop with fringe |
(sorry i cant add anymore pics if i could i would have added one pic what everyhaircut looks like)
your hair type
(look up)
your hair density
(look up)
your hairline
self explainable if your receding you should choose a haircut where you dont see
your hairline, if you dont have a receding hairline you can practicly choose any
hairstyle youd like
(cant add anymore pics sorry)
your lifestyle
if your into heavy metal you can choose smt that suits that like really long hair
or if your chad you choose to grow out your sides stuff like that
(i can add anymore pics sorry)
do not copy a celebrity unless your hair
or your face is similar to the celebrity.
Styling Products
your hair type
(look up)
your hair density
(look up)
your hairline
self explainable if your receding you should choose a haircut where you dont see
your hairline, if you dont have a receding hairline you can practicly choose any
hairstyle youd like
(cant add anymore pics sorry)
your lifestyle
if your into heavy metal you can choose smt that suits that like really long hair
or if your chad you choose to grow out your sides stuff like that
(i can add anymore pics sorry)
do not copy a celebrity unless your hair
or your face is similar to the celebrity.
Styling Products
| Product: | Best for: | Hairstyle/Haircut |
| Clay | Matte styles textured styles | Textured Crop Textured quiff |
| Paste | Natrual styles flexible styles | ivy league side part |
| Pomade | Sleek styles shiny styles | slick back pomadour |
| Sea Salt Spray | textured style volume | curtains textrued fringe |
| Texture Powder | volume lift | french crop textured crop |
| Hair Spray | long lasting hold | quiff pomadour |
(cant add pics sorry)
Chapter 4
Cutting your own Hair
Equipment
Equipment is one of the most important parts about
cutting your own hair
Equipment
(you dont need all of the equpment if you want to do only one cut
like if you dont want fades you dont need clippers guardes yk?)
Cutting your own Hair
Equipment
Equipment is one of the most important parts about
cutting your own hair
Equipment
(you dont need all of the equpment if you want to do only one cut
like if you dont want fades you dont need clippers guardes yk?)
| Equipment: | Purpose: | Approx. Price: | Importance: |
| Hair Clippers | Cutting sides and back | $60-300 | if you intend to give yourself fades this is a MUST. |
| Clipper Guards | Allows the clippers to be used with differents lenghts | $10-20 most of the time included with the clippers | if you intend to give yourself fades this is a MUST. |
| Hair Cutting Scissors | Cutting and refining the hair cutting layers all "no fade" cuts etc. | $20-300 | a MUST doesnt matter what hairvut you want to give yourself/learn youll always need a pair of scissors. |
| Thinning Shears | Removing bulk and blending | $15-300 | for the start it is a good helping tool but once you get better you wont need it anymore. |
| Barber Comb | mainly for sectioning also used for clipper over comp | $3-30 often included with the clippers or scissors | a MUST you cant cut your hair if you dont compe or section it |
| Hair Clips | hoilding the sectioned hair you did with the Comb | $5-10 rarely included in clippers or scissors | not a must but really helpfull for sectioning |
| Spray Bottle | wetting or dampening your hair | $3-10 | not a must but helps getting your hair evenly wet |
| Hand Mirror/3-Way Mirror | viewing the sides your back your whole head without breaking your neck | $10-25 | not a must but really really helpfull and will upgrade your owncuts |
| Cape or towel | keeps clothes clean from the hair | $10-20 rarely comes with other things in a kit | not a must just cut your hair half nacked and just shower after |
| Neck Duster Brush | brushes away loose hair | $5-15 | not nessesary just shower after the cut or use a normal brush while cuting your hair |
| Clipper Oil | lubricates clipper blades | $5-10 sometimes included with the clippers | if you plan on useing your clippers more than a month you should use this you can buy a spray where this oil and the cleaning effect is in so you dont have to buy both |
| Blade Cleaining Spray | cleans and disinfects blades | $8-15 | very important with out this your clippers will die stop working or work worse than before you can buy sprays where the clipperoil is already in so you dont need to buy both |
Cutting your own hair
firstly cutting your own hair can save you allot of money gives you complete control over
what your hair looks like at the end. you can outgrow anybarber in a few weeks of cutting your own or your
friends hair bc 90% of barbers a actually dog shit. you can make good money if you start cutting other
niggas hair plus you will always have the freshest fade or layers in your friend group
what your hair looks like at the end. you can outgrow anybarber in a few weeks of cutting your own or your
friends hair bc 90% of barbers a actually dog shit. you can make good money if you start cutting other
niggas hair plus you will always have the freshest fade or layers in your friend group
Step 1
(i will show you everything based on the mod cut cuz
thats the best cut i can do)
Everything you should do before you even thouch a clipper/sicorss:
wash your hair if it contains products like clay texture powder etc.
damp your hair (90% of the time) if working with scissors if doing a fade keep the hair dry
set up good lighting(bright, even and shadow free) to see your hair clearly blend lines etc.
use the right mirrors (your normal front mirror and a back mirror like those you just hold with your hand
or preferably a 3 way mirror no really nessasary i cut my own hair without a 3 way mirror)
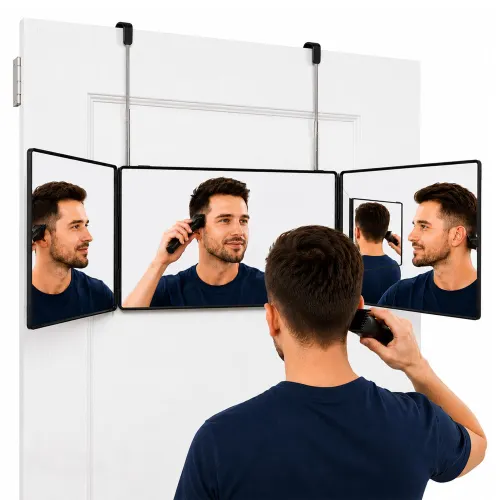
keep all your tools within reach to you can switch fast(not important just nice to have)
put on your baber cape do it shirtless or use a old t shirt
Step 2
now we set up everything
but
before actually starting to cut your own hair you should know exactly what your trying to achieve.
always ask or think to yourself:
what about the sides?(shorther longer)
the top?(layers)
do i do a fade?(if yes which one)
where do i set all the fade lines for my fade?
how will it all line up?
dont think you can just freestyle your cut you might do it on the left side different from the right side or sum if you dont plan
Step 3
always section your hair before you cut anything
the sections are basicly the same all the time
they just change in a few cuts but not much
most niggas fail here bc they dont know how to section or underrate it
and say i dont need ts i can do it without
you cant, i mean you can but it will look much worse
so create the sections
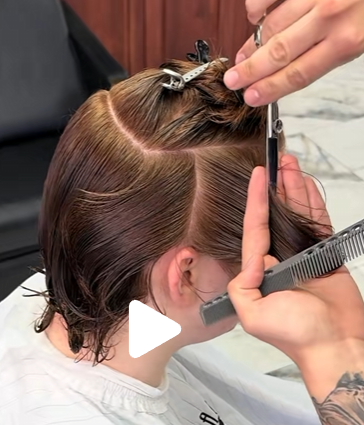
useing your comb and hair clips divide your hair into 4 to 5 sections:
top(with our without the fring)
left side/right side
back
use a hair clip to clip each section so it dosent go away
create a horitontal part from temple to temple across the crown to separate the
top from the sides
separate the fringe from the rest of the top by creating a part about 2-4 cm behind hte hair line this is not
nessasary only if you want to if you dont just put those hair to the top section
divide the remaining hair into the left side right side and back section
and dont forget to put clips on all of it obv
it matters so you keep both sides symmetrical avoid cuting
the wrong part of the head, blend everyxthing better
and stay organized thoughout the haircut
top from the sides
separate the fringe from the rest of the top by creating a part about 2-4 cm behind hte hair line this is not
nessasary only if you want to if you dont just put those hair to the top section
divide the remaining hair into the left side right side and back section
and dont forget to put clips on all of it obv
it matters so you keep both sides symmetrical avoid cuting
the wrong part of the head, blend everyxthing better
and stay organized thoughout the haircut
a good section looks smt like this:
Step 4
A mod cut is usually medium length, alot of good layers,
and shaped around the forehead, ears, and neck. The top and fringe
remain longer, while the sides and back are blended with scissors rather than cut very short.
before cutting it think
how long do you want the fring means the hair on your forhead
fring above or below the eyebrows (prolly above always looks better)
hair around the ears should i cover them up or nah
back long and nice or shorter and nice
the avg length for a mod cut (also the once i usally use)
are:
fringe 8-12 cm
top 10-15 cm
sides 5-10 cm
back 7-12 cm
but always start longer than your final target
lets say you want your fringe to be 10 cm long then you would start bc cutting it 11 or 12 cm long
etc.
Exact lengths depend on your current hair, curl pattern, and desired version of the cut.
(means dont just copy 1 to 1 what any tut says look at your hair and think abt it)
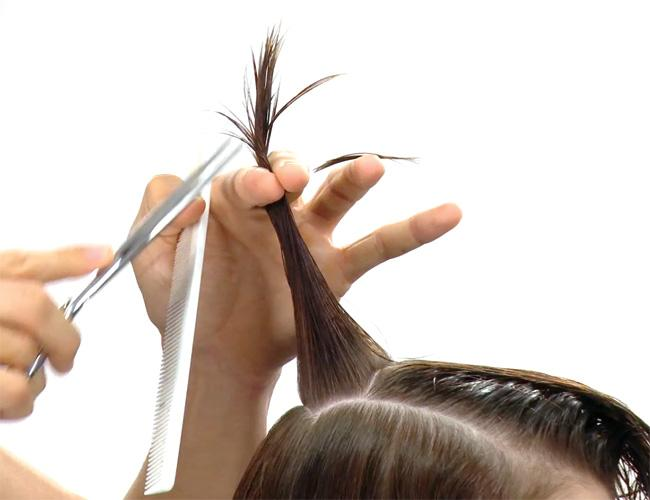
Create your first guide at the center of the top. Comb a small section upward, hold it between your index and middle fingers, and remove only a small amount. This first section determines the length of the rest of the top.
Step 5
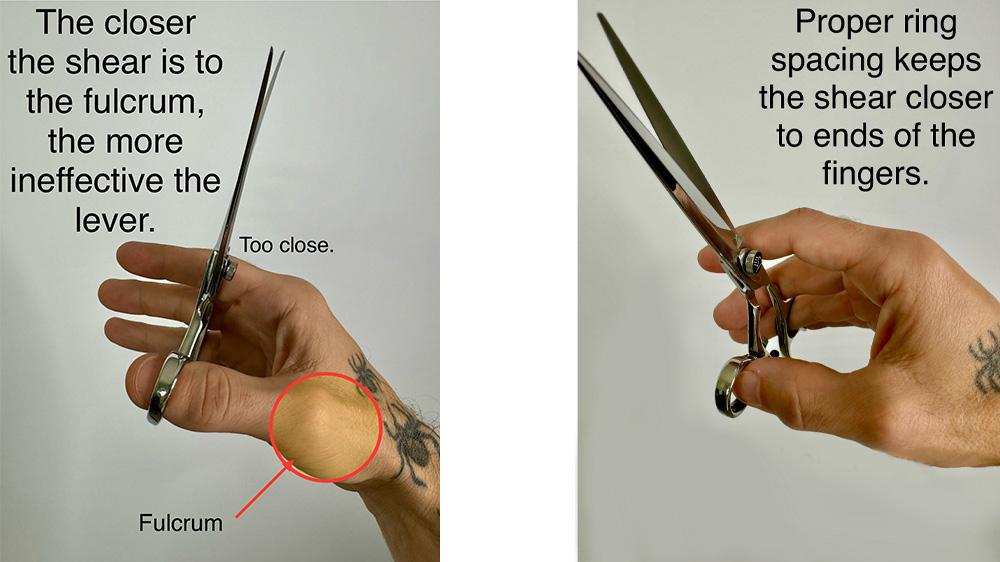
how to hold the scissors corretly
place your thumb in the small hole.
your ring finger in the big one.
lay your lil finger on the finger rest.
and put your index and middle finger along the handle for stability.
your thumb should do most of the movment job.
For straight cutting, hold the blades horizontally.
For point cutting and texturizing, hold them vertically or diagonally.
Never cut toward your fingers, ears, eyes, or scalp obv.
Step 6
Cut the Top in Sections
The top should retain length and movement.
1. Take a narrow section from the center of the forehead toward the crown.
2. Comb the hair upward at approximately a 90-degree angle from the scalp.
3. Hold it between your index and middle fingers.
4. Use your first cut section as the guide.
5. Cut using small, controlled movements.
6. Continue across the top in parallel sections.
Keep your fingers at a consistent angle.
Raising every section equally creates balanced layers, while changing the angle can create uneven areas.
Do not cut the top straight across in one large section.
Small sections give you more control.
Step 7
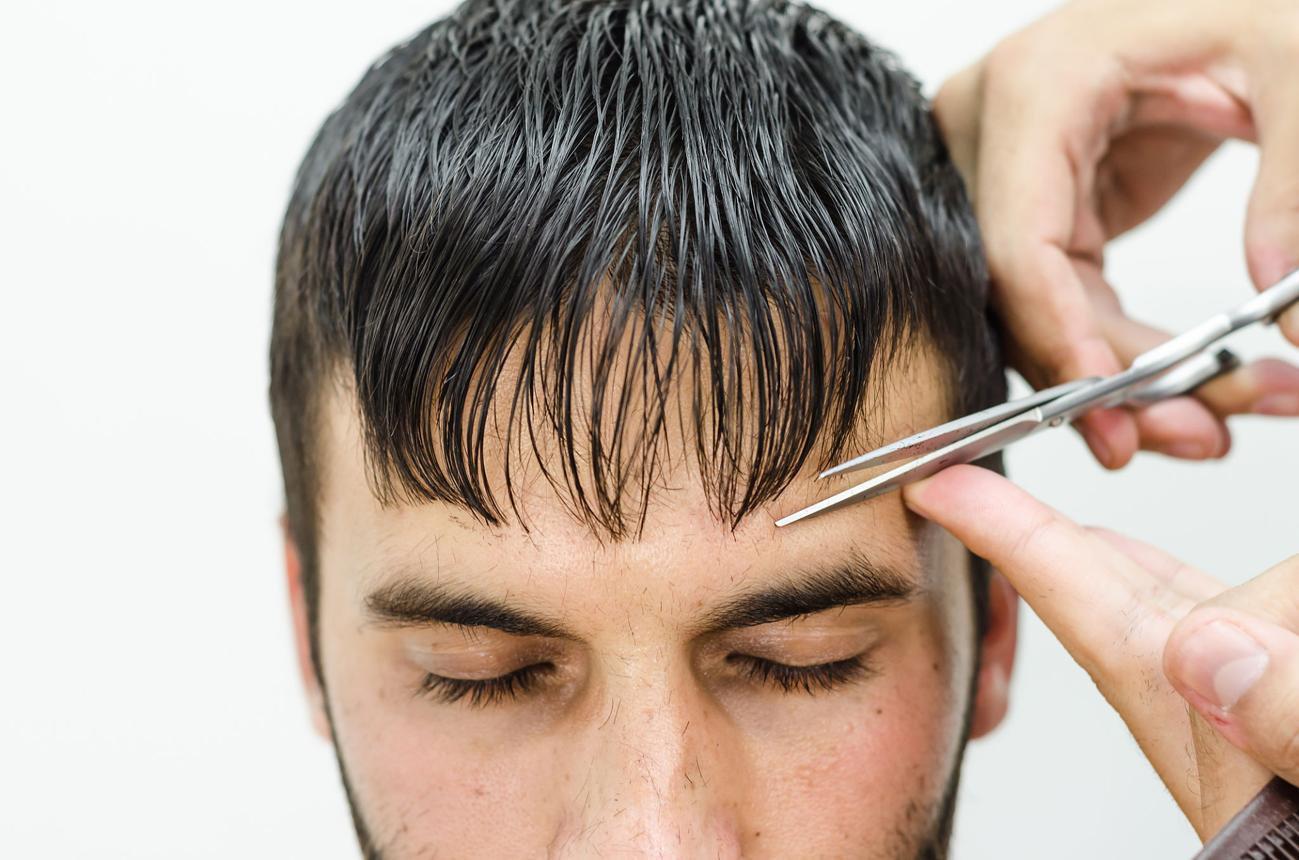
Shape the Fringe
The fringe is one of the most important parts of a mod cut.
Comb the fringe forward in its natural position.
Divide it into three sections: center, left, and right.
Begin with the center section.
Hold the scissors vertically or diagonally.
Use point cutting to remove small amounts from the ends.
Gradually connect the center to both sides.
Avoid pulling the fringe tightly before cutting.
Hair becomes shorter when released, especially if it is wavy or curly.
For a softer mod-style fringe, keep the center slightly shorter
and allow the sides to become gradually longer toward the temples.
Do not cut a perfectly blunt horizontal line unless that is the exact look you want.
Step 8
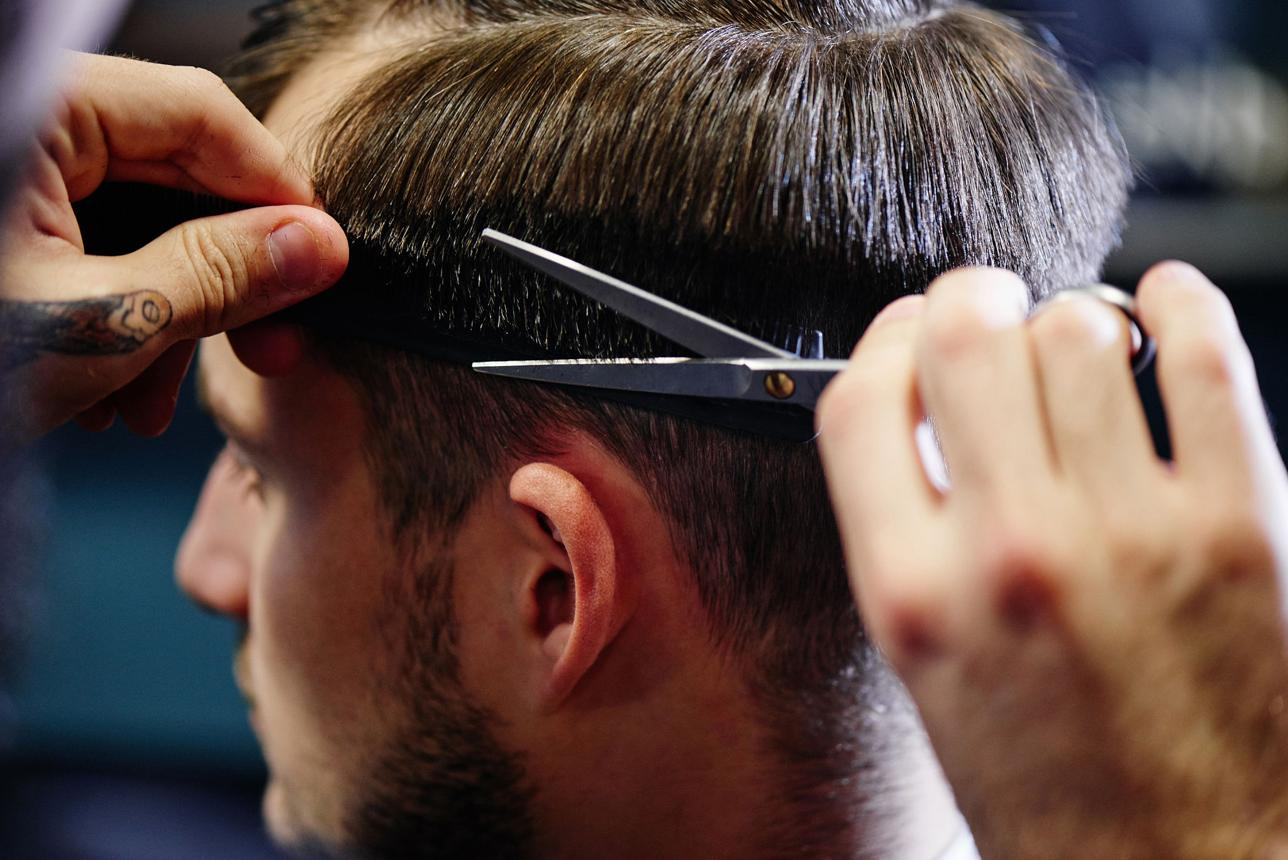
Cut and Layer the Sides
The sides should blend into the longer top while maintaining enough length to frame the face.
Comb the side hair downward.
Separate a vertical section near the temple.
Hold the section away from the head between your fingers.
Use the top as a guide and remove a small amount.
Continue toward the area behind the ear.
Repeat on the opposite side.
Use vertical sections because they create a softer, layered result.
Horizontal sections can create heavy shelf-like lines.
Around the ears, point the scissors downward and carefully trim around the natural ear shape.
Do not press the scissors against the skin.
For a traditional mod cut, leave some hair covering or partially covering the ears.
For a cleaner modern version, trim the outline slightly shorter.
Step 9
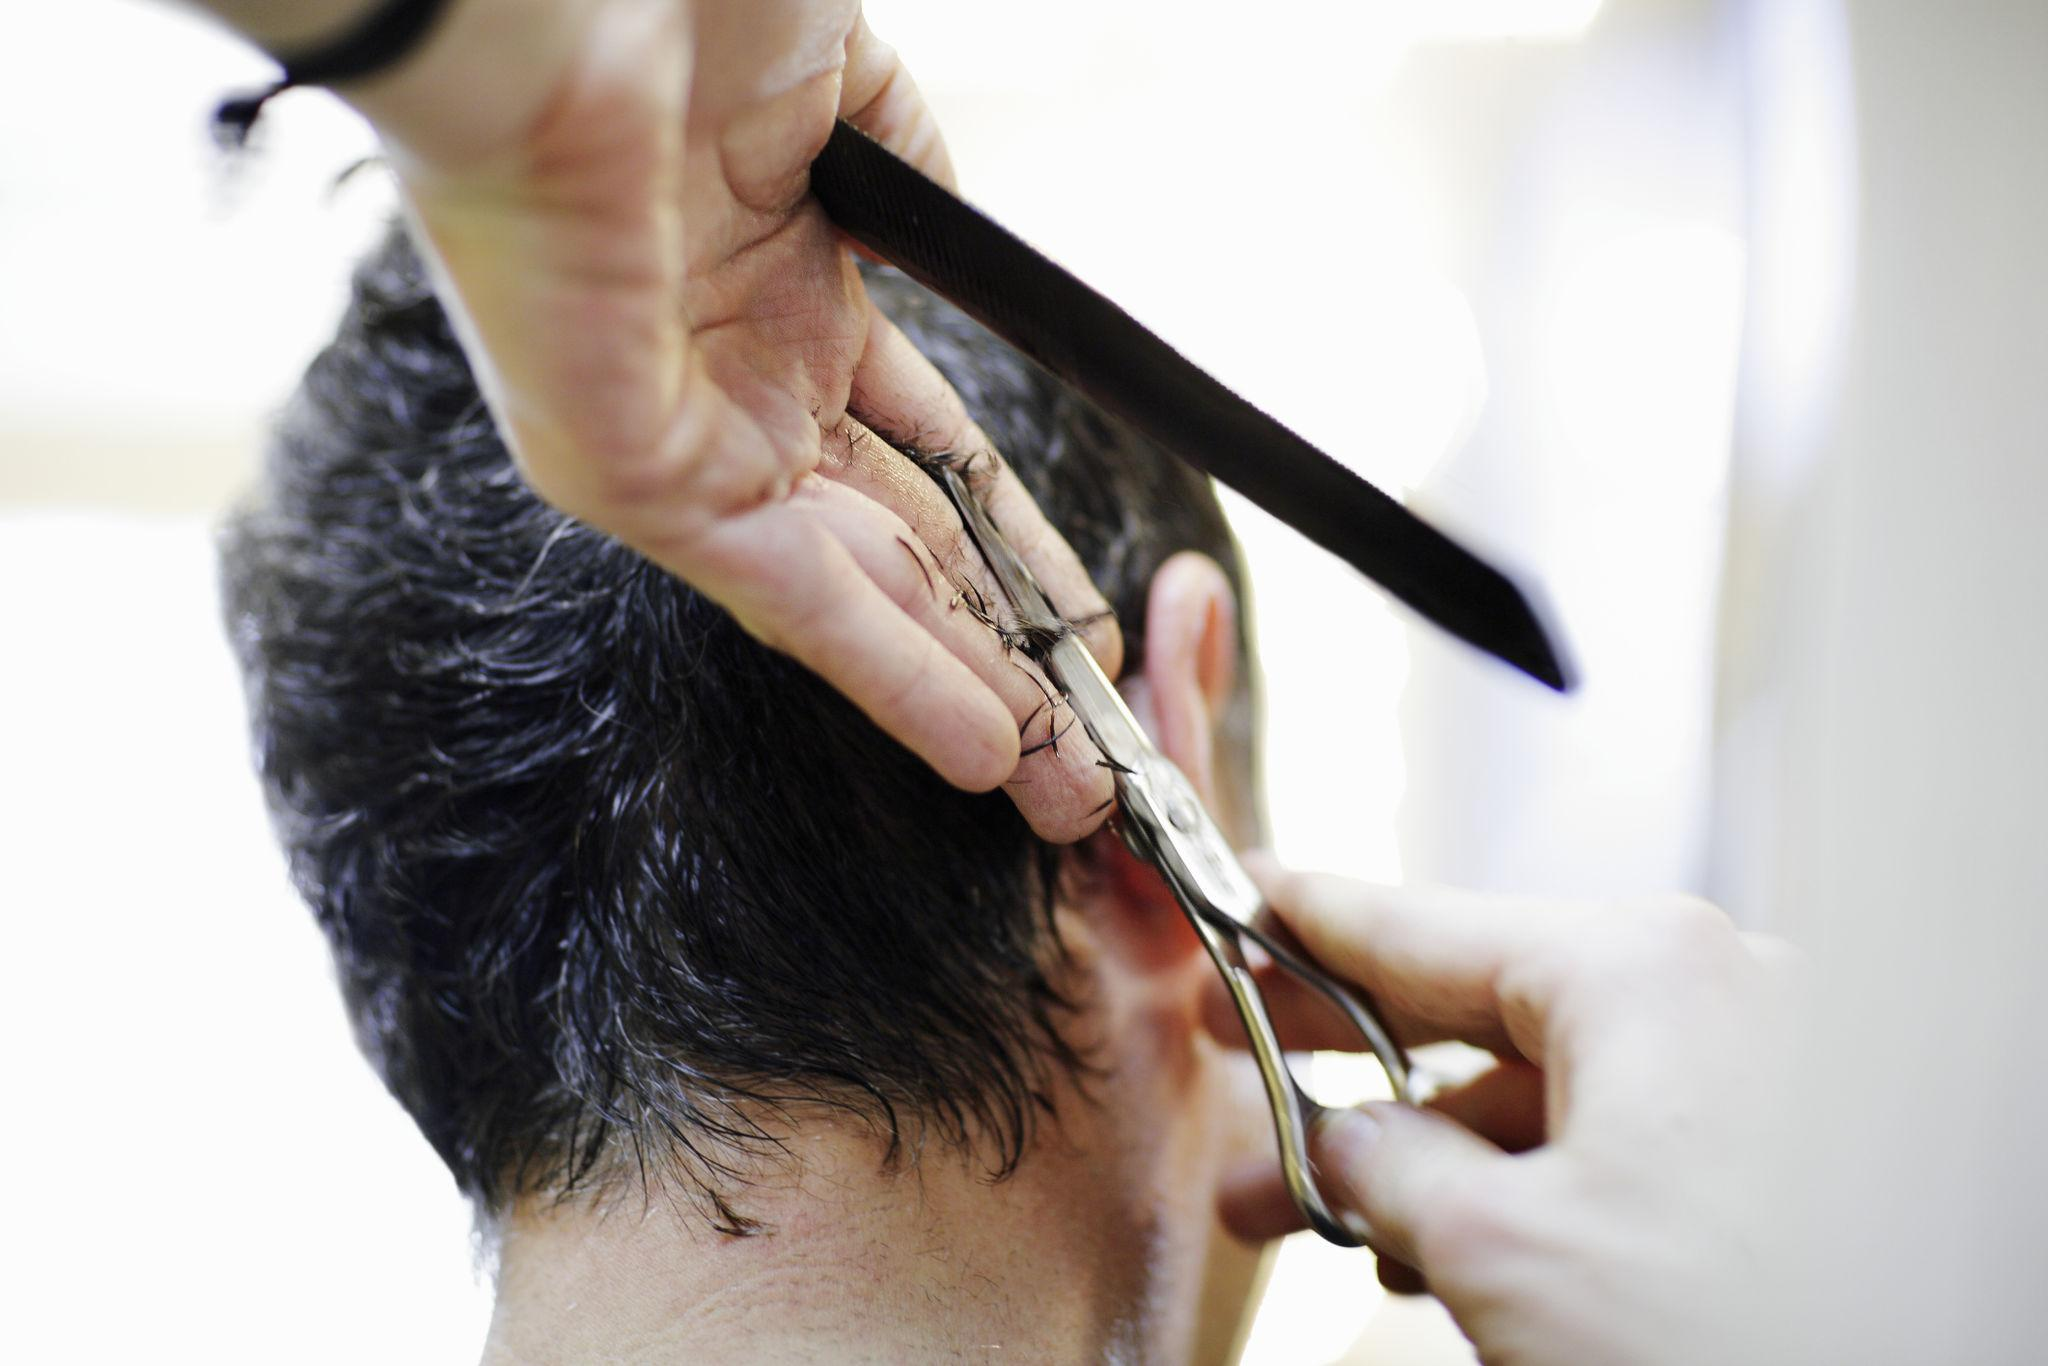
Cut the Back
The back should connect smoothly to the crown and sides.
Divide the back into a center section and two side sections.
Begin at the crown and work downward.
Lift each section away from the scalp.
Use previously cut hair from the top as your guide.
Cut small amounts using point cutting.
Gradually reduce the elevation as you approach the neckline.
Higher elevation removes more weight and creates stronger layering.
Lower elevation preserves more length and fullness.
Use a second mirror or three-way mirror to check the shape constantly.
The back is the hardest part to cut accurately by yourself, so work slowly.
For the neckline, choose one of these finishes:
Natural neckline:
Soft and slightly longer
Tapered neckline:
Gradually becomes shorter near the neck
Clean outline:
More defined but less traditional for a mod cut
Avoid creating a high, straight line across the back.
Step 10
Connect the Top, Sides, and Back
After each area has been cut, the sections must be blended together.
Use scissor-over-comb around the upper sides and back:
Hold the comb at a slight outward angle.
Lift the hair that appears heavier than the surrounding area.
Cut only the hair extending beyond the comb.
Move gradually around the head.
Step back frequently to check the overall silhouette.
You can also use vertical sections to cross-check the blend.
If you see a corner or sudden length change between the top and sides, remove it gradually with point cutting.
A mod cut should look layered and slightly messy, but it should not contain obvious disconnected lines.
Step 11
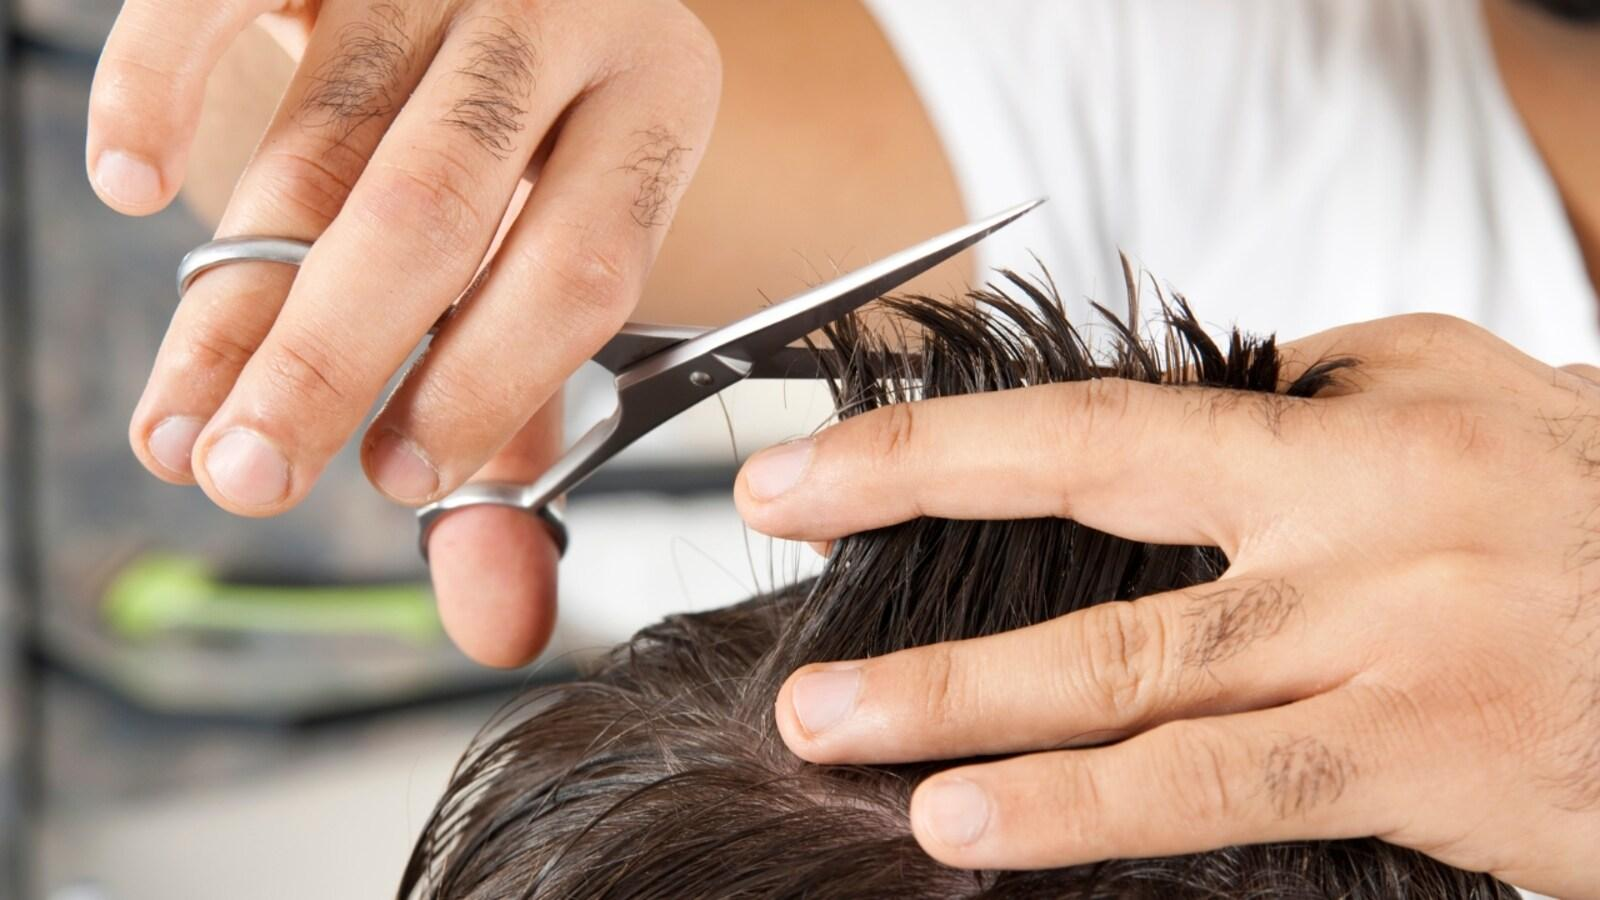
add texture
Texture gives the mod cut its movement and prevents it from looking like a helmet.
Point Cutting
Hold the scissors vertically and make shallow cuts into the ends.
Use this technique to:
Soften the fringe
Break up blunt lines
Add separation
Create a more natural finish
Keep the cuts shallow. Cutting too deeply can create holes or uneven sections.
Twist Cutting
Take a small section, gently twist it, and point-cut into the ends.
This can create loose, irregular texture.
Use it sparingly, especially on fine or low-density hair.
Thinning Shears
Thinning shears may be used only in areas with excessive bulk.
Keep them away from the roots.
Use one cut at a time.
Comb the hair out after each cut.
Avoid them on fine, damaged, or low-density hair.
Removing too much internal weight can make the hairstyle look thin, frizzy, or uneven.
Step 12
Cross Check the haircut
just take a look at the shit you just created and look out for:
Uneven fringe length
One side being heavier than the other
Visible lines between sections
Excessive weight behind the ears
A flat or uneven crown
An unbalanced shape at the back
check your top if from the opposite drection from how you sectioned it
means if you cut it from front to back check it from side to side.
remember to only remove clearly uneven pieces if you hunt those tiny lil ass bits of
imperfection you gonna fuck up your hair.
Step 13
Dry and Refine the Cut
after the whole cut your let your hair dry or dry it like showing in this thread
you check it bc after your hair dryess it reveals the true lenght volume n shit.
just use point cutting to refine any heavy or uneven ends dont change it
to much tho
Step 14
mog with your new selfmade modcut.

yall can ask me anthing about this whole thread
particularly about the self hair cutting part im pretty good myself cutting hair
plus ts is my first ever guide so lmk what i could do better in the next one thanks
Tips
always cut less than what you think.
Work rather slowly than fast.
Only work with good lighting.
Clean your tools after every use.
@Regret @Iamspace @shedontluv-U @jkxdy @Mr. Squarepants