


A GUIDE TO INJECTING STEROIDS AND PEPTIDES
Disclaimer: Not a medical professional. Information presented is research-based & from personal experience. You are responsible for your own decisions and health. Consult a certified medical professional before implementation.
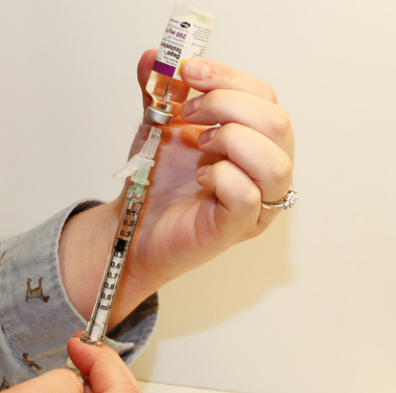
The first time I held a loaded syringe, I sat there for nearly 15 minutes doing absolutely nothing. I just stared at it with the needle cap still on and the oil drawn up. The alcohol swab in my other hand was sitting there completely frozen in my room.
I wasn't scared of the pain to come but of what might happen afterward. All these questions flooded in my head:
- What if I do it wrong?
- What if I hit a vein
- What if I inject air and something terrible happens?
- What if I wake up tomorrow with a swollen, infected region where my quad used to be??
Chances are if you are reading this right now with the intent to pin, you are probably where I used to be. Everything's ready to go, but there's a huge wall of fear and uncertainty that nothing you do can overcome.
This guide is what I wish existed on this forum when I first pinned. Not reading off a clinical medical textbook or a 30-second YouTube short that skips all the important details. A real, complete, and step-by-step breakdown of how to inject steroids and peptides written by someone who has actually done it before countless times.
TABLE OF CONTENTS
- Steroids
- 1A. What You'll Need
- 1B. How to Inject (via Intramuscular Injection)
- 1C. Where to Inject
- 1D. Post-Injection Pain
- 1E. Common Mistakes
- Peptides
- 2A. What You'll Need
- 2B. How to Reconstitute
- 2C. How to Inject (via Subcutaneous Injection)
- 2D. Where to Inject
- 2E. Body Reactions (with Tips)
- Free Resources to Use
STEROIDS
Steroids are injected via a method of "intramuscular injection" in medical terms. They are a bit harder to do than peptides however given if you follow step by step, it will be relatively easy for you each time. I will provide a list of materials needed and a step-by-step guide with images.
WHAT YOU'LL NEED
HOW TO INJECT
WHERE TO INJECT
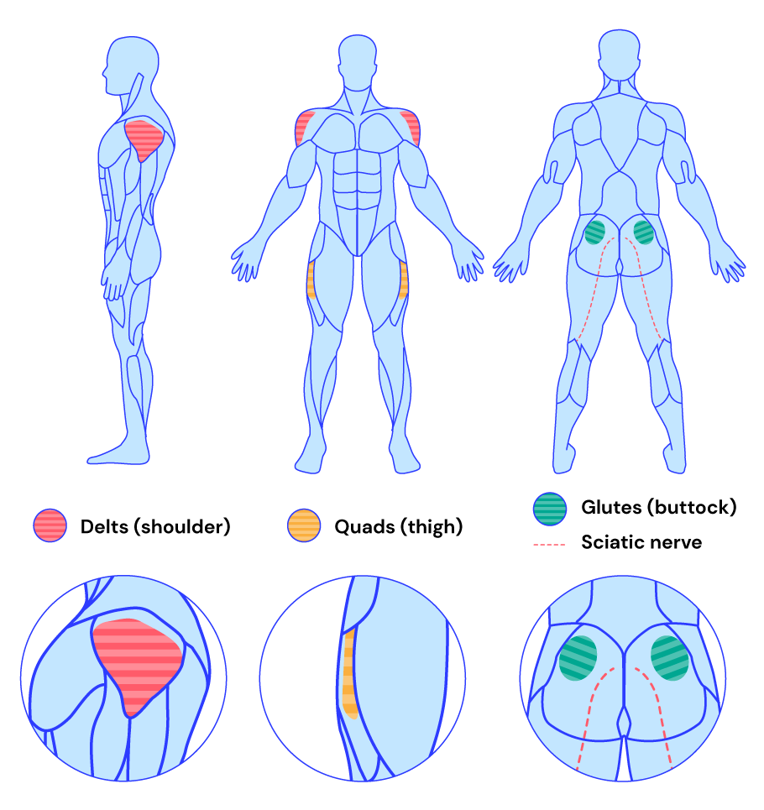
The vastus lateralis muscle in the thigh
The gluteus maximus in your buttocks
Disregard delts; they carry a bigger risk for injecting as they are a smaller muscle
and you will likely inject in the wrong place.
POST-INJECTION PAIN
COMMON MISTAKES TO AVOID
Steroids are injected via a method of "intramuscular injection" in medical terms. They are a bit harder to do than peptides however given if you follow step by step, it will be relatively easy for you each time. I will provide a list of materials needed and a step-by-step guide with images.
WHAT YOU'LL NEED
* Note: I've divided this up into two different lists, recurring purchases and one-time purchases, for your convenience, but there is a full list at the end of this spoiler if you don't have that much time to read.
RECURRING PURCHASES
Items you'll regularly need throughout your cycle, please stock up ahead of time.
ONE-TIME PURCHASES
Things you can buy once & forget about it.
You can buy all these things at any online store or a pharmacy locally.
All the items will approximately cost $37 USD ~ $73 USD
Here's the quick list to summarize:
RECURRING PURCHASES
Items you'll regularly need throughout your cycle, please stock up ahead of time.
- Injection needles (23g-25g, 1 inch (2.54 cm))
Get a new needle every S. I. N. G. L. E. injection, no exceptions. It's smooth, minimal PIP, and you'll barely feel it going in. I'd recommend buying these in bulk; a 100-pack may last you a full cycle. Remember a fresh needle will cost you pennies, but an infection will cost hundreds and weeks of recovery; don't be stupid.

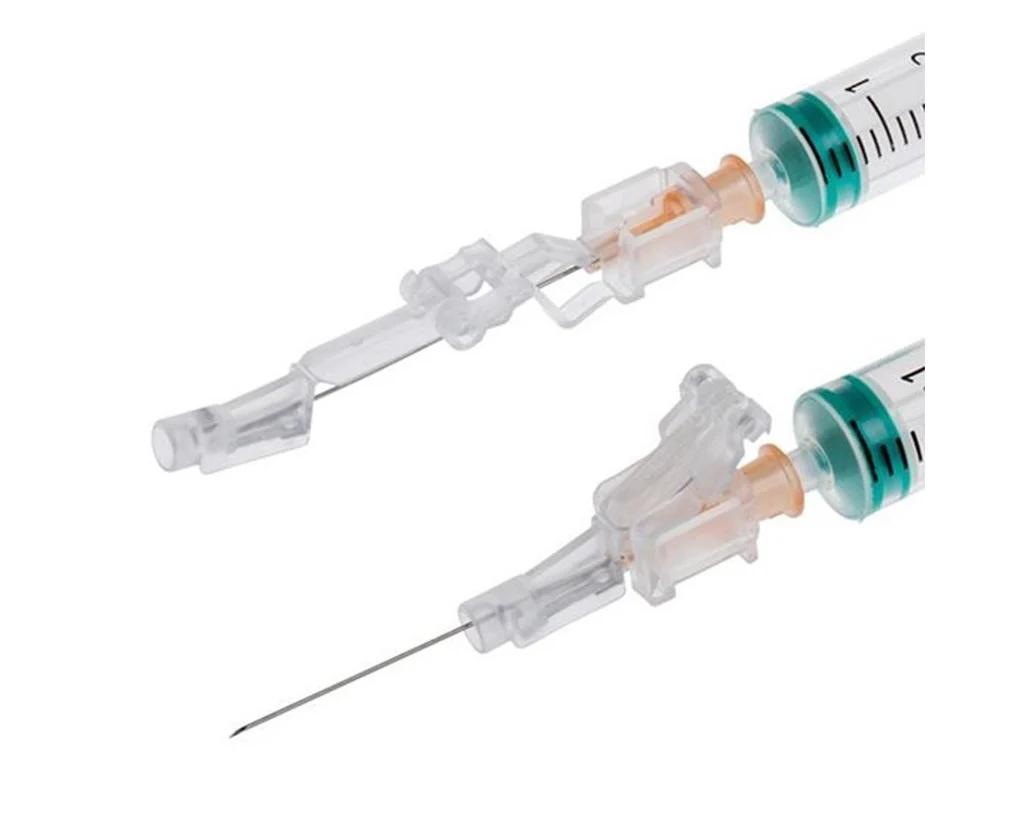
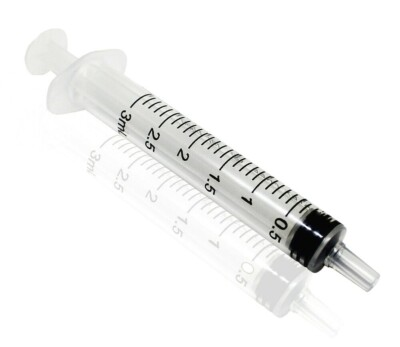
- Syringes (3ml)
One per injection, 3 ml is the sweet spot, usually big enough for most doses and easy to read the measurements. Don't cheap out on these, as a good syringe with a smooth plunger makes drawing and injecting 10x easier.

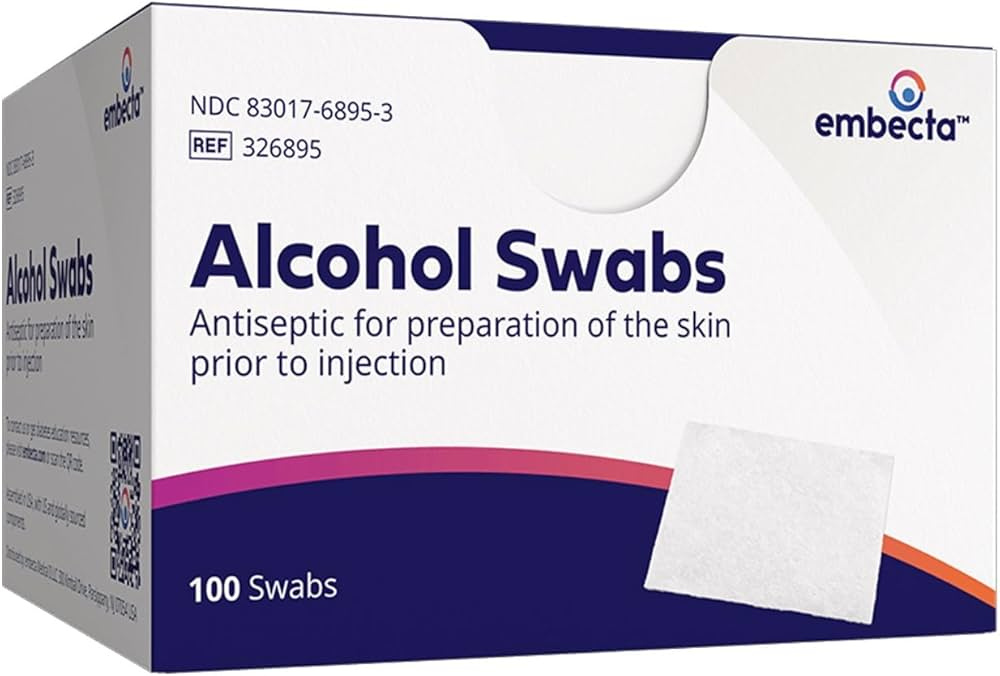
- Alcohol Swabs
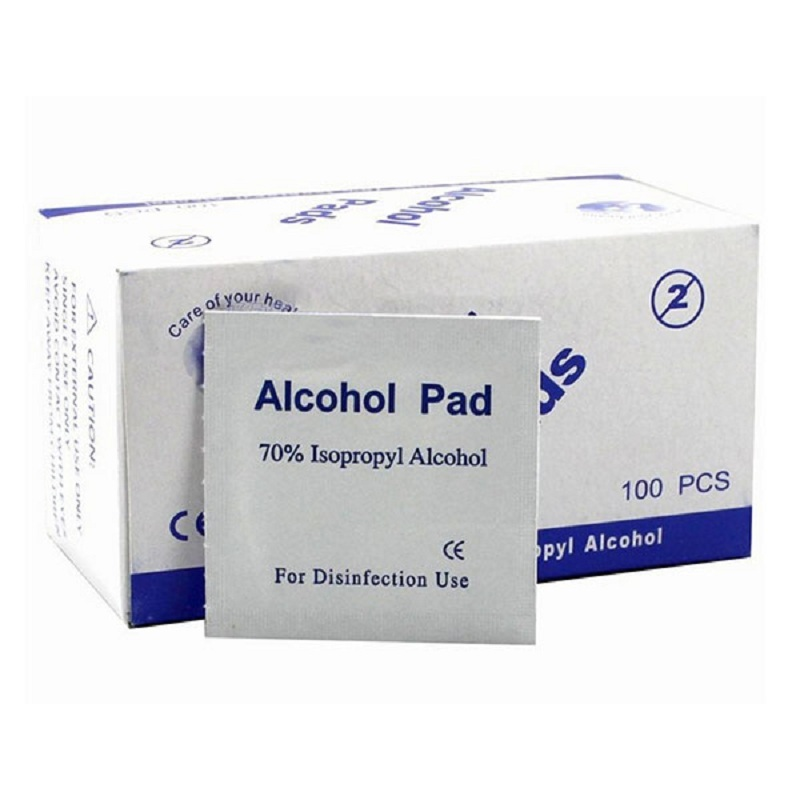
You will be using at least 2 per injection, one for the vial top and one for the injection site. These go fast.

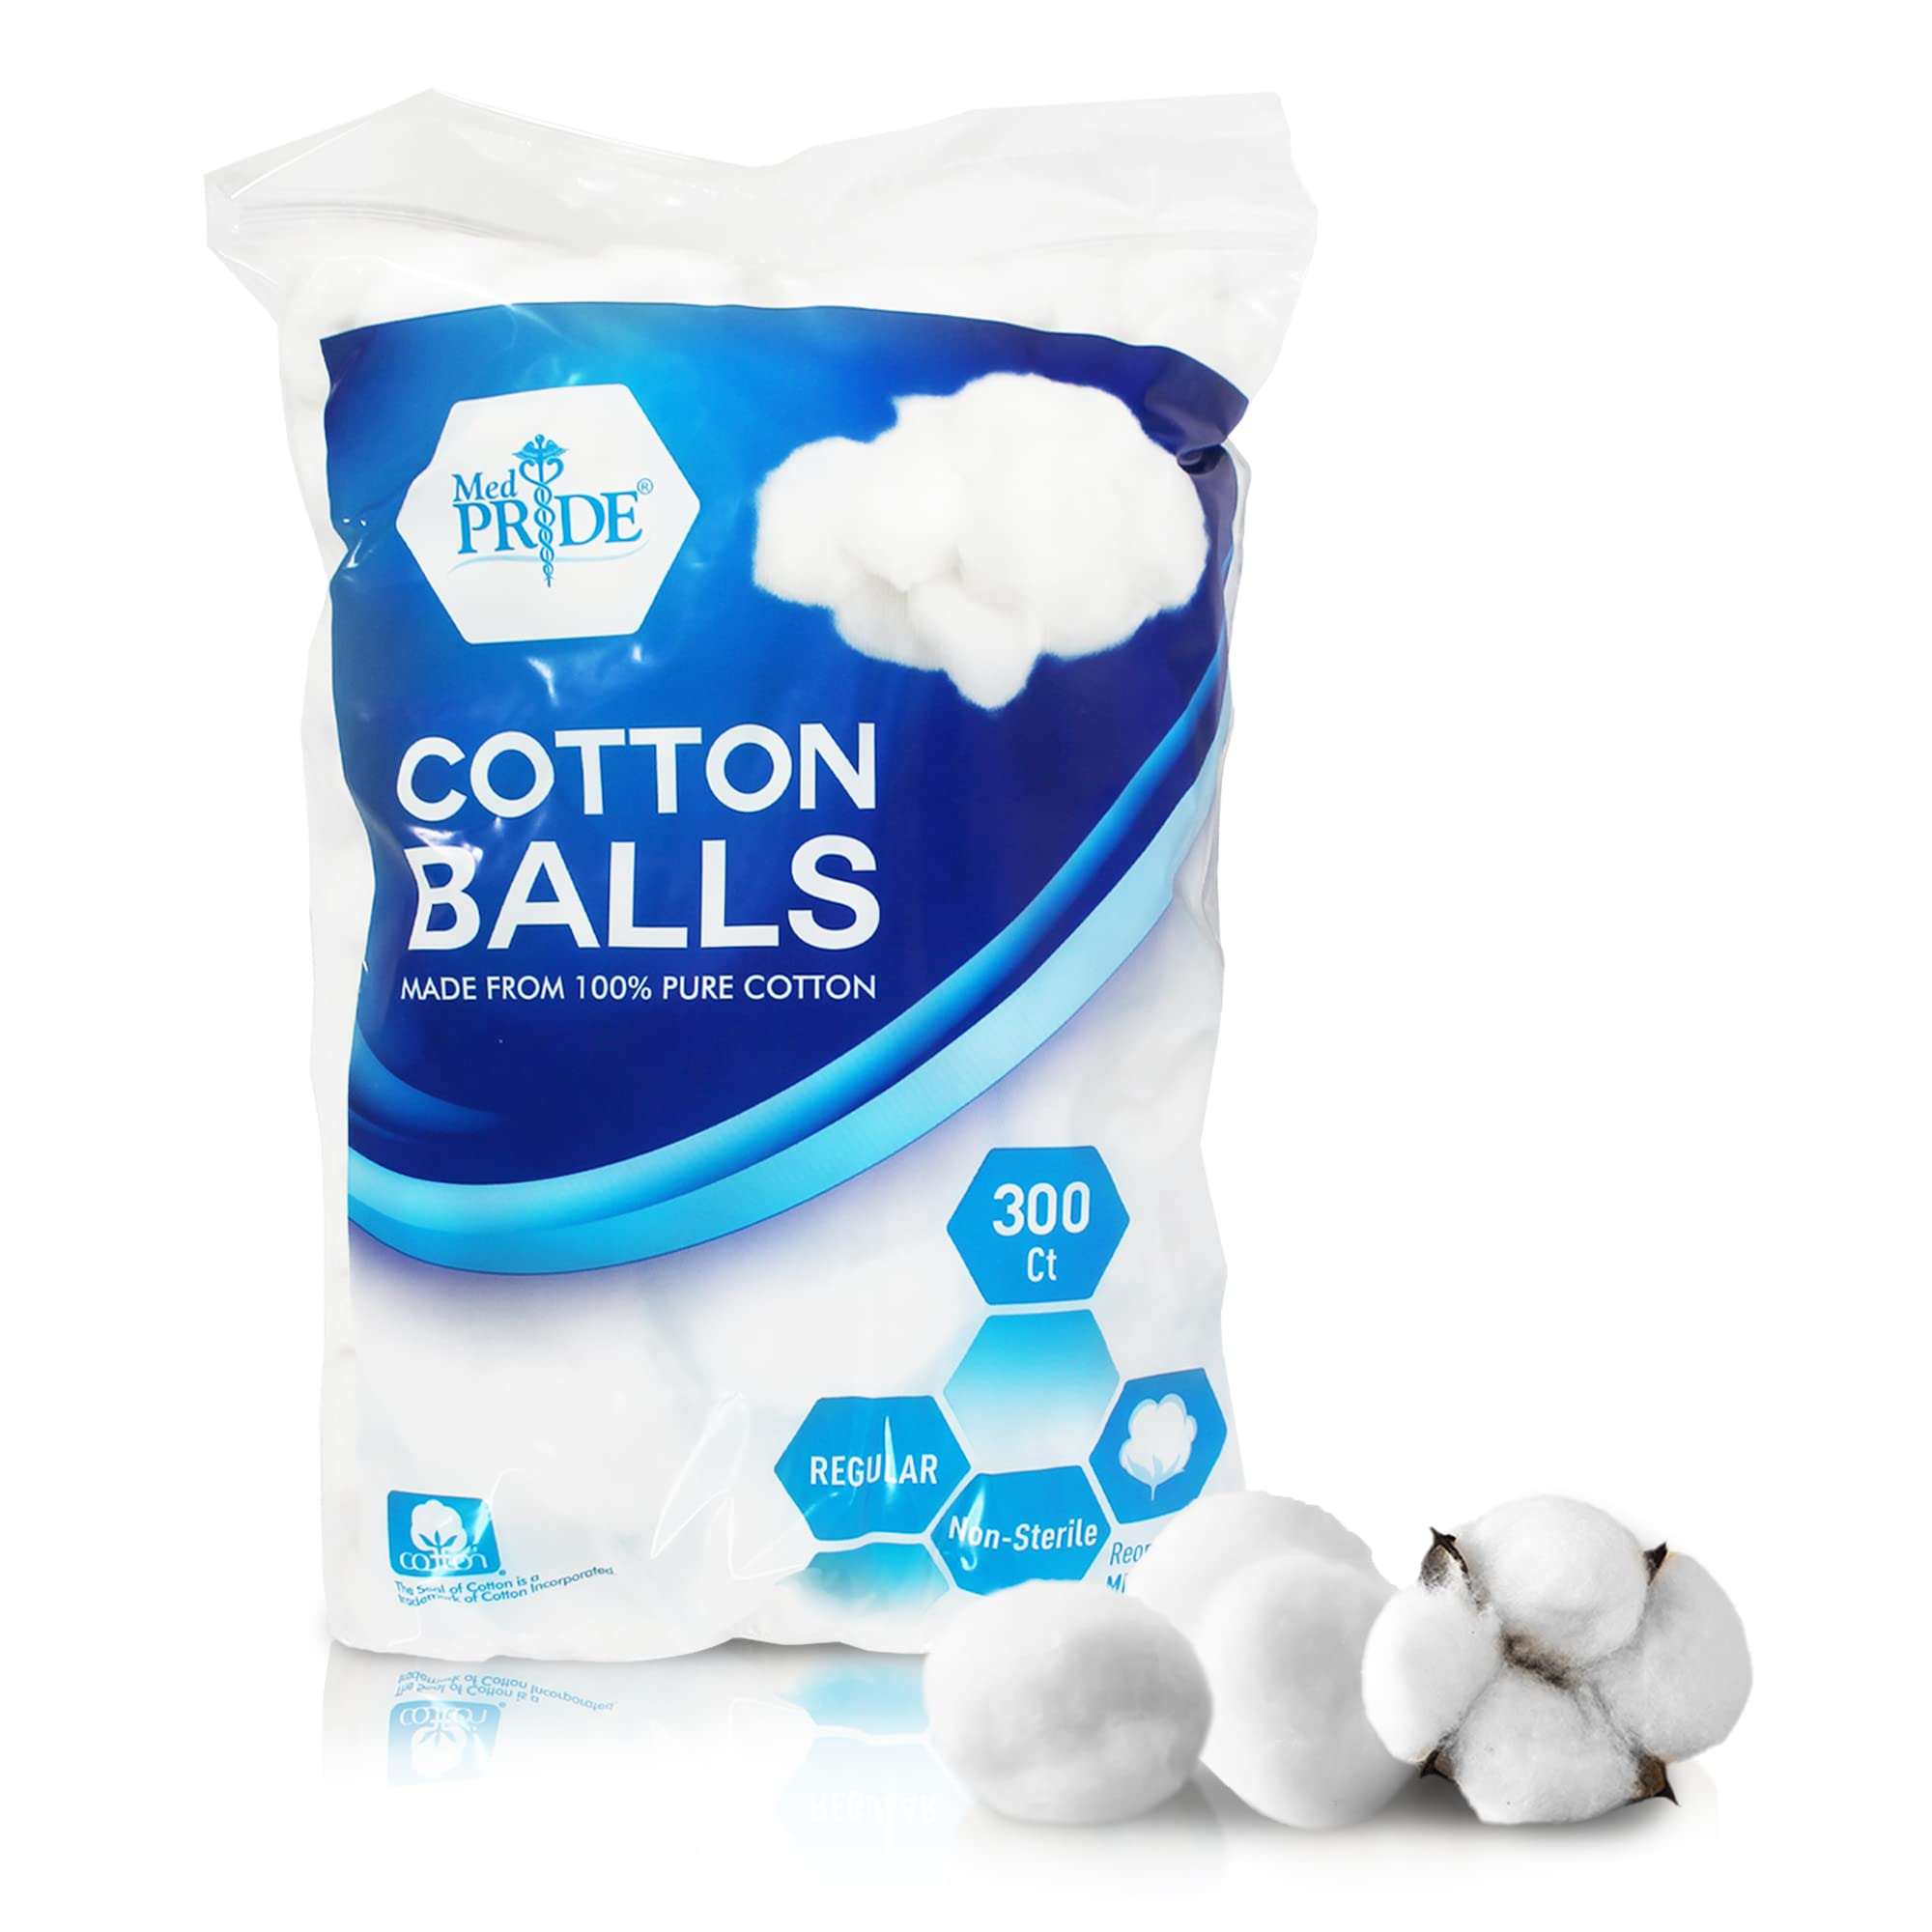
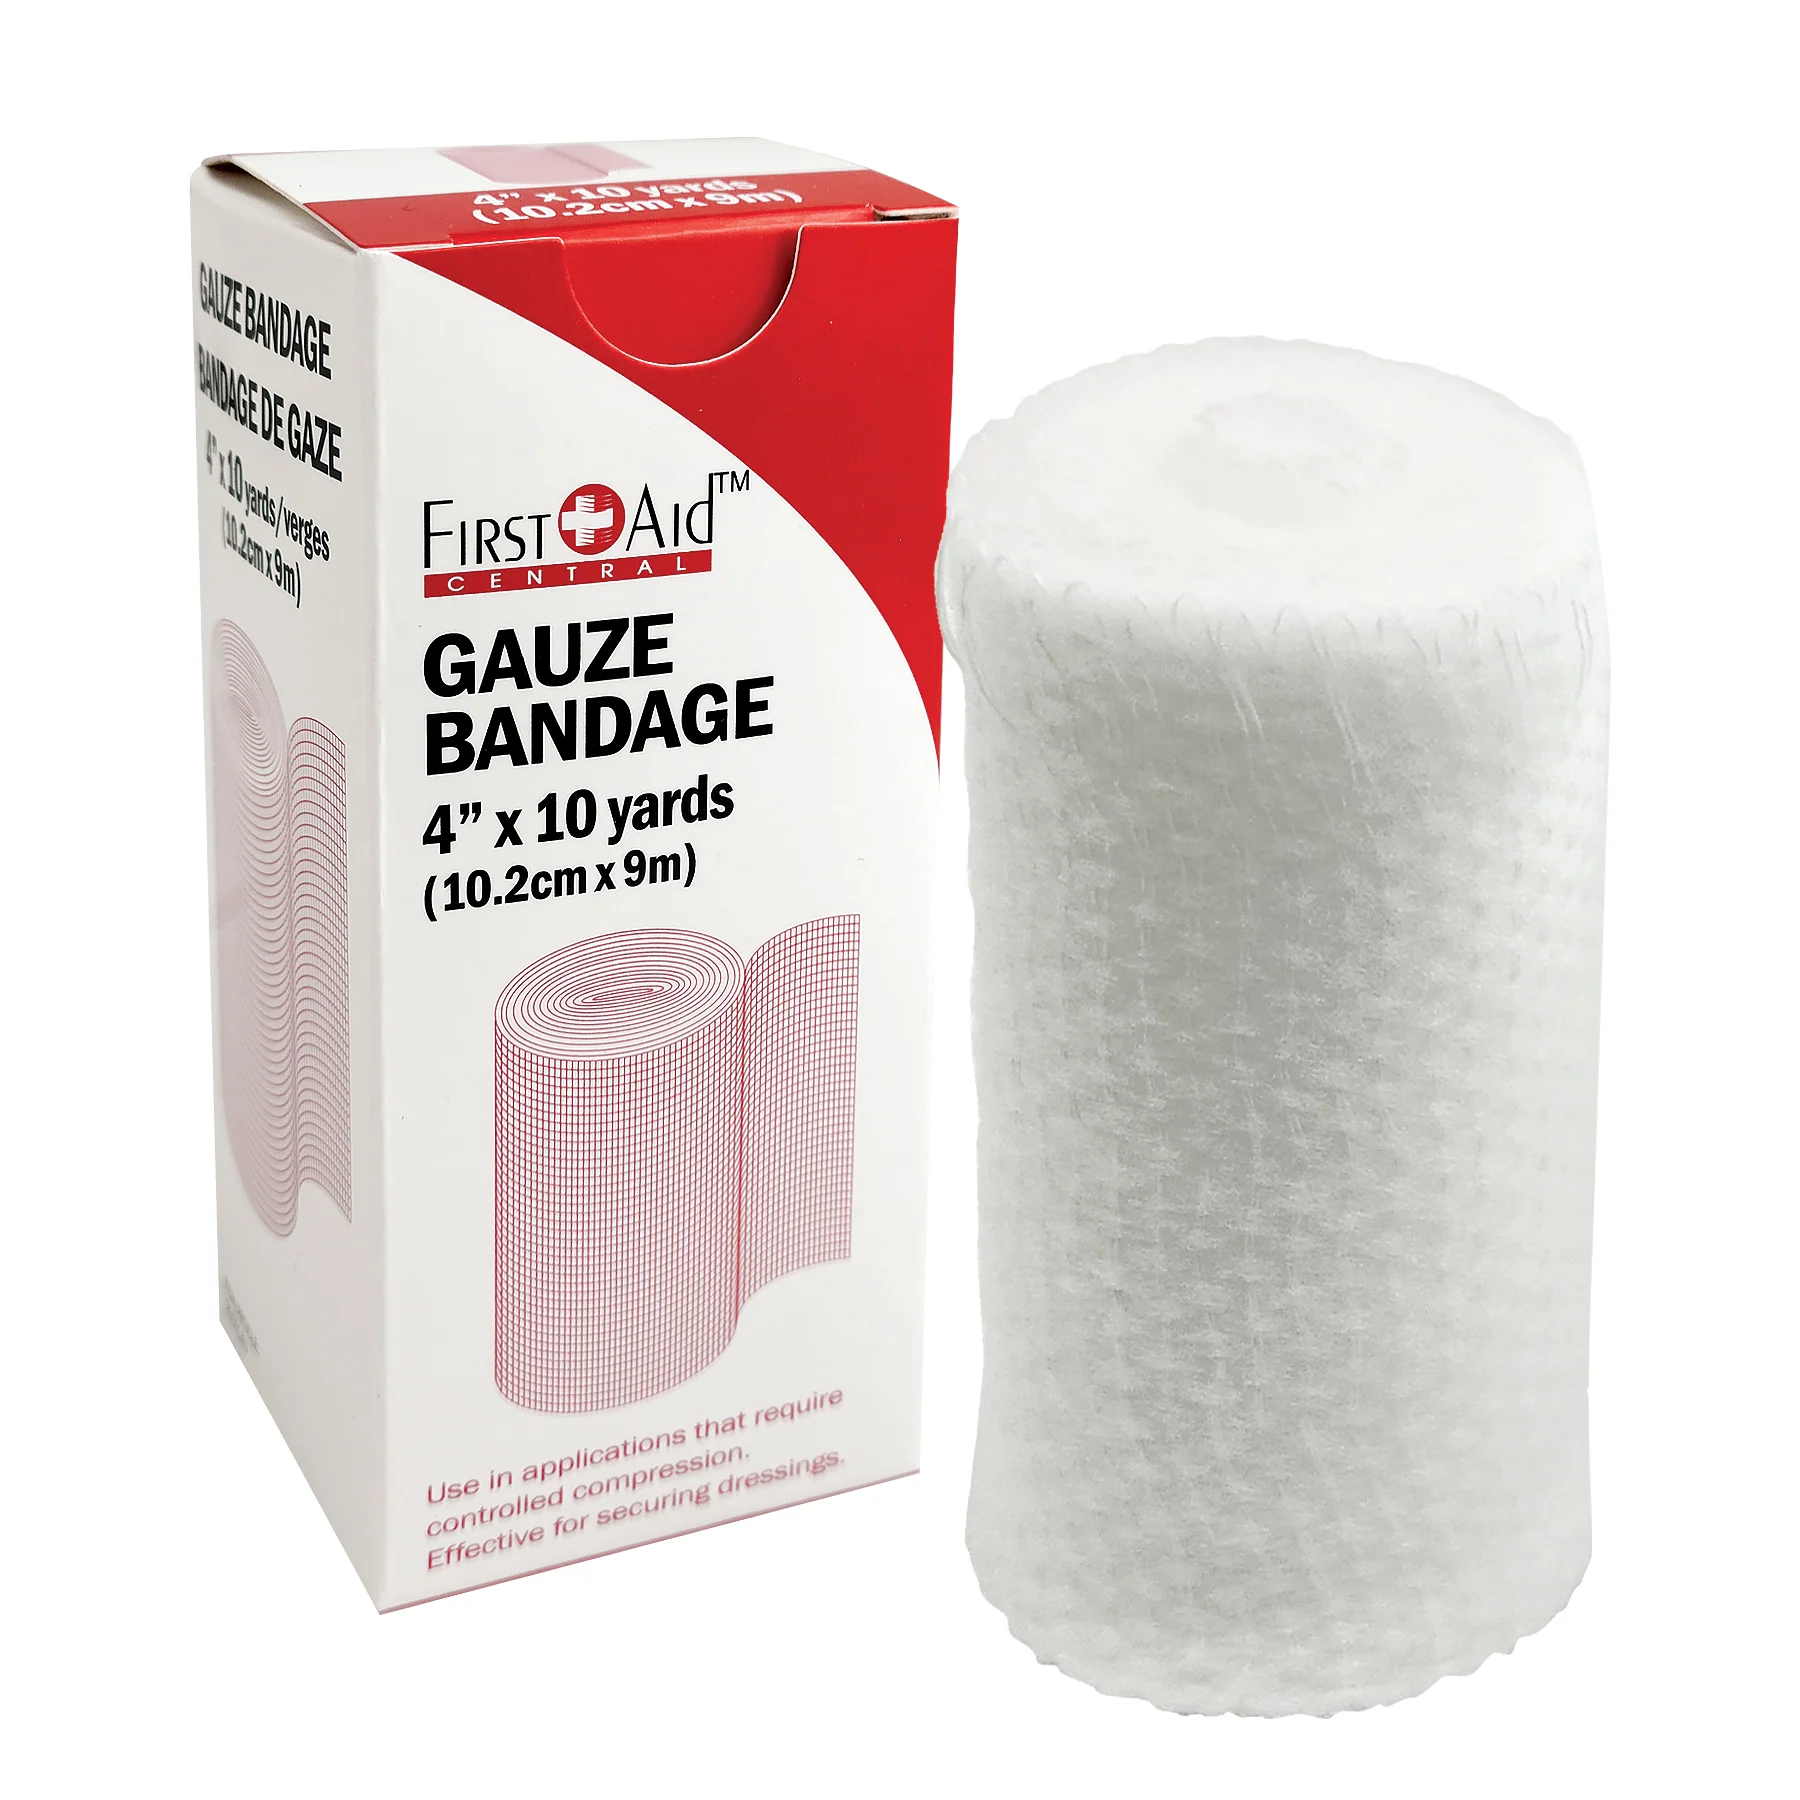
- Cotton balls / Gauze
This is for applying light pressure after pinning; it's optional, but I would highly recommend getting it. A small box will last you almost a lifetime.

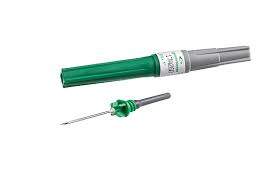
- Draw needles (20g-21g, 18g)
If you are using the method I provide, you will need one per injection. 18g works as well, but 21g is the one I'd recommend.

Quick tip: before you start your cycle, calculate how many injections you'll be doing in total and buy 10-15% more supplies than you think you may need. Trust me, you'll thank yourself later for this.
Get a new needle every S. I. N. G. L. E. injection, no exceptions. It's smooth, minimal PIP, and you'll barely feel it going in. I'd recommend buying these in bulk; a 100-pack may last you a full cycle. Remember a fresh needle will cost you pennies, but an infection will cost hundreds and weeks of recovery; don't be stupid.
- Syringes (3ml)
One per injection, 3 ml is the sweet spot, usually big enough for most doses and easy to read the measurements. Don't cheap out on these, as a good syringe with a smooth plunger makes drawing and injecting 10x easier.
- Alcohol Swabs
You will be using at least 2 per injection, one for the vial top and one for the injection site. These go fast.
- Cotton balls / Gauze
This is for applying light pressure after pinning; it's optional, but I would highly recommend getting it. A small box will last you almost a lifetime.
- Draw needles (20g-21g, 18g)
If you are using the method I provide, you will need one per injection. 18g works as well, but 21g is the one I'd recommend.
Quick tip: before you start your cycle, calculate how many injections you'll be doing in total and buy 10-15% more supplies than you think you may need. Trust me, you'll thank yourself later for this.
ONE-TIME PURCHASES
Things you can buy once & forget about it.
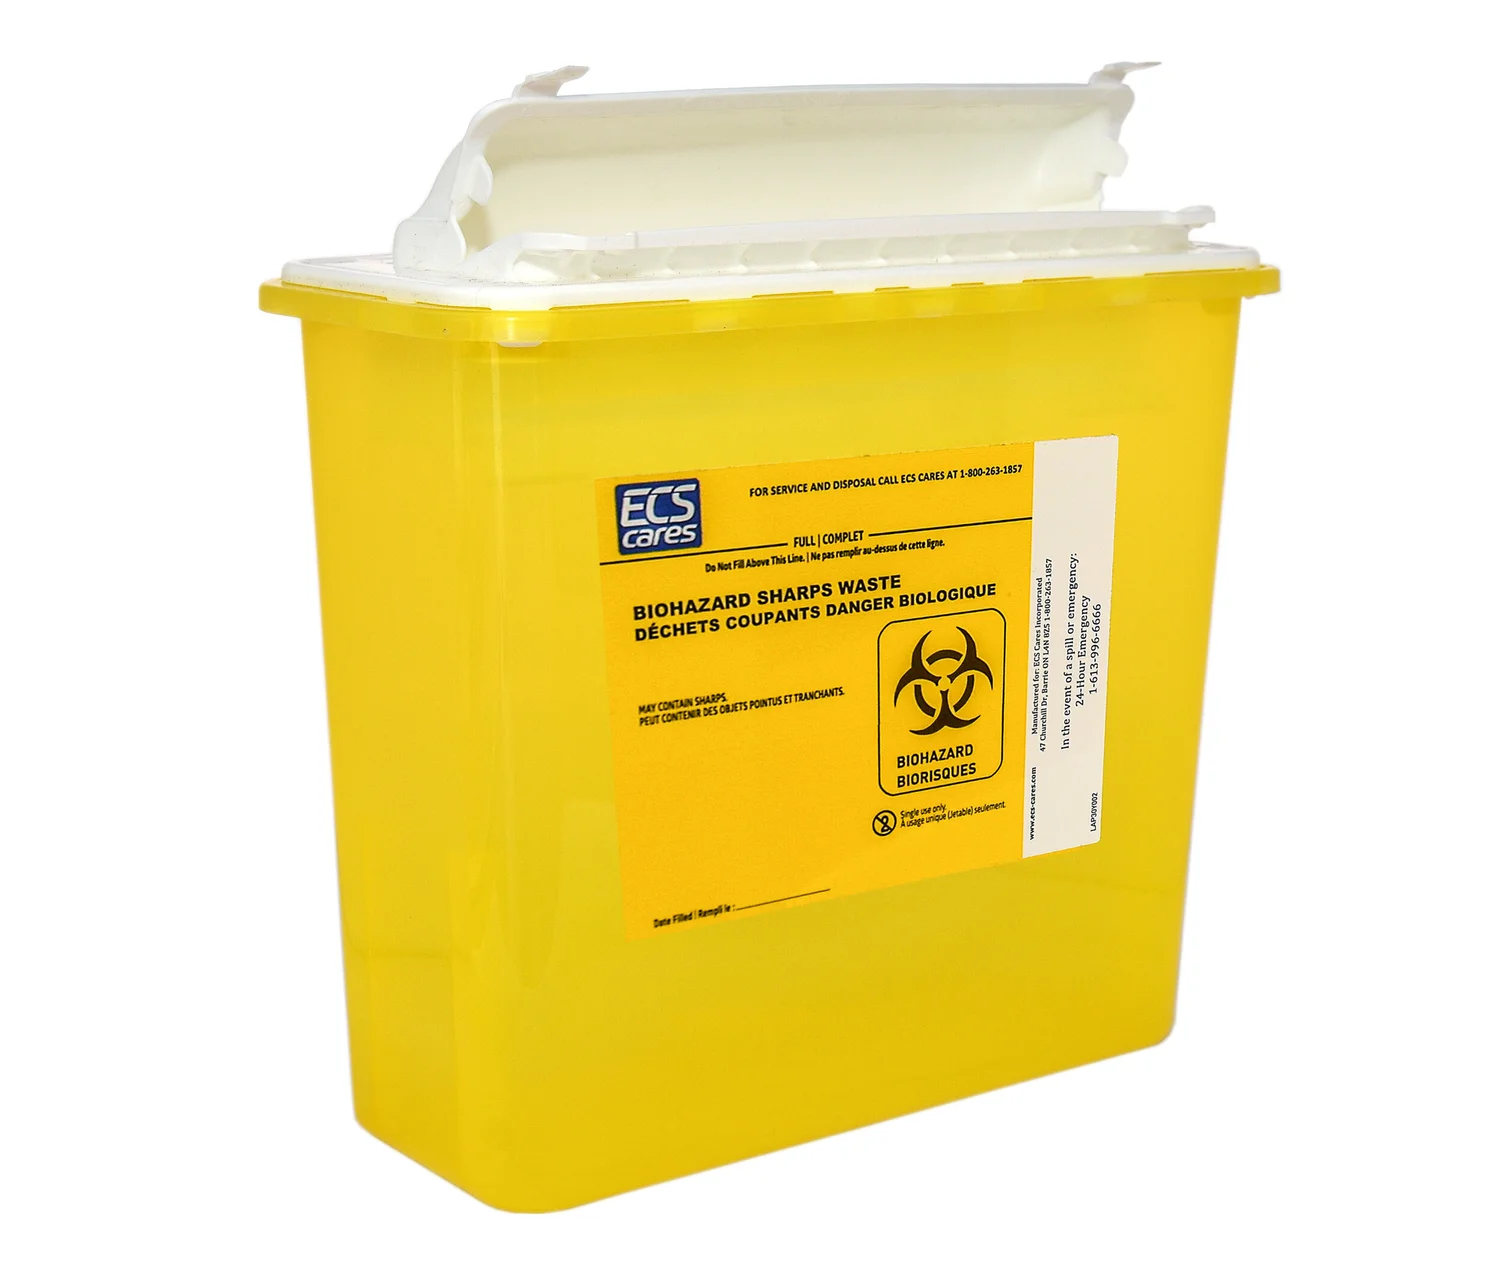
- Sharps container
For safe needle disposal, don't be that person throwing used needles in the trash.

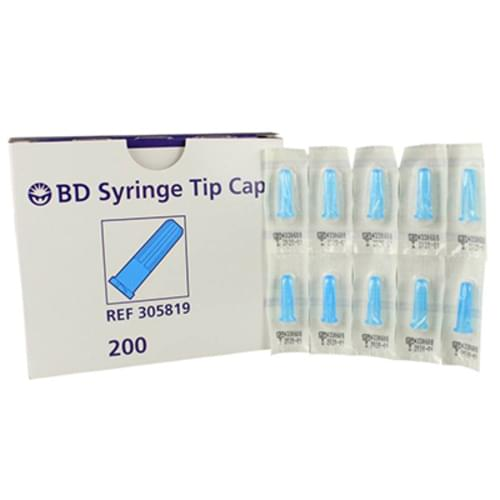
- Needle tip caps
Optional if you are preloading syringes for travel or convenience.
For safe needle disposal, don't be that person throwing used needles in the trash.
- Needle tip caps
Optional if you are preloading syringes for travel or convenience.
You can buy all these things at any online store or a pharmacy locally.
All the items will approximately cost $37 USD ~ $73 USD
Here's the quick list to summarize:
- Injection needles (23g-25g, 1 inch (2.54 cm))
- Draw needles (20g-21g)
- 3 ml syringes
- Alcohol swabs
- Cotton balls or gauze pads
- Sharps container
- Your compound(s)
Steps:
1. First and foremost, find yourself a well-lit environment, and remember to inject at the same time of day each time when you do your injection.
Begin by assembling your supplies and washing your hands properly. Remember to have a needle of 23-25g, which will be perfect.
2. We will now prepare the injection dose. Start by carefully taking the cap off the vial, then clean the rubber stopper with an alcohol swab as shown here.

3. Pull the 21-23G needle cover off the needle. Then, pull back the plunger and draw air into the syringe. The amount of air drawn into the syringe should be the same amount (mL or cc) that matches the amount of oil you will draw into the syringe. It isn't really a must-do, but it'll be easier for you to do the other steps. Do not let the needle touch any surfaces.
4. Now hold the vial on a flat surface and then insert the needle straight down through the center of the rubber stopper into the bottle.

5. Push the plunger of the syringe down and push the air from the syringe all the way into the vial like so.

6. Now, keeping the needle in the vial, turn the vial upside down. Then position the needle so the liquid is covering the tip of the needle. You might need to pull the needle out slightly to make sure the tip is completely covered by the liquid.
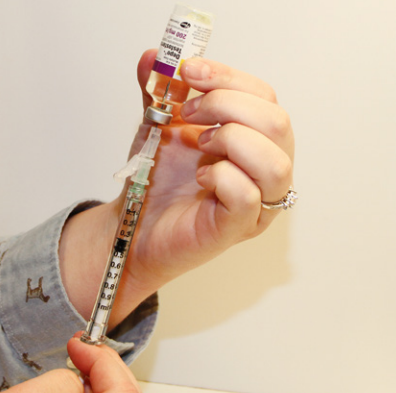
7. We're nearly there. Keep the vial upside down, then slowly pull back on the plunger to fill the syringe with the oil (steroid) until the desired amount is obtained.

Quick note to users: many may choose to “draw needle” for this purpose, which just means using a larger needle; however, in this instance you will use a 20-21g needle to draw your steroid, as it is much easier and faster. If you decide on the “draw needle” method, you will have to draw air, empty the air, and replace the needle you used in the first place.
8. With the needle in the vial, check for air bubbles in the syringe. If there are any air bubbles, just gently tap the syringe with your fingers until the air bubbles rise to the top of the syringe. Then slowly push the plunger up to force air bubbles out without removing the needle from the bottle.
-
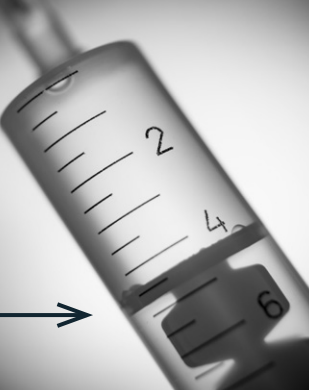
9. After the air bubbles are gone, pull the plunger back to the amount you desire (mL or cc) marked on the syringe.
-
10. Pull the syringe with the needle out of the bottle, remove the needle and discard it, and then put a new needle securely on the syringe. DO NOT press on the plunger while you change needles. This step isn't necessary, but for caution purposes I'd recommend following it.
-
11. Make sure to double-check you have the desired amount before injecting.

Now go ahead and select which site to inject from the next section, depending on if you are self-injecting or someone else is doing it for you.
12. Clean the injection site with a new alcohol swab; let the skin air dry (do not pat or blow on skin to dry it)

13. Pull the skin tight around the injection site.
Insert the needle into the muscle at a 90-degree angle with one quick and strong motion.
Once the needle is inserted into the muscle, keep the skin pulled tight. Pull the syringe back; this is called aspirating. If blood fills into the syringe, remove the needle and pick a new location. It means you've hit a vein or blood vessel. If you decide to inject for whatever reason, you will fall victim to the “Tren Cough.” Now, with the right location, firmly push the plunger down slowly and completely to finish the injection.

You may feel some burning or pressure as the steroid enters the muscle, which is normal
14. After the steroid is injected, pull the syringe and needle out of your skin at the SAME ANGLE as you injected. Let go of your skin once the needle is out. Dispose of the syringe and needle properly.
-
15. Gently press with sterile gauze on the injection site. Hold pressure on the site until there is no bleeding.
1. First and foremost, find yourself a well-lit environment, and remember to inject at the same time of day each time when you do your injection.
Begin by assembling your supplies and washing your hands properly. Remember to have a needle of 23-25g, which will be perfect.
2. We will now prepare the injection dose. Start by carefully taking the cap off the vial, then clean the rubber stopper with an alcohol swab as shown here.
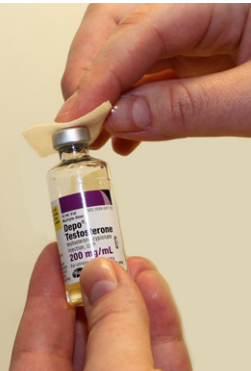
3. Pull the 21-23G needle cover off the needle. Then, pull back the plunger and draw air into the syringe. The amount of air drawn into the syringe should be the same amount (mL or cc) that matches the amount of oil you will draw into the syringe. It isn't really a must-do, but it'll be easier for you to do the other steps. Do not let the needle touch any surfaces.
4. Now hold the vial on a flat surface and then insert the needle straight down through the center of the rubber stopper into the bottle.
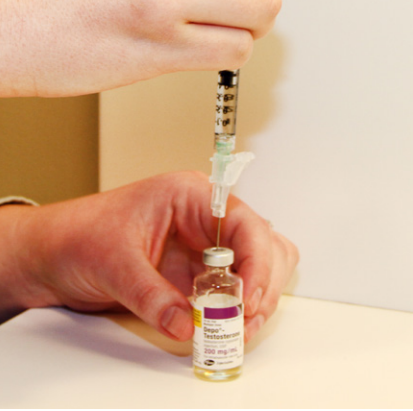
5. Push the plunger of the syringe down and push the air from the syringe all the way into the vial like so.
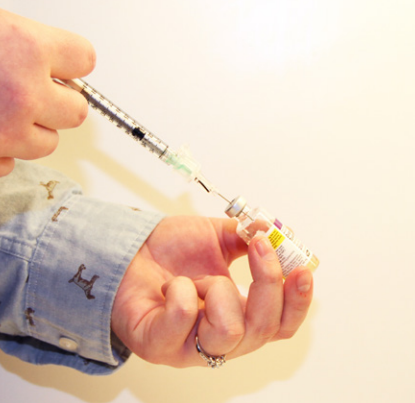
6. Now, keeping the needle in the vial, turn the vial upside down. Then position the needle so the liquid is covering the tip of the needle. You might need to pull the needle out slightly to make sure the tip is completely covered by the liquid.
7. We're nearly there. Keep the vial upside down, then slowly pull back on the plunger to fill the syringe with the oil (steroid) until the desired amount is obtained.
Quick note to users: many may choose to “draw needle” for this purpose, which just means using a larger needle; however, in this instance you will use a 20-21g needle to draw your steroid, as it is much easier and faster. If you decide on the “draw needle” method, you will have to draw air, empty the air, and replace the needle you used in the first place.
8. With the needle in the vial, check for air bubbles in the syringe. If there are any air bubbles, just gently tap the syringe with your fingers until the air bubbles rise to the top of the syringe. Then slowly push the plunger up to force air bubbles out without removing the needle from the bottle.
-
9. After the air bubbles are gone, pull the plunger back to the amount you desire (mL or cc) marked on the syringe.
-
10. Pull the syringe with the needle out of the bottle, remove the needle and discard it, and then put a new needle securely on the syringe. DO NOT press on the plunger while you change needles. This step isn't necessary, but for caution purposes I'd recommend following it.
-
11. Make sure to double-check you have the desired amount before injecting.
Now go ahead and select which site to inject from the next section, depending on if you are self-injecting or someone else is doing it for you.
12. Clean the injection site with a new alcohol swab; let the skin air dry (do not pat or blow on skin to dry it)
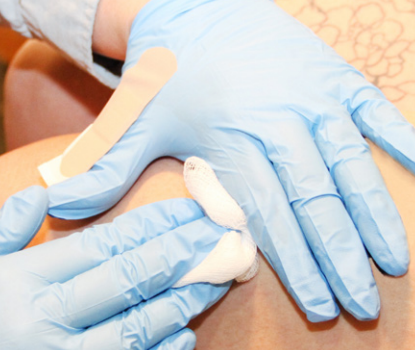
13. Pull the skin tight around the injection site.
Insert the needle into the muscle at a 90-degree angle with one quick and strong motion.
Once the needle is inserted into the muscle, keep the skin pulled tight. Pull the syringe back; this is called aspirating. If blood fills into the syringe, remove the needle and pick a new location. It means you've hit a vein or blood vessel. If you decide to inject for whatever reason, you will fall victim to the “Tren Cough.” Now, with the right location, firmly push the plunger down slowly and completely to finish the injection.
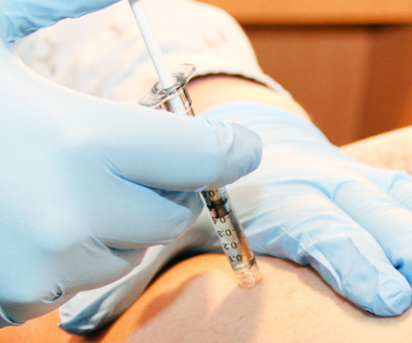
You may feel some burning or pressure as the steroid enters the muscle, which is normal
14. After the steroid is injected, pull the syringe and needle out of your skin at the SAME ANGLE as you injected. Let go of your skin once the needle is out. Dispose of the syringe and needle properly.
-
15. Gently press with sterile gauze on the injection site. Hold pressure on the site until there is no bleeding.
WHERE TO INJECT
The vastus lateralis muscle in the thigh
The upper thigh is the best site to do an injection, especially if you are self-injecting, which is what we are doing.

To find the best and most appropriate location, look at the top of your thigh and imagine dividing it into a 3 · 3 grid.
The injection will go into the outer middle third as shown in the image.
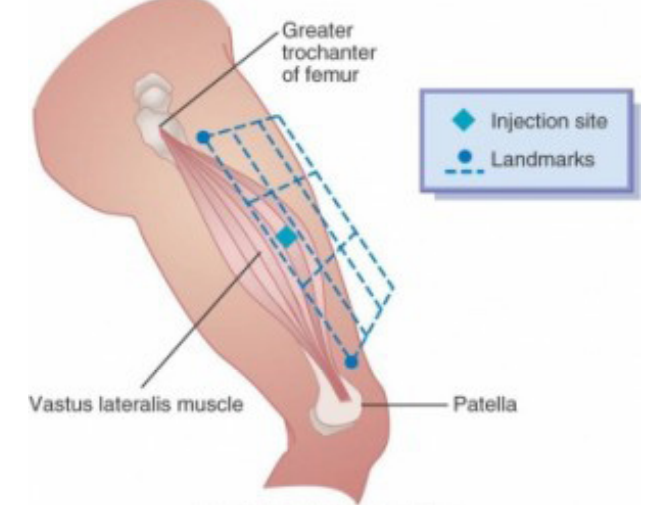
To find the best and most appropriate location, look at the top of your thigh and imagine dividing it into a 3 · 3 grid.
The injection will go into the outer middle third as shown in the image.
The gluteus maximus in your buttocks
The site is used only if someone else is doing your injection. PLEASE DO NOT self-inject at this site.

To find the most appropriate location and expose the buttocks, imagine dividing each buttock into 4 parts.
The injection is aimed at the upper, outer quarter of the buttock towards the hip bone, so like where a pants pocket would be.
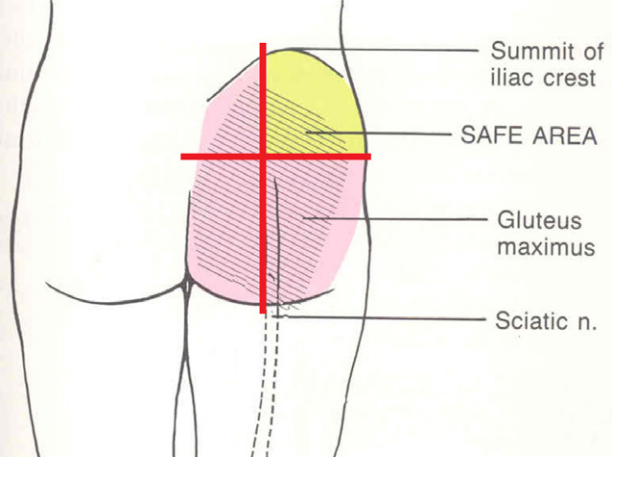
To find the most appropriate location and expose the buttocks, imagine dividing each buttock into 4 parts.
The injection is aimed at the upper, outer quarter of the buttock towards the hip bone, so like where a pants pocket would be.
Disregard delts; they carry a bigger risk for injecting as they are a smaller muscle
and you will likely inject in the wrong place.
POST-INJECTION PAIN
Some tips (some are optional and some are musts) I'd give to reduce pain:
- Don't reuse needles.
- Let your skin dry fully from the alcohol wipe before you pin.
- Keep your muscles in the injection area warm and relaxed.
- Inject your steroid at room temperature.
- Break through the skin quickly with the needle.
- Pull the needle the same way you put it in, same direction, same angle.
- Reusing needles: a needle becomes dull after one use. Reusing causes infection and all that nasty stuff.
- Not aspirating: If you don't pull back and check for blood, you will risk injecting into a vein, which causes Tren Cough; violent coughing, a metallic taste, and feeling like you can't breathe are symptoms of it.
- Not disinfecting: Just follow the steps, but if you decide to skip one of the steps, good luck with spending hundreds on an abscess that needs to be surgically drained, antibiotics, and all of those things.
- Injecting into the wrong location: Learn your injection sites properly and follow the images in the instructions; it'll take you 5 minutes and save you a world of pain.
- Wrong needle size: The needle is too short, and the steroid will go into the fat rather than the muscle. Needle too thick, and you have pain you could have avoided and tissue damage.
- Forgetting to swap the draw needle for the injection needle: self-explanatory; if you are using the draw needle method, swap from it to the injection needle.
All these mistakes are avoidable by following the instructions step by step.
- Not aspirating: If you don't pull back and check for blood, you will risk injecting into a vein, which causes Tren Cough; violent coughing, a metallic taste, and feeling like you can't breathe are symptoms of it.
- Not disinfecting: Just follow the steps, but if you decide to skip one of the steps, good luck with spending hundreds on an abscess that needs to be surgically drained, antibiotics, and all of those things.
- Injecting into the wrong location: Learn your injection sites properly and follow the images in the instructions; it'll take you 5 minutes and save you a world of pain.
- Wrong needle size: The needle is too short, and the steroid will go into the fat rather than the muscle. Needle too thick, and you have pain you could have avoided and tissue damage.
- Forgetting to swap the draw needle for the injection needle: self-explanatory; if you are using the draw needle method, swap from it to the injection needle.
All these mistakes are avoidable by following the instructions step by step.
PEPTIDES
Peptides have a different method of injecting, in medical terms it is called "subcutaneous injection." which significantly varies from the method of injecting steroids. I will outline what you will need and how to do it providing video demonstrations for you to follow along in case you are a visual learner.
WHAT YOU'LL NEED
RECONSTITUTION
HOW TO INJECT
WHERE TO INJECT
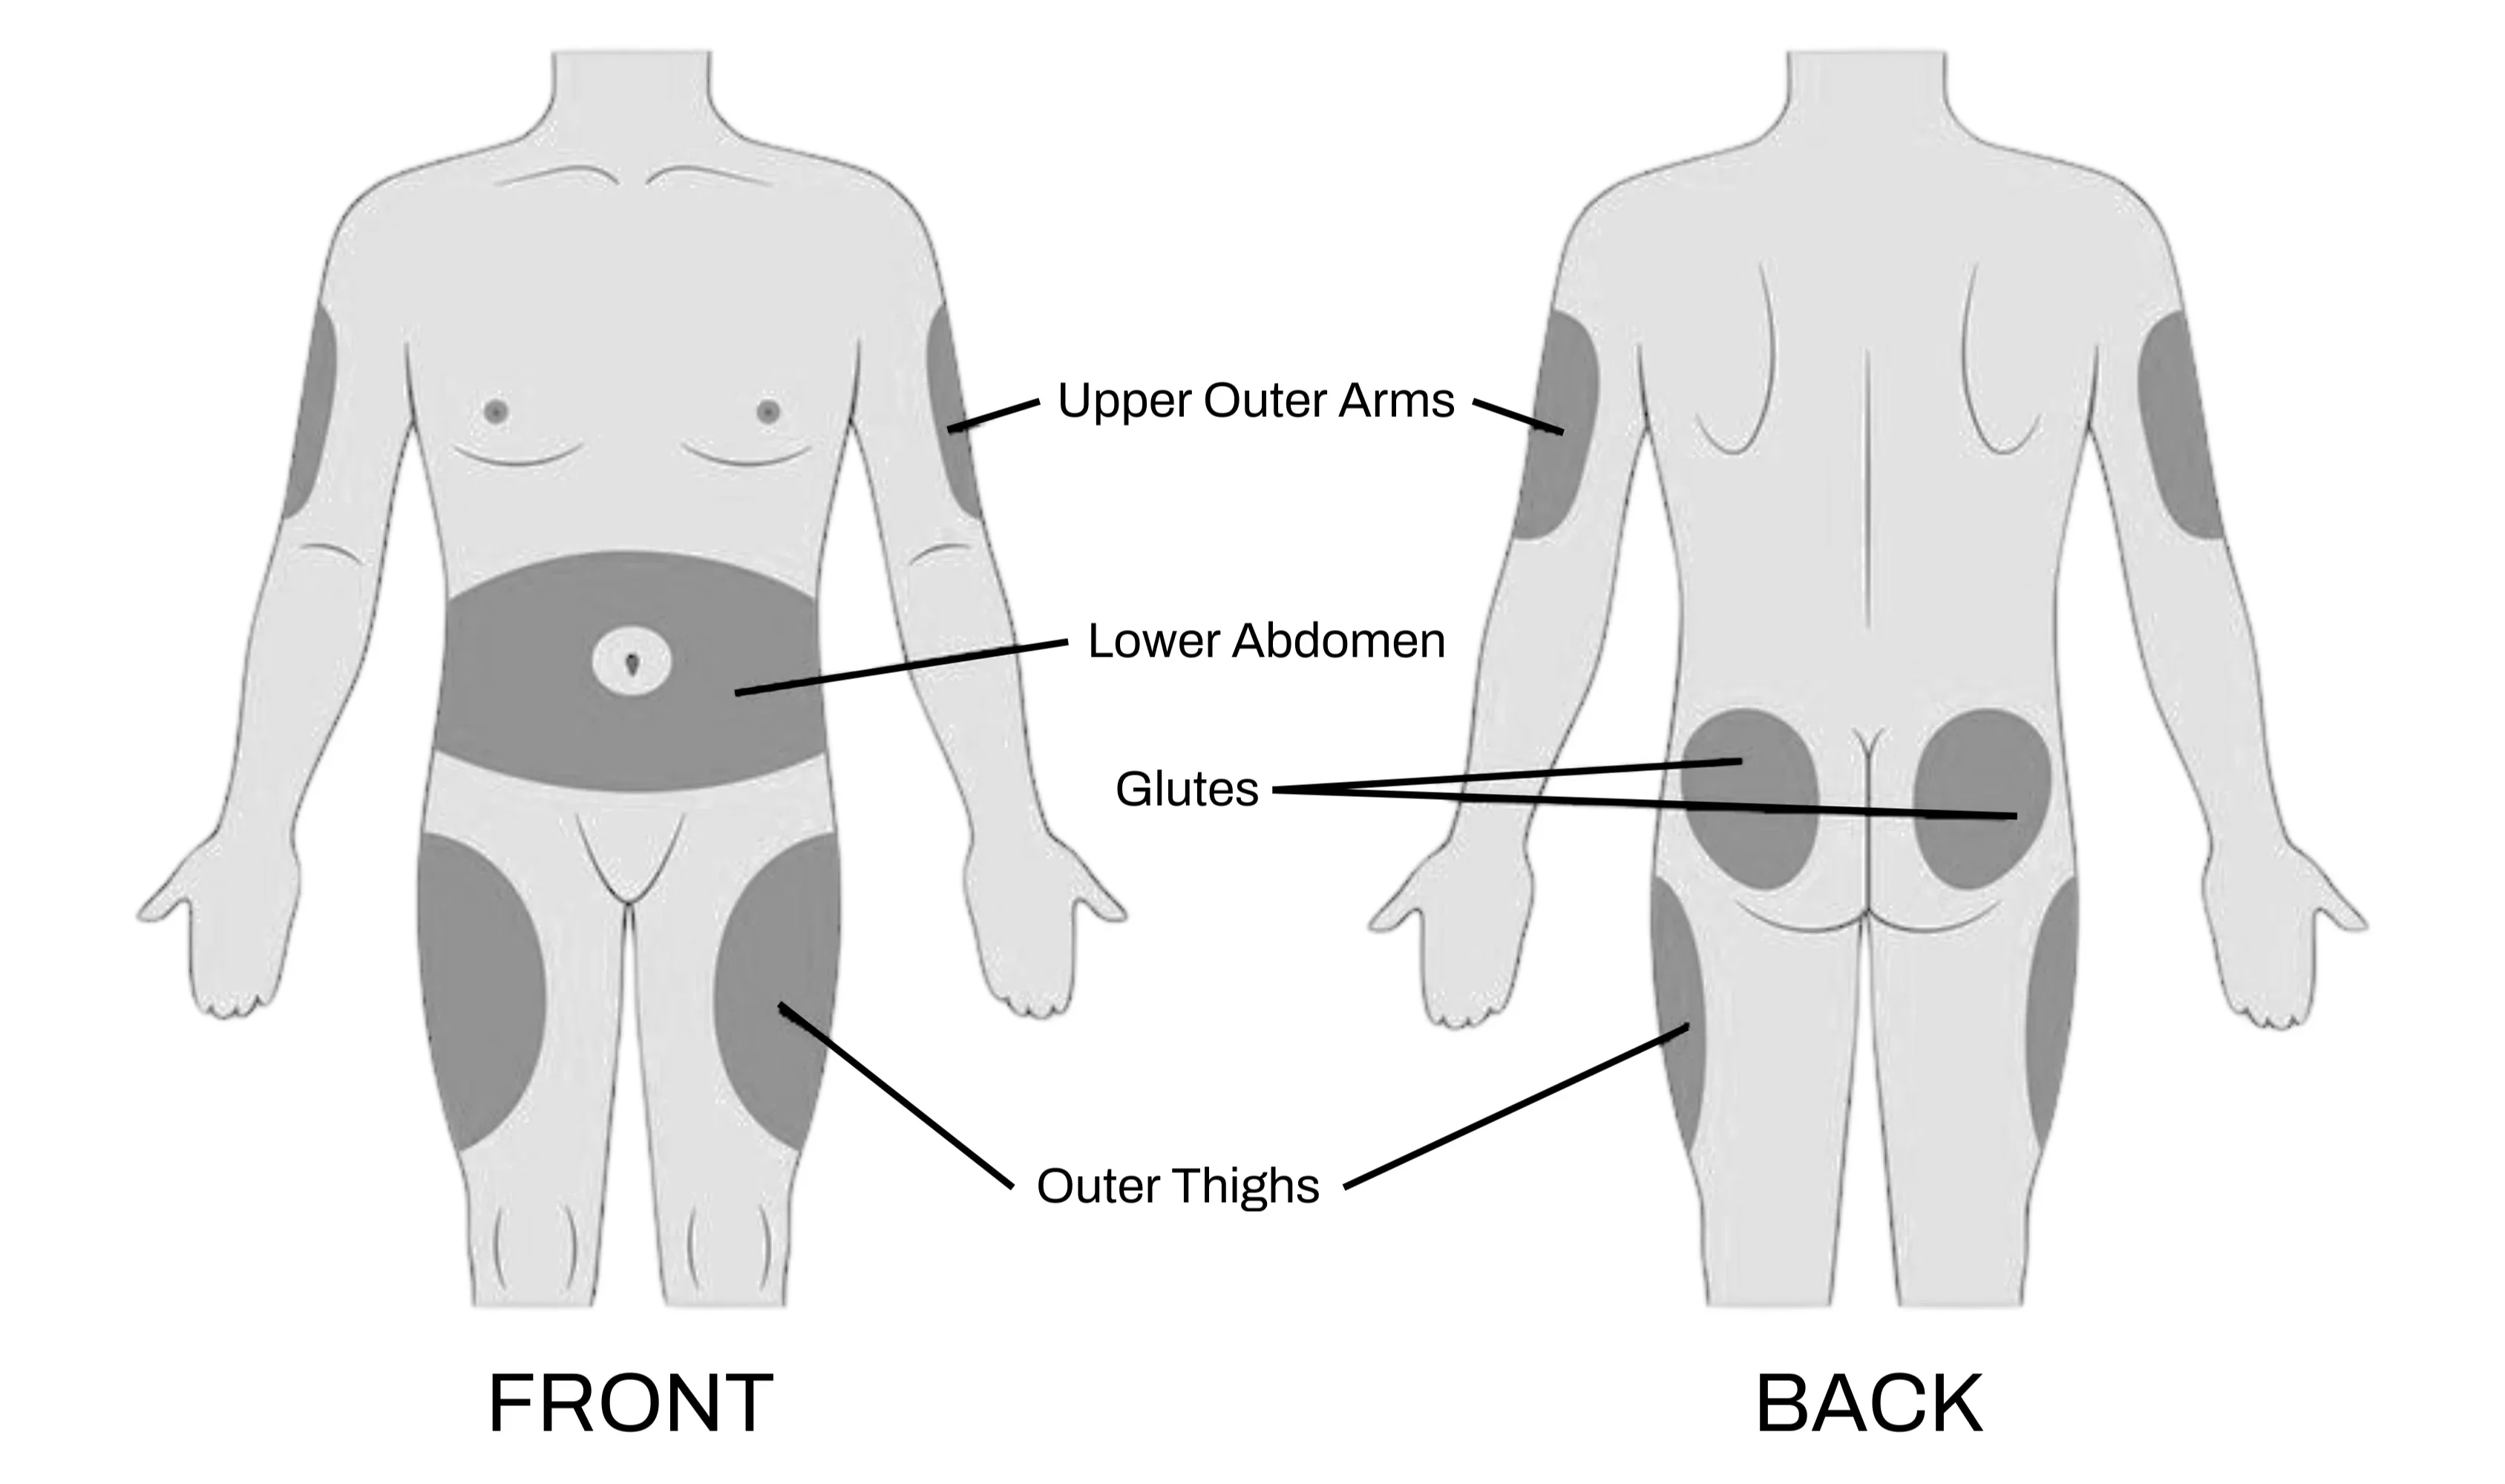
You can inject the peptides in any of the highlighted
areas within the image.
INJECTION REACTIONS (& TIPS)
Peptides have a different method of injecting, in medical terms it is called "subcutaneous injection." which significantly varies from the method of injecting steroids. I will outline what you will need and how to do it providing video demonstrations for you to follow along in case you are a visual learner.
WHAT YOU'LL NEED
* Note: I've divided this up into two different lists, recurring purchases and one-time purchases, for your convenience, but there is a full list at the end of this spoiler if you don't have that much time to read.
RECURRING PURCHASES
Items you'll regularly need throughout your cycle, please stock up ahead of time.
ONE-TIME PURCHASES
Things you can buy once & forget about it.
In total this should cost you around $28 USD ~ $70 USD
Here's the complete list if you do not have time to read:
RECURRING PURCHASES
Items you'll regularly need throughout your cycle, please stock up ahead of time.
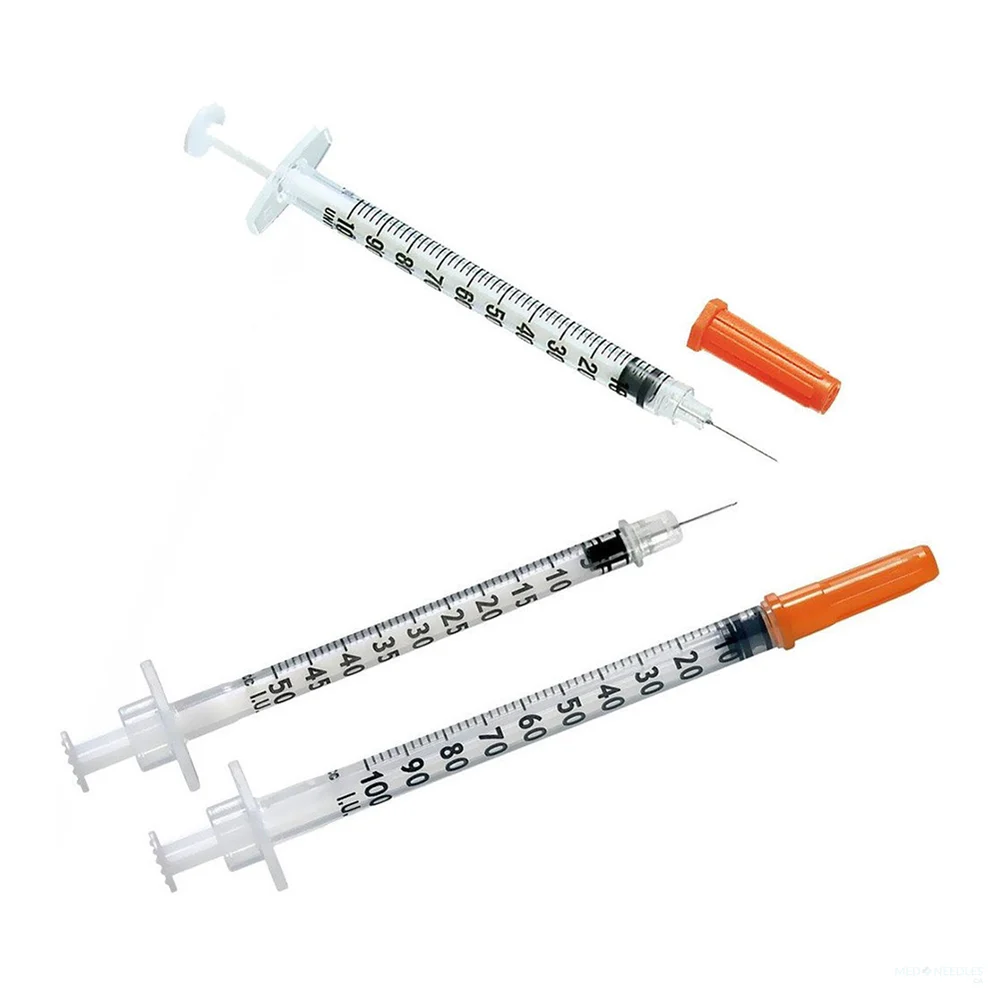
- Insulin syringes (25g-31g, 0.5 ml or 1 ml both work)
1 per injection. The only syringes for injecting peptides. I recommend 29g 0.5ml; it's easy to read the measurements, and the needle is thin

- Alcohol swabs
You will use at least 2 per injection. One for the vial top and one for the injection site.
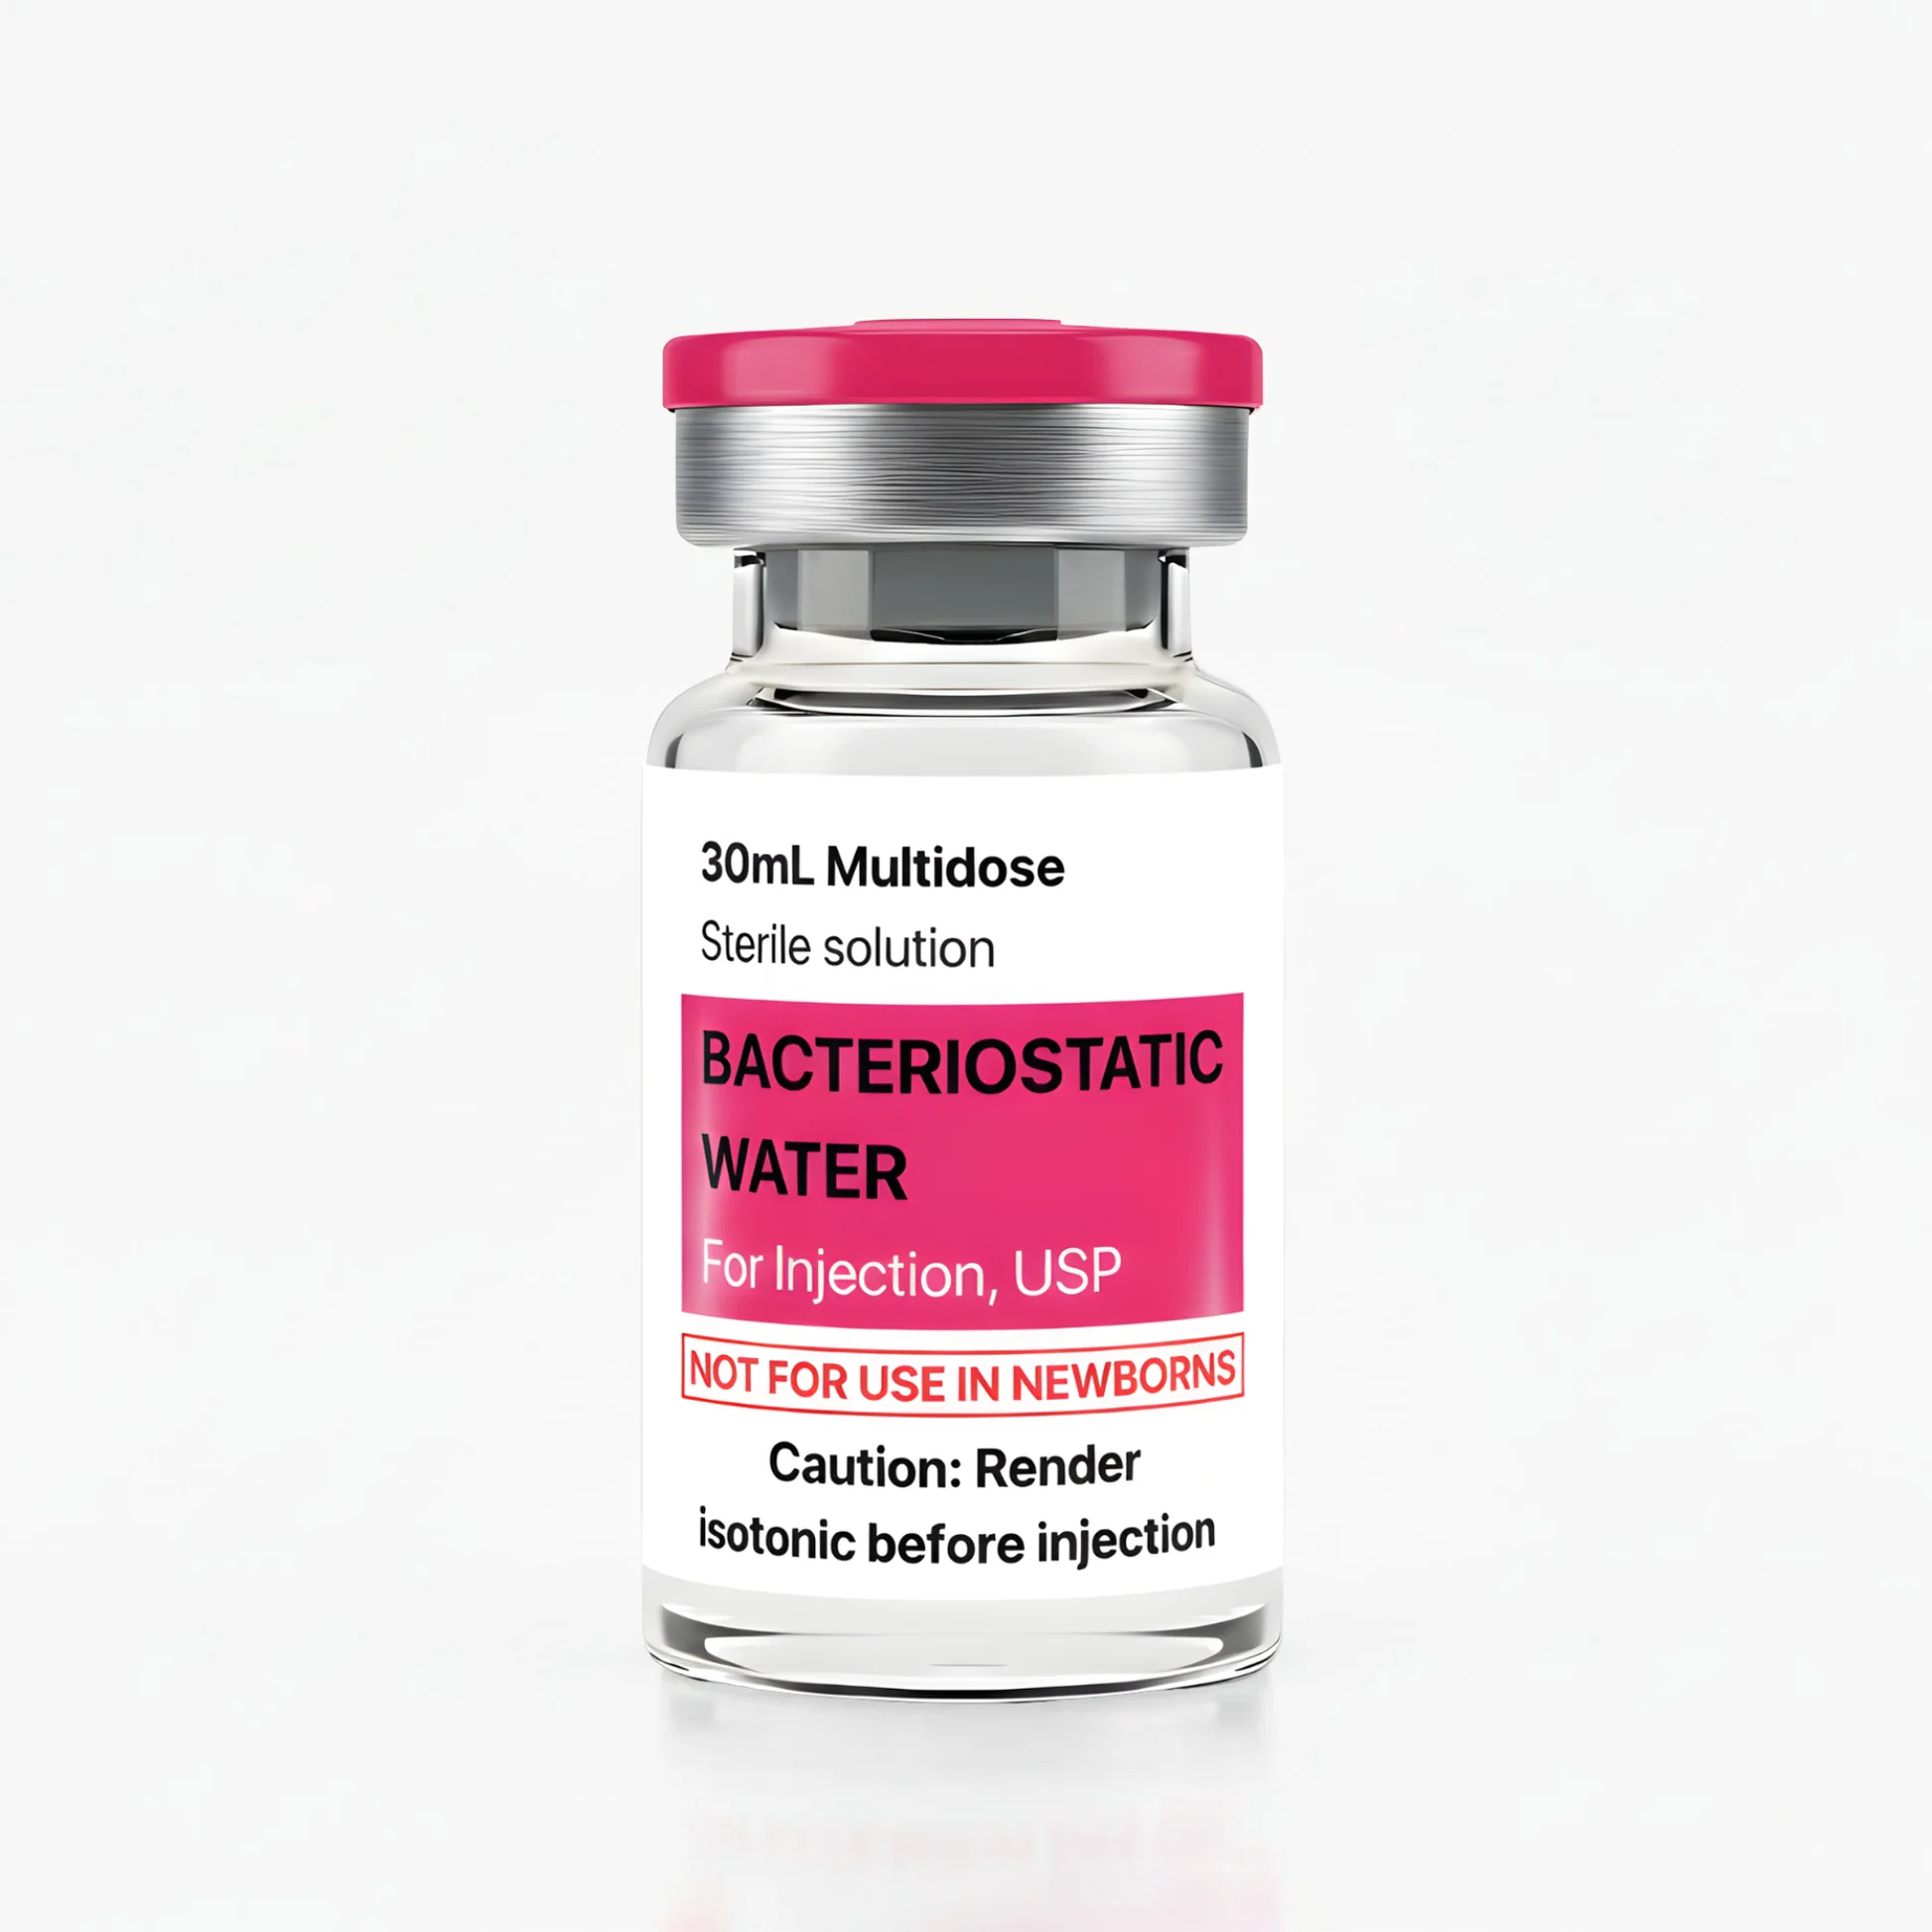
- Bacteriostatic water (BAC water)
This is what we will use to reconstitute (mix) your peptides. A 30 ml vial will usually last you multiple peptide vials. No regular water or saline will work.

- Cotton balls / Gauze
To apply light pressure after pinning if needed
1 per injection. The only syringes for injecting peptides. I recommend 29g 0.5ml; it's easy to read the measurements, and the needle is thin
- Alcohol swabs
You will use at least 2 per injection. One for the vial top and one for the injection site.
- Bacteriostatic water (BAC water)
This is what we will use to reconstitute (mix) your peptides. A 30 ml vial will usually last you multiple peptide vials. No regular water or saline will work.
- Cotton balls / Gauze
To apply light pressure after pinning if needed
ONE-TIME PURCHASES
Things you can buy once & forget about it.
- Mini fridge or a dedicated fridge space
Reconstituted peptides must be stored in a fridge, and unconstituted peptides in a cool, dark place, but they'll last longer in a fridge
Reconstituted peptides must be stored in a fridge, and unconstituted peptides in a cool, dark place, but they'll last longer in a fridge
In total this should cost you around $28 USD ~ $70 USD
Here's the complete list if you do not have time to read:
- Insulin syringes (29g-31g, 0.5ml or 1ml)
- Alcohol swabs
- Bacteriostatic water (30ml)
- Cotton balls or gauze
Many peptides are in lyophilized or powdered form. These peptides must be reconstituted with bacteriostatic water before injecting.
Steps:
1. Clean your workspace and wash your hands properly
2. Remove the caps from the peptide vial and the BAC water vial
3. Sanitize the rubber stoppers on both vials with alcohol wipes and let them air dry
4. Draw the desired amount of BAC water into the syringe
5. Insert the needle into the peptide vial at a slight angle and then inject the water to minimize bubbling
6. Gently swirl the vial until the powder has dissolved. DO NOT shake.
7. Store the peptide in the refrigerator.
You can watch a video form of the steps.
Steps:
1. Clean your workspace and wash your hands properly
2. Remove the caps from the peptide vial and the BAC water vial
3. Sanitize the rubber stoppers on both vials with alcohol wipes and let them air dry
4. Draw the desired amount of BAC water into the syringe
5. Insert the needle into the peptide vial at a slight angle and then inject the water to minimize bubbling
6. Gently swirl the vial until the powder has dissolved. DO NOT shake.
7. Store the peptide in the refrigerator.
You can watch a video form of the steps.
CHECKING VIAL PRESSURE
Before we dose, we should ensure the vial pressure is optimal.
Here is how we will do it.
INJECTION PROCEDURE
Steps:
1. Wash your hands and clean your injection area
2. Gather all of your materials, like your reconstituted peptide, injection syringe, and alcohol wipes.
3. Decide where you want to inject by heading over to the “Where to Inject” section.
4. Clean the injection site with an alcohol wipe and allow it to air dry completely
5. Pinch a small fold of skin at the desired location
6. Insert the needle at a slight angle into the subcutaneous tissue
7. Inject slowly and steadily
8. Remove the needle and dispose of it
I'D HIGHLY RECOMMEND WATCHING A VIDEO DEMONSTRATION.
Before we dose, we should ensure the vial pressure is optimal.
Here is how we will do it.
- Fill a syringe halfway with air
- Insert the needle into the vial without pushing or pulling the plunger
- Observe, and it should remain neutral
- If the plunger moves on its own, allow the vial to equalize before drawing from the vial.
INJECTION PROCEDURE
Steps:
1. Wash your hands and clean your injection area
2. Gather all of your materials, like your reconstituted peptide, injection syringe, and alcohol wipes.
3. Decide where you want to inject by heading over to the “Where to Inject” section.
4. Clean the injection site with an alcohol wipe and allow it to air dry completely
5. Pinch a small fold of skin at the desired location
6. Insert the needle at a slight angle into the subcutaneous tissue
7. Inject slowly and steadily
8. Remove the needle and dispose of it
I'D HIGHLY RECOMMEND WATCHING A VIDEO DEMONSTRATION.
WHERE TO INJECT
You can inject the peptides in any of the highlighted
areas within the image.
INJECTION REACTIONS (& TIPS)
Some of you may receive the following reactions to the peptides:
These are all common, and do not be concerned.
How can you reduce injection reactions?
- Mild redness
- Itching
- Swelling
- Small hives at injection sites
These are all common, and do not be concerned.
How can you reduce injection reactions?
- Switch injection sites often
- Allow peptides to reach room temperature before injecting
- Inject slowly and stay calm
- Avoid rubbing the site after injecting
- Split large doses into multiple sites
FREE RESOURCES
Here's a free steroid plotter that will help you plan your cycles. It's completely free, and it's great for visualizing peaks, planning blasts, or PCT.
steroidplotter.com
There are other peptide calculators; however, this one also works as well as others. It's quite great for beginners to use.
PeptidesCalculator.com
Here's an iOS app for tracking steroids, etc. This should be free; however, I haven't really looked much into it.
Here's an Android app for tracking peptides, etc. This should be free; however, I haven't actually looked much into it either.
These are only the few resources I've found that seem to fulfill the need of an average user, but I'd highly recommend searching the web, and you might find even better apps or calculators than these.
Here's a free steroid plotter that will help you plan your cycles. It's completely free, and it's great for visualizing peaks, planning blasts, or PCT.
steroidplotter.com
There are other peptide calculators; however, this one also works as well as others. It's quite great for beginners to use.
PeptidesCalculator.com
Here's an iOS app for tracking steroids, etc. This should be free; however, I haven't really looked much into it.
Here's an Android app for tracking peptides, etc. This should be free; however, I haven't actually looked much into it either.
These are only the few resources I've found that seem to fulfill the need of an average user, but I'd highly recommend searching the web, and you might find even better apps or calculators than these.
That is everything from me. If you see any mistakes or have any questions, please let me know in the replies, and I'll try my best to answer to the best of my ability. If any information is missing I will make a new "better complete guide". I hope you learned how to pin properly now.
 This guide couldn't have been possible without @Histy. Made in honor of my legend.
"The Complete Peptide Guide: Reconstitution, Injection & Storage." Extension Health, extension.health/the-cozmplete-peptide-guide-recondstitution-injection-storage.
"Injection Guide for Transgender Hormone Therapy." Fenway Health, fenwayhealth.org/wp-content/uplaoads/MG-6_TransHealth_InjectionGfuide.pdf.
"Safer Injecting for Steroid Users." We Are With You, www.wearewithyou.org.uk/advice-and-information/advice-for-you/safer-injecting/safer-injecting-for-steroid-users.
"Steroid Injection Information." Steroid.com, www.stersoid.com/Steroid-Injection-Information.php.
"Injection Guide for Transgender Hormone Therapy." Fenway Health, fenwayhealth.org/wp-content/uplaoads/MG-6_TransHealth_InjectionGfuide.pdf.
"Safer Injecting for Steroid Users." We Are With You, www.wearewithyou.org.uk/advice-and-information/advice-for-you/safer-injecting/safer-injecting-for-steroid-users.
"Steroid Injection Information." Steroid.com, www.stersoid.com/Steroid-Injection-Information.php.