







Organ
was it all worth it?
- Joined
- Jul 9, 2026
- Posts
- 532
- Reputation
- 1,791
How to INSTANTLY Dissolve Stubborn Facial Fat: A Guide to Lipo Vela
Comprehensive guide by Organ
I am not a medical professional, and the information provided here is for general educational and informational purposes only. It does not constitute professional medical advice, diagnosis, or treatment.
Table Of Contents:
1. Pre-injection planning & research
2. Risk-prevention & Technique
3. Injection Site Explanation
4. Injection process
5. Healing process
1. Pre-injection planning & research
Before you even think about doing this procedure, you must do your own research. It is a fairly simple procedure, but if you go about it like a dumbass, then you might mess up.
I just browsed a few threads on here to understand the procedure. I also was interested in the science behind it, but you do not really need to understand all of the science to succeed with this procedure. I will be tagging some of the users that had great threads regarding the process:
@Sayori @Psocho @illusion @Lexapro @IAmBecoming183CM
Most other dissolvers like Aqualyx are slow-release gels that take around four weeks to fully work. That slow release is why people stay bloated and puffy for so long. Lipo Vela hits the fat cells more directly and clears faster, usually within about two weeks. The extra vitamins, peptides, and growth factors also protect skin quality so you get permanent fat loss without the long bloated phase or as much risk of shitty looking skin afterward.
Science behind ingredients:
PPC (phosphatidylcholine) breaks down the fat cell membranes so the stored fat can be released and metabolized by the body.
Sodium deoxycholate actively destroys the fat cells themselves.
Riboflavin (B2) and cyanocobalamin (B12) support cellular energy and the fat metabolism process so the body can clear the released fat more efficiently.
Peptides like Syn-AKE plus added collagen and growth factors help maintain skin firmness and elasticity while the fat is being cleared.
Items used:
Lipo Vela V: This is what I injected. I ordered 10 vials, but you shouldn't need more than 1 vial per session (if only treating cheeks).
Alcohol wipes: I used this to sterilize my vial as well as my face pre and post injection.
8 mm 27-31 G needles: To extract and inject the solution.
Eyeliner Pen: This was used to draw markings on my face. I suggest getting surgical pens, but I could not be bothered.
Facial Cleanser: This was to make sure my face was clean. I used it pre and post lidocaine.
Topical lidocaine: This was used to numb the areas I was treating. I ordered 10.56% and let it sit on my face for 45 minutes.
Surgical gloves: Used these to make sure everything was sterile.
I sourced my Lipo Vela V (the solution) from here and my topical lidocaine (the numbing cream) from here.
2. Risk-prevention & Technique
Throughout the session I stayed strictly subcutaneous and pinched the skin firmly before every injection. The goal is to stay in the subcutaneous layer the whole time and never go too deep or inject too much volume in one point.
Another way to be safe is to aspirate. This is when you pull the plunger back once injected. If blood comes into the syringe then you should pull out and re-inject.
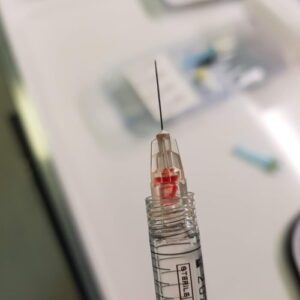
This would be your indication to pull out.
The face has a lot of important veins and arteries packed close together, so technique matters more than people realize. The facial nerve (CN7) exits the skull and splits into five main extratemporal branches:
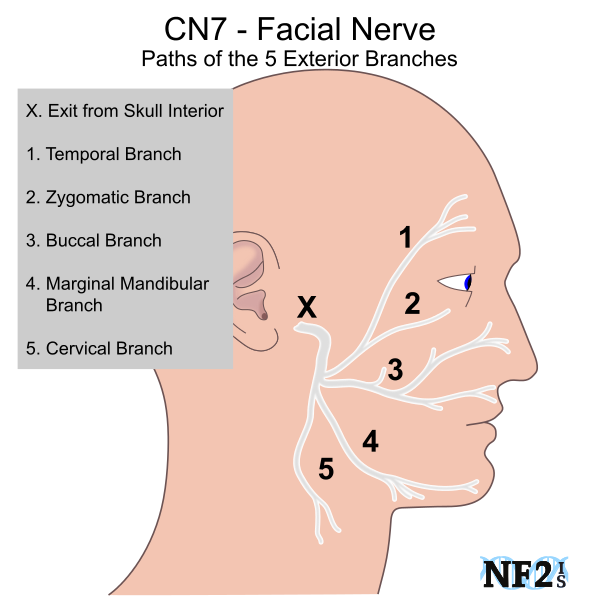
Marginal mandibular branch:
The marginal mandibular branch that runs along the jawline is one of the riskiest for lower-face and jaw functionality. Damage there can leave you with a drooping or weak lower lip. Nerve damage is a real risk when it comes to this procedure (very unlikely though).
Vascular issues are another major concern. If you inject into or compress certain vessels you can get skin necrosis. In very rare worst-case scenarios involving facial vessels that supply the eye, you can get vision problems or even blindness. The main areas to be extra cautious are along the jawline where the marginal mandibular branch runs, near major vessels in the mid-cheek, and anywhere close to the orbital area.
Stay subcutaneous, pinch properly, never go too deep, and never use too much volume in one spot. These complications are uncommon with good technique, but they’re possible if you’re careless.
I worked in a top-to-bottom order so I never lost track of which points I had already treated. Dose was kept low per point (0.2 ml) because the liquid spreads more than a gel does. Overloading a single spot is an easy way to get uneven texture.
3. Injection Site Explanation
Have a rough idea of where all the nerves, veins, and arteries run across the face. The five branches fan out across the face and the ones that matter most for the lower face and jaw are the marginal mandibular and cervical branches. The buccal and zygomatic branches become relevant if you’re treating higher on the mid-cheek.
I only treated my cheeks. I stayed completely away from the ramus and anything along the jawline on purpose.
Why I avoided the jawline and ramus
The marginal mandibular branch of the facial nerve runs right along the lower border of the mandible / jawline. That branch is one of the most important for the lower lip and the corner of the mouth. Hitting it (or getting too close with inflammation) can cause temporary or longer-lasting weakness, drooping, or asymmetry of the lower lip. The ramus sits in an area where the nerve is still relatively superficial as it courses forward, and the facial artery and other vessels are also present. Control of depth gets harder there and the risk of nerve or vascular injury is greater. The mid-cheek fat pads are an easier target if you stay superficial. Fewer critical branches are sitting right under the surface compared to the jawline, and you can keep a safer distance from the orbital danger area. I mapped 9 points per cheek in a 3x3 grid, roughly 1 cm apart. To do this, I used an eyeliner pen as well as a protractor (that part was OD I suppose). That spacing respects how far the liquid spreads so you don’t get overlap or uneven texture. Total of 18 points across both cheeks. Every single one stayed well above the jawline and far from the ramus.
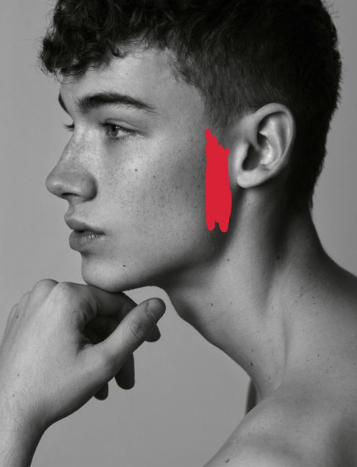
Image from @IAmBecoming183CM's thread

4. Injection process
Enjoy this epic montage.
For the dose I went with 0.2 ml per point because the liquid spreads more than gels. Overloading any single spot can cause uneven texture. During the procedure I pinched the skin firmly before every injection to protect deeper branches and stayed in the subcutaneous layer the whole time. In order to not forget where I pinned, I made sure to fully wipe off the mark after injecting. I also worked top-to-bottom in an organized way.
When it comes to injecting, it is advised not to go straight in (90 degrees). 45 degrees is what is considered optimal. However, I personally found it uncomfortable to pin like this so I improvised. I would initially inject at a 90 degree angle, and once the needle was barely inside my skin, I would reposition the syringe to be at a 45 degree angle.
5. Healing process
Honestly, results do not come that fast. You will need multiple sessions to see real change. One session alone is not going to give you dramatic results.
You will probably be bloated for around 4 days. The treated area swells up and feels firm, which is normal while the body processes the broken-down fat. Slight aching or tenderness at the injection spots is also expected.
I recommend drinking a lot of water and trying to sweat/drain your body (light cardio, sauna if you have access, anything that gets you sweating) to help clear the lipids quicker. Staying hydrated and moving the fluid out of the area seems to speed up how fast the bloat settles.
Signs you succeeded
Signs you messed up
The fat cells that die are gone permanently, but you still need two to four sessions spaced about three weeks apart for noticeable results on stubborn cheek fat. Don’t expect overnight change.
Thankyou and goodluck!
@sample @Short @Kingly @Renophobeadoobe @cc000
Comprehensive guide by Organ
I am not a medical professional, and the information provided here is for general educational and informational purposes only. It does not constitute professional medical advice, diagnosis, or treatment.
Table Of Contents:
1. Pre-injection planning & research
2. Risk-prevention & Technique
3. Injection Site Explanation
4. Injection process
5. Healing process
1. Pre-injection planning & research
Before you even think about doing this procedure, you must do your own research. It is a fairly simple procedure, but if you go about it like a dumbass, then you might mess up.
I just browsed a few threads on here to understand the procedure. I also was interested in the science behind it, but you do not really need to understand all of the science to succeed with this procedure. I will be tagging some of the users that had great threads regarding the process:
@Sayori @Psocho @illusion @Lexapro @IAmBecoming183CM
Most other dissolvers like Aqualyx are slow-release gels that take around four weeks to fully work. That slow release is why people stay bloated and puffy for so long. Lipo Vela hits the fat cells more directly and clears faster, usually within about two weeks. The extra vitamins, peptides, and growth factors also protect skin quality so you get permanent fat loss without the long bloated phase or as much risk of shitty looking skin afterward.
Science behind ingredients:
PPC (phosphatidylcholine) breaks down the fat cell membranes so the stored fat can be released and metabolized by the body.
Sodium deoxycholate actively destroys the fat cells themselves.
Riboflavin (B2) and cyanocobalamin (B12) support cellular energy and the fat metabolism process so the body can clear the released fat more efficiently.
Peptides like Syn-AKE plus added collagen and growth factors help maintain skin firmness and elasticity while the fat is being cleared.
Items used:
Lipo Vela V: This is what I injected. I ordered 10 vials, but you shouldn't need more than 1 vial per session (if only treating cheeks).
Alcohol wipes: I used this to sterilize my vial as well as my face pre and post injection.
8 mm 27-31 G needles: To extract and inject the solution.
Eyeliner Pen: This was used to draw markings on my face. I suggest getting surgical pens, but I could not be bothered.
Facial Cleanser: This was to make sure my face was clean. I used it pre and post lidocaine.
Topical lidocaine: This was used to numb the areas I was treating. I ordered 10.56% and let it sit on my face for 45 minutes.
Surgical gloves: Used these to make sure everything was sterile.
I sourced my Lipo Vela V (the solution) from here and my topical lidocaine (the numbing cream) from here.
2. Risk-prevention & Technique
Throughout the session I stayed strictly subcutaneous and pinched the skin firmly before every injection. The goal is to stay in the subcutaneous layer the whole time and never go too deep or inject too much volume in one point.
Another way to be safe is to aspirate. This is when you pull the plunger back once injected. If blood comes into the syringe then you should pull out and re-inject.
This would be your indication to pull out.
The face has a lot of important veins and arteries packed close together, so technique matters more than people realize. The facial nerve (CN7) exits the skull and splits into five main extratemporal branches:
Marginal mandibular branch:
The marginal mandibular branch that runs along the jawline is one of the riskiest for lower-face and jaw functionality. Damage there can leave you with a drooping or weak lower lip. Nerve damage is a real risk when it comes to this procedure (very unlikely though).
Vascular issues are another major concern. If you inject into or compress certain vessels you can get skin necrosis. In very rare worst-case scenarios involving facial vessels that supply the eye, you can get vision problems or even blindness. The main areas to be extra cautious are along the jawline where the marginal mandibular branch runs, near major vessels in the mid-cheek, and anywhere close to the orbital area.
Stay subcutaneous, pinch properly, never go too deep, and never use too much volume in one spot. These complications are uncommon with good technique, but they’re possible if you’re careless.
I worked in a top-to-bottom order so I never lost track of which points I had already treated. Dose was kept low per point (0.2 ml) because the liquid spreads more than a gel does. Overloading a single spot is an easy way to get uneven texture.
3. Injection Site Explanation
Have a rough idea of where all the nerves, veins, and arteries run across the face. The five branches fan out across the face and the ones that matter most for the lower face and jaw are the marginal mandibular and cervical branches. The buccal and zygomatic branches become relevant if you’re treating higher on the mid-cheek.
I only treated my cheeks. I stayed completely away from the ramus and anything along the jawline on purpose.
Why I avoided the jawline and ramus
The marginal mandibular branch of the facial nerve runs right along the lower border of the mandible / jawline. That branch is one of the most important for the lower lip and the corner of the mouth. Hitting it (or getting too close with inflammation) can cause temporary or longer-lasting weakness, drooping, or asymmetry of the lower lip. The ramus sits in an area where the nerve is still relatively superficial as it courses forward, and the facial artery and other vessels are also present. Control of depth gets harder there and the risk of nerve or vascular injury is greater. The mid-cheek fat pads are an easier target if you stay superficial. Fewer critical branches are sitting right under the surface compared to the jawline, and you can keep a safer distance from the orbital danger area. I mapped 9 points per cheek in a 3x3 grid, roughly 1 cm apart. To do this, I used an eyeliner pen as well as a protractor (that part was OD I suppose). That spacing respects how far the liquid spreads so you don’t get overlap or uneven texture. Total of 18 points across both cheeks. Every single one stayed well above the jawline and far from the ramus.
Image from @IAmBecoming183CM's thread
4. Injection process
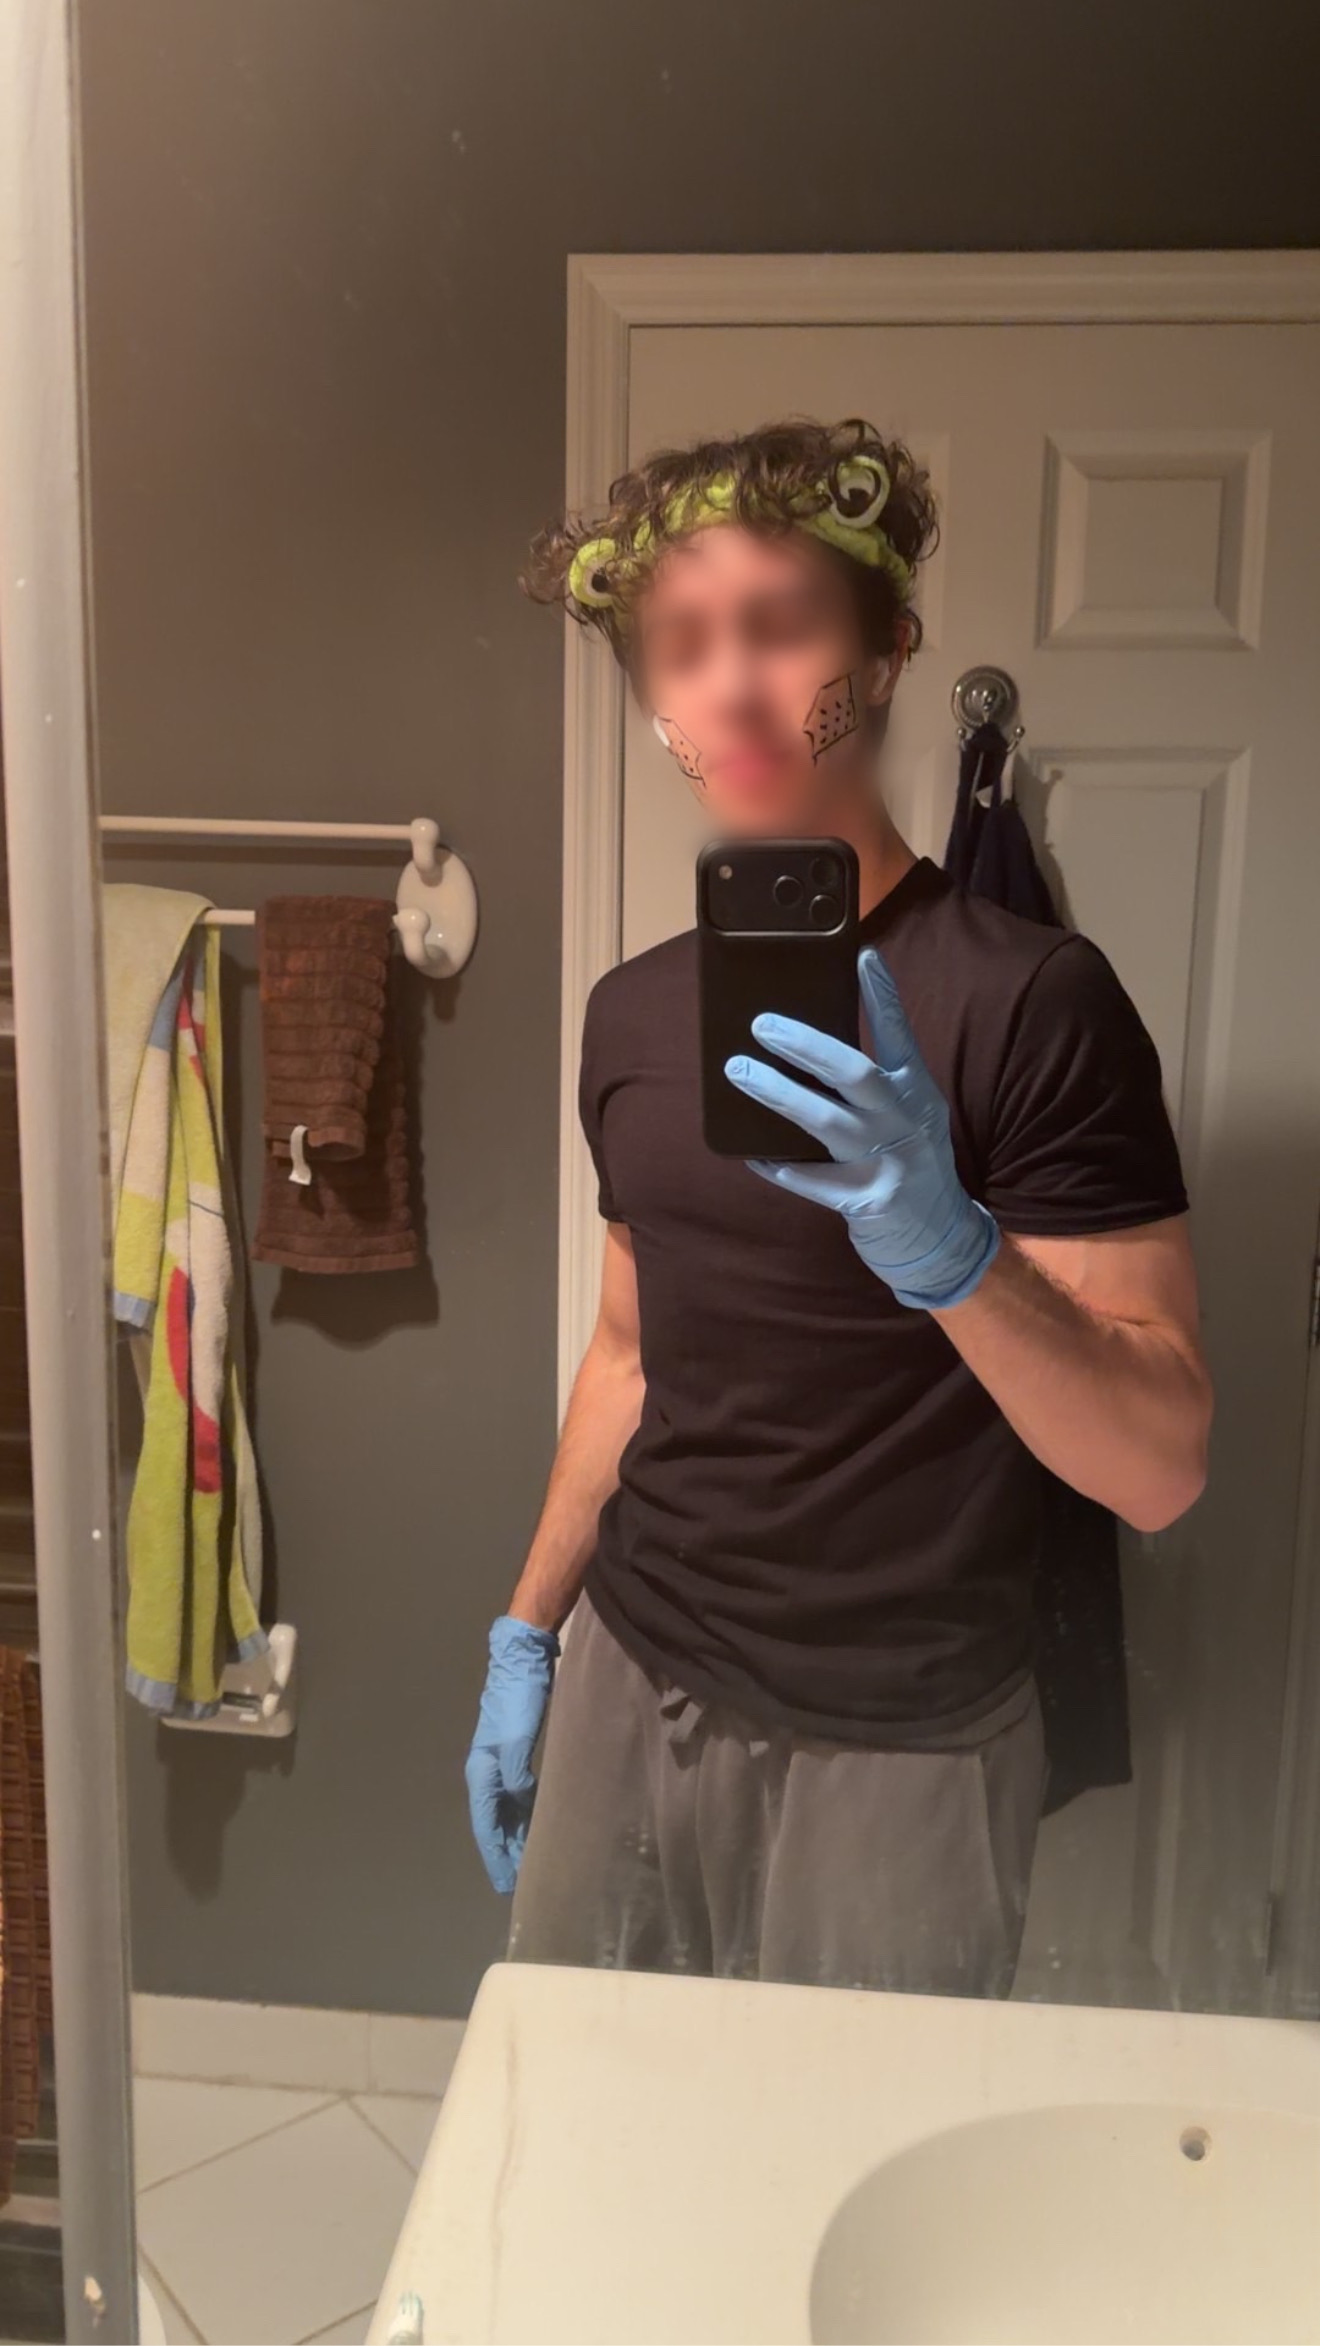
Enjoy this epic montage.
For the dose I went with 0.2 ml per point because the liquid spreads more than gels. Overloading any single spot can cause uneven texture. During the procedure I pinched the skin firmly before every injection to protect deeper branches and stayed in the subcutaneous layer the whole time. In order to not forget where I pinned, I made sure to fully wipe off the mark after injecting. I also worked top-to-bottom in an organized way.
When it comes to injecting, it is advised not to go straight in (90 degrees). 45 degrees is what is considered optimal. However, I personally found it uncomfortable to pin like this so I improvised. I would initially inject at a 90 degree angle, and once the needle was barely inside my skin, I would reposition the syringe to be at a 45 degree angle.
5. Healing process
Honestly, results do not come that fast. You will need multiple sessions to see real change. One session alone is not going to give you dramatic results.
You will probably be bloated for around 4 days. The treated area swells up and feels firm, which is normal while the body processes the broken-down fat. Slight aching or tenderness at the injection spots is also expected.
I recommend drinking a lot of water and trying to sweat/drain your body (light cardio, sauna if you have access, anything that gets you sweating) to help clear the lipids quicker. Staying hydrated and moving the fluid out of the area seems to speed up how fast the bloat settles.
Signs you succeeded
- Swelling and firmness in the treated area that peaks then starts settling after about 4 days.
- Mild aching or tenderness at the points.
Signs you messed up
- Redness, heat, or swelling that lasts past seventy-two hours, any pus, fever, or skin that looks hot.
- Severe or worsening pain that does not calm down.
- Hard lumps that stay for a long time.
- Facial weakness or facial paralysis.
- Asymmetry.
- Blurry vision or blindness.
The fat cells that die are gone permanently, but you still need two to four sessions spaced about three weeks apart for noticeable results on stubborn cheek fat. Don’t expect overnight change.
Thankyou and goodluck!
@sample @Short @Kingly @Renophobeadoobe @cc000
Last edited: