






resting
its never going to be enough
- Joined
- Mar 24, 2026
- Posts
- 2,117
- Reputation
- 3,581
6.1 Body Fat and Facial Fat Reduction
this is the subsection everyone jumps to first because "just lose fat" is the most repeated advice on this entire site for literally every facial concern, eye area included. and it's not wrong, exactly. it's just wildly overapplied, and I need you to understand precisely what it does and doesn't do before you go cut yourself into a hollow-faced mess chasing an eye area problem that fat loss was never going to fix in the first place.

what actually happens mechanically
facial fat, as covered in section 2, isn't one uniform layer. it's distinct compartments, and body fat reduction affects them unevenly, not all at once, not equally. as overall body fat drops, buccal fat and general midface fat volume tend to reduce first and most noticeably for most people. this has a real, legitimate knock-on effect on the eye area: less midface volume means less general puffiness/fullness pushing up into the lower lid region, which can make an already-decent orbital vector look sharper and more defined, and can reduce mild lower lid fat pad bulging that was being exaggerated by overall facial fullness.
that's the actual mechanism. it's real, it's not cope, guys who cut from 20% to 12% body fat genuinely do often see a sharper, less puffy eye area as a side effect of general facial leaning.
what it does not do, and this is the important part
fat loss does not change orbital vector itself. it doesn't move your cheekbone forward relative to your cornea, that's bone position, covered extensively in section 3, and bone doesn't respond to a caloric deficit. if your vector is negative, cutting body fat can, in some cases, make it look worse, not better, because you're removing the small amount of soft tissue volume that was providing some cushioning over that bone-driven hollow. lean guys with negative vector often have the most pronounced-looking hollows on this entire site, not the least, and they get confused because they did "everything right" on the fat loss front and still have a shadow under their eyes.
it also doesn't change canthal tilt, doesn't change fissure shape, doesn't change intercanthal spacing — none of the skeletal/tendon-based traits move even slightly regardless of how lean you get. and it has a genuinely negative effect on UEE for a lot of guys specifically because upper lid fat pad volume, also covered in section 2, is one of the areas that can thin out with significant leanness, which increases apparent UEE and can make hooding worse in guys who didn't have much upper lid fat to begin with. this is the classic "shredded but somehow looks more tired" problem you'll see posted about on here — it's usually this exact mechanism.
how to actually use this lever correctly
use this as your first check if you're actually carrying facial fat, not as your default answer to every eye area complaint regardless of your actual composition. it's a real, legitimate, non-cope lever — but it's also the most overprescribed advice on this entire site precisely because it's the easiest thing to tell someone without doing the actual diagnostic work from section 5 first. if your section 5 assessment says your main issues are vector or tilt, this subsection isn't going to move the needle for you nearly as much as guys in the replies will insist it will, and you should be spending your effort further down this list instead.
this is the subsection everyone jumps to first because "just lose fat" is the most repeated advice on this entire site for literally every facial concern, eye area included. and it's not wrong, exactly. it's just wildly overapplied, and I need you to understand precisely what it does and doesn't do before you go cut yourself into a hollow-faced mess chasing an eye area problem that fat loss was never going to fix in the first place.
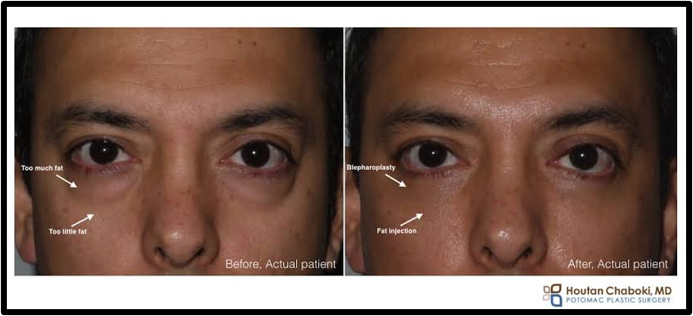
what actually happens mechanically
facial fat, as covered in section 2, isn't one uniform layer. it's distinct compartments, and body fat reduction affects them unevenly, not all at once, not equally. as overall body fat drops, buccal fat and general midface fat volume tend to reduce first and most noticeably for most people. this has a real, legitimate knock-on effect on the eye area: less midface volume means less general puffiness/fullness pushing up into the lower lid region, which can make an already-decent orbital vector look sharper and more defined, and can reduce mild lower lid fat pad bulging that was being exaggerated by overall facial fullness.
that's the actual mechanism. it's real, it's not cope, guys who cut from 20% to 12% body fat genuinely do often see a sharper, less puffy eye area as a side effect of general facial leaning.
what it does not do, and this is the important part
fat loss does not change orbital vector itself. it doesn't move your cheekbone forward relative to your cornea, that's bone position, covered extensively in section 3, and bone doesn't respond to a caloric deficit. if your vector is negative, cutting body fat can, in some cases, make it look worse, not better, because you're removing the small amount of soft tissue volume that was providing some cushioning over that bone-driven hollow. lean guys with negative vector often have the most pronounced-looking hollows on this entire site, not the least, and they get confused because they did "everything right" on the fat loss front and still have a shadow under their eyes.
it also doesn't change canthal tilt, doesn't change fissure shape, doesn't change intercanthal spacing — none of the skeletal/tendon-based traits move even slightly regardless of how lean you get. and it has a genuinely negative effect on UEE for a lot of guys specifically because upper lid fat pad volume, also covered in section 2, is one of the areas that can thin out with significant leanness, which increases apparent UEE and can make hooding worse in guys who didn't have much upper lid fat to begin with. this is the classic "shredded but somehow looks more tired" problem you'll see posted about on here — it's usually this exact mechanism.
how to actually use this lever correctly
- if you're carrying meaningful body fat (roughly above 15-18% for most guys, though this varies by individual fat distribution) and haven't leaned out specifically in the face yet, there's real room here, and it's a legitimate first move before anything else in this section.
- if you're already reasonably lean, in the 10-14% range, and your eye area issues are persisting, further cutting is very unlikely to meaningfully change your specific problem and you should stop looking at this lever and go check whether your actual issue is vector, tilt, UEE from a non-fat cause, or something else in the cluster from your section 5 assessment.
- if you have negative vector specifically and you're already lean, cutting further is a genuinely bad idea for this specific goal — you're not going to fix the hollow, you're just going to remove cushioning and make it read sharper against the surrounding structure. this is a case where the fat loss lever should just be left alone.
- facial fat loss also isn't spot-reducible any more than fat loss anywhere else on the body is — there's no version of "face-specific cardio" that targets buccal fat while leaving everything else. it's downstream of overall body fat percentage, full stop, so this lever is really just "generalized body fat reduction" wearing an eye-area-specific label.
use this as your first check if you're actually carrying facial fat, not as your default answer to every eye area complaint regardless of your actual composition. it's a real, legitimate, non-cope lever — but it's also the most overprescribed advice on this entire site precisely because it's the easiest thing to tell someone without doing the actual diagnostic work from section 5 first. if your section 5 assessment says your main issues are vector or tilt, this subsection isn't going to move the needle for you nearly as much as guys in the replies will insist it will, and you should be spending your effort further down this list instead.
6.2 Upper Eyelid Exposure vs Hooding Improvements
alright, this is the subsection covering the trait with the most possible root causes, which means it's also the one where "just do X" advice fails the hardest if you skipped your actual diagnosis from section 5. before you read a single word further here, you need to already know which of the four causes — skin quantity, fat pad volume, levator function, or brow position — is actually driving your specific case, because the interventions below are not interchangeable. doing a fix aimed at fat volume when your actual problem is levator weakness is just wasted effort.
if the cause is skin excess (dermatochalasis)
this is loose or excess skin sitting between your lash line and crease, and it's the one genuinely time-dependent cause on this list — it gets progressively worse with age as collagen and elastin production decline, full stop, no way around that basic biology.
if the cause is fat pad volume (excess or deficient)
as covered in section 2, this can go either direction — too much upper lid fat pushing the crease down and contributing to hooding, or too little leaving a hollow, sunken upper lid that reads as gaunt rather than sharp.
this is the cause guys are least likely to correctly self-diagnose because it doesn't have an obvious "look" the way excess skin or fat does — it just presents as generally reduced lid opening that can look like hooding or high UEE depending on what else is going on.

this is genuinely the most actionable of the four causes for a lot of guys, because unlike skin/fat/levator, brow position has both a soft tissue component (somewhat responsive to non-surgical intervention) and is often the one people most underestimate as the actual root cause of what they thought was an eyelid problem.
putting this subsection together
notice the pattern across all four causes: the non-surgical options here are real but modest, mostly maintenance-tier or partial-improvement-tier, not dramatic transformations. this is one of the more honest sections of the whole guide because the truth is UEE/hooding is disproportionately a surgical-fix trait once it's actually significant rather than mild — which is exactly why blepharoplasty specifically is one of the more commonly performed and genuinely high-satisfaction eye area procedures, coming up properly in 6.11. if your section 5 assessment showed mild-to-moderate UEE or hooding, the tools above are worth actually using consistently. if it showed significant, visually obvious hooding or excess, I'd rather tell you honestly now that you're likely looking at a surgical conversation eventually than have you spend two years on retinoids and eye creams expecting a transformation they were never going to deliver.
alright, this is the subsection covering the trait with the most possible root causes, which means it's also the one where "just do X" advice fails the hardest if you skipped your actual diagnosis from section 5. before you read a single word further here, you need to already know which of the four causes — skin quantity, fat pad volume, levator function, or brow position — is actually driving your specific case, because the interventions below are not interchangeable. doing a fix aimed at fat volume when your actual problem is levator weakness is just wasted effort.
if the cause is skin excess (dermatochalasis)
this is loose or excess skin sitting between your lash line and crease, and it's the one genuinely time-dependent cause on this list — it gets progressively worse with age as collagen and elastin production decline, full stop, no way around that basic biology.
- retinoids (tretinoin, adapalene) used consistently around the orbital area: thin, delicate periorbital skin does respond to retinoid use over months, not weeks, with modest improvements in collagen density and skin thickness. this is a real, evidence-backed mechanism, not cope, but the effect size here is genuinely modest for meaningfully reducing visible excess skin, not dramatic. it's a maintenance/slow-improvement tool, not a fix for already-significant excess.
- peptide-based eye creams (matrixyl and similar peptide complexes): there's reasonable evidence these support collagen signaling in skin generally, but periorbital-specific clinical data is thin, and expecting a cream to meaningfully reduce visible hooding from actual excess skin is not realistic. treat this as a minor supporting habit at best, not a real lever on its own.
- the hard limit here: once excess skin has actually developed to the point of visibly overhanging the lash line, no topical is reversing that. this is exactly the trait blepharoplasty exists to correct, and it'll come up again directly in 6.11.
if the cause is fat pad volume (excess or deficient)
as covered in section 2, this can go either direction — too much upper lid fat pushing the crease down and contributing to hooding, or too little leaving a hollow, sunken upper lid that reads as gaunt rather than sharp.
- if the issue is excess upper lid fat, there is genuinely no reliable non-surgical fix. this is one of the more honest things I can tell you in this entire guide — the fat pad reduction techniques you'll see advertised (certain facial massage protocols, "eye yoga," various device gimmicks) do not have real evidence behind them for reducing fat pad volume specifically. this is a surgical trait, covered in 6.11, full stop.
- if the issue is deficient upper lid volume (hollow upper lid, common in already-lean guys), the non-surgical fix is actually the opposite direction — this is a volume-restoration problem, which is what fillers and fat grafting are for, briefly covered in 6.10 with the honest caveat that this is a genuinely tricky area to inject well and results vary a lot by injector skill specifically in this location.
this is the cause guys are least likely to correctly self-diagnose because it doesn't have an obvious "look" the way excess skin or fat does — it just presents as generally reduced lid opening that can look like hooding or high UEE depending on what else is going on.
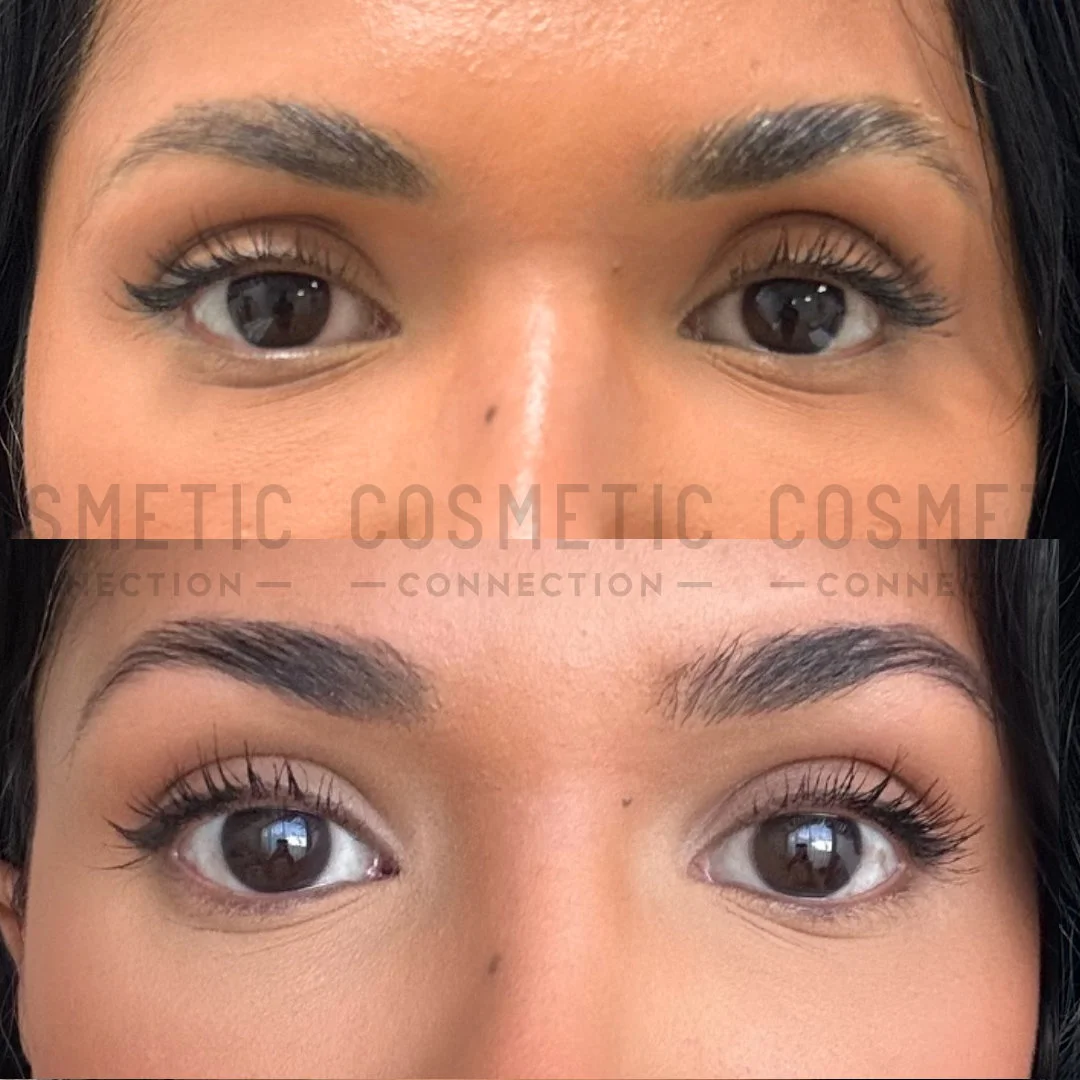
- mild, non-clinically-significant levator weakness genuinely doesn't have a reliable non-surgical fix either. there's no exercise that meaningfully strengthens the levator palpebrae superioris the way you'd train skeletal muscle elsewhere on your body — it doesn't respond to that kind of training stimulus in any evidence-backed way.
- if you suspect this might be more than mild — meaning your lid margin is sitting noticeably lower relative to your pupil than the other eye, or lower than would be expected generally, or it's been getting progressively worse independent of any skin change — this genuinely crosses into "see an actual ophthalmologist or oculoplastic surgeon" territory rather than a looksmax forum territory, because clinically significant ptosis can occasionally be a marker of something worth ruling out medically, not just an aesthetic concern. I'm not going to pretend to diagnose that distinction for you over text, get it actually looked at if you're unsure.
this is genuinely the most actionable of the four causes for a lot of guys, because unlike skin/fat/levator, brow position has both a soft tissue component (somewhat responsive to non-surgical intervention) and is often the one people most underestimate as the actual root cause of what they thought was an eyelid problem.
- brow-lifting facial exercises: I want to be straight with you here rather than blowing smoke. evidence for facial exercises meaningfully and permanently lifting brow position is weak. some guys report short-term, very temporary improvement in muscle tone/engagement, but nothing suggesting a durable structural change to resting brow height. treat any claims of dramatic brow-lift results from exercise protocols with real skepticism.
- grooming and shaping this sounds almost too simple to include, but proper eyebrow grooming, shaping the lower border specifically to sit cleanly along your natural brow ridge rather than growing wild and low, genuinely changes how much "visual weight" the brow appears to add to hooding. this isn't changing your bone or your soft tissue position, it's changing what's visually read against it, and it's free and immediate.
- botox (brow lift effect): relevant to mention here even though it's technically covered more fully in 6.10, because it's specifically a brow-position tool. botox targeting the depressor muscles that pull the brow down (rather than the frontalis that lifts it) can produce a modest, temporary brow elevation, which in turn can genuinely reduce the appearance of hooding for guys whose root cause is a lower-set brow crowding the lid. this is real, it's evidence-backed, and it's temporary, typically 3-4 months. which is both the appeal (low commitment, reversible) and the limitation (ongoing cost, not a permanent fix).
- the hard limit: if your brow ridge itself, the actual bone, is flat and low-projecting as covered in section 2, no amount of grooming or temporary botox is changing that underlying structure. those tools are working on soft tissue position layered on top of the bone, not the bone itself. surgical brow lift or, in more involved cases, orbital rim augmentation are the actual structural fixes, covered in 6.11.
putting this subsection together
notice the pattern across all four causes: the non-surgical options here are real but modest, mostly maintenance-tier or partial-improvement-tier, not dramatic transformations. this is one of the more honest sections of the whole guide because the truth is UEE/hooding is disproportionately a surgical-fix trait once it's actually significant rather than mild — which is exactly why blepharoplasty specifically is one of the more commonly performed and genuinely high-satisfaction eye area procedures, coming up properly in 6.11. if your section 5 assessment showed mild-to-moderate UEE or hooding, the tools above are worth actually using consistently. if it showed significant, visually obvious hooding or excess, I'd rather tell you honestly now that you're likely looking at a surgical conversation eventually than have you spend two years on retinoids and eye creams expecting a transformation they were never going to deliver.
6.3 Brow Position and Brow Ridge Relationship
we touched on brow position already in 6.2 specifically as one of four causes of UEE/hooding, but it deserves its own full breakdown because brow position affects way more than just how much lid is showing — it changes how the entire upper eye area reads, independent of tilt, vector, or anything else in your cluster. a lot of guys on here have a genuinely fine eye area being dragged down purely by brow positioning nobody ever told them to look at.
the two separate variables you're actually assessing
as covered in section 2, the brow sits on soft tissue directly overlying the superior orbital rim, so what you're looking at when you assess "brow position" is actually two stacked things that need to be separated out:
assessing brow ridge projection (the bone)
run a finger along your brow bone from the inner corner out toward the temple. is there a clear forward projection you can feel under the skin, or does it feel relatively flat, with the forehead sloping fairly directly into the eye area with minimal shelf. side profile photos help here too a projected ridge will visibly cast shadow over the upper lid in even lighting, a flat one won't regardless of how the brow hair itself is groomed or positioned.

if this is flat, that's your section 2 material, that's genuinely a hard skeletal limit, and it's addressed properly (briefly, high-level only, since surgery in this exact area is invasive) in 6.11.
assessing brow height and shape (the soft tissue)
this is the part with actual levers. brow height refers to how far above the orbital rim the brow sits at rest — higher-set brows increase the visual distance between brow and lash line, lower-set brows crowd that space. shape refers to the arch and the taper, which affects perceived "openness" independent of raw height.
actual levers for brow height and shape
the interaction with orbital vector and UEE — why this section doesn't stand alone
this is worth flagging explicitly because it's a mistake I see constantly: guys assess brow position in total isolation from the rest of their cluster and either over- or under-value it as a result. a flat brow ridge paired with an already-strong positive vector and low UEE reads completely differently than the same flat brow ridge paired with negative vector and high UEE — in the first case the brow flatness is a relatively minor drag on an otherwise strong eye area, in the second it's compounding on top of multiple other traits all pulling the same direction. go back to your section 5 cluster read before deciding how much time to actually invest here relative to your other traits.
bottom line for this subsection
if your brow ridge itself is well-projected and your actual issue is just grooming, height, or shape, this is one of the highest-leverage, lowest-cost items in the entire section 6 lineup — genuinely worth doing regardless of what else is going on with your eye area, since proper grooming has no downside and immediate visible effect. if your actual issue is a flat ridge underneath, be honest with yourself that you've hit a skeletal limit here, same as with vector, and either accept it as one trait in your overall cluster that isn't going to move without surgery, or read ahead to 6.11 when we get there.
we touched on brow position already in 6.2 specifically as one of four causes of UEE/hooding, but it deserves its own full breakdown because brow position affects way more than just how much lid is showing — it changes how the entire upper eye area reads, independent of tilt, vector, or anything else in your cluster. a lot of guys on here have a genuinely fine eye area being dragged down purely by brow positioning nobody ever told them to look at.
the two separate variables you're actually assessing
as covered in section 2, the brow sits on soft tissue directly overlying the superior orbital rim, so what you're looking at when you assess "brow position" is actually two stacked things that need to be separated out:
- the bone underneath (brow ridge/supraorbital ridge projection) — fixed, skeletal, not changing without surgery.
- the soft tissue and hair sitting on top of it (brow height and shape) — this has genuine non-surgical range of motion, both temporary and semi-permanent.
assessing brow ridge projection (the bone)
run a finger along your brow bone from the inner corner out toward the temple. is there a clear forward projection you can feel under the skin, or does it feel relatively flat, with the forehead sloping fairly directly into the eye area with minimal shelf. side profile photos help here too a projected ridge will visibly cast shadow over the upper lid in even lighting, a flat one won't regardless of how the brow hair itself is groomed or positioned.
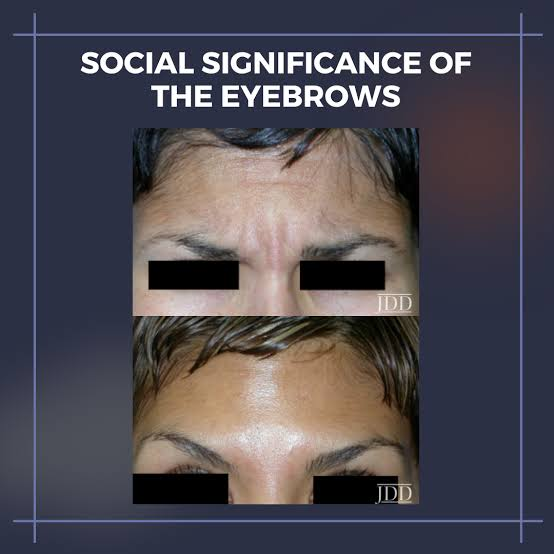
if this is flat, that's your section 2 material, that's genuinely a hard skeletal limit, and it's addressed properly (briefly, high-level only, since surgery in this exact area is invasive) in 6.11.
assessing brow height and shape (the soft tissue)
this is the part with actual levers. brow height refers to how far above the orbital rim the brow sits at rest — higher-set brows increase the visual distance between brow and lash line, lower-set brows crowd that space. shape refers to the arch and the taper, which affects perceived "openness" independent of raw height.
actual levers for brow height and shape
- grooming and shaping to the correct lower border — already covered briefly in 6.2, worth repeating here as its own point because it's the single highest value-for-effort item in this entire subsection. a brow that's shaped to sit cleanly along the natural ridge, rather than growing wild below it or getting over-plucked thin and high, changes the entire visual weight of the upper eye area for free, immediately, with zero downside. most guys on here have never had this done properly even once.
- brow lamination — physically restructures the direction brow hairs sit, generally brushing them up and slightly out, which can create the visual effect of a very slightly higher, more "lifted" brow without doing anything to the actual skin or bone underneath. temporary, typically lasting 6-8 weeks, purely a hair-direction trick, but a legitimately underused one in this specific community given how much attention goes to tilt and vector by comparison.
- botox for depressor muscles — covered in 6.2 and again briefly here since it's directly relevant: relaxing the muscles that actively pull the brow down (procerus, corrugator, depressor supercilii) allows the frontalis muscle, which lifts the brow, to act with less opposition, producing a modest, temporary elevation. genuinely evidence-backed, genuinely real, genuinely temporary (3-4 months), and it's a soft-tissue-position tool, not a bone tool, so don't expect it to compensate for a flat ridge underneath.
- posture and habitual expression — this sounds minor but is worth a real mention: guys who chronically furrow or hold tension in the brow, whether from screen habits, squinting, or just resting expression, can develop a lower habitual brow position over time purely from sustained muscle engagement pulling it down. this isn't a dramatic lever, but conscious awareness of resting facial tension is free and has zero downside, unlike most things in this list.
the interaction with orbital vector and UEE — why this section doesn't stand alone
this is worth flagging explicitly because it's a mistake I see constantly: guys assess brow position in total isolation from the rest of their cluster and either over- or under-value it as a result. a flat brow ridge paired with an already-strong positive vector and low UEE reads completely differently than the same flat brow ridge paired with negative vector and high UEE — in the first case the brow flatness is a relatively minor drag on an otherwise strong eye area, in the second it's compounding on top of multiple other traits all pulling the same direction. go back to your section 5 cluster read before deciding how much time to actually invest here relative to your other traits.
bottom line for this subsection
if your brow ridge itself is well-projected and your actual issue is just grooming, height, or shape, this is one of the highest-leverage, lowest-cost items in the entire section 6 lineup — genuinely worth doing regardless of what else is going on with your eye area, since proper grooming has no downside and immediate visible effect. if your actual issue is a flat ridge underneath, be honest with yourself that you've hit a skeletal limit here, same as with vector, and either accept it as one trait in your overall cluster that isn't going to move without surgery, or read ahead to 6.11 when we get there.
6.4 Eyebrow Density and Shape
this subsection is about the hair itself now, not position or ridge projection, those were 6.3. density, thickness, and fullness of the brow hair, and how much of that you can actually change versus how much is locked in by genetics.
what determines your baseline density
as covered in section 2, brow density comes down to total follicle count, which is mostly fixed genetically and set early, and how many of those existing follicles are actively in the anagen (growth) phase at any given time versus sitting dormant in telogen. this second part is the actual target for basically every intervention in this subsection. nothing here is creating brand new follicles from scratch. every real option works by either extending the growth phase of follicles you already have, or waking up dormant ones that already exist but aren't currently producing visible hair.
this matters because it sets your expectations correctly from the start. if your brows are genuinely sparse due to low follicle count rather than a high proportion of dormant follicles, the tools below will give you a smaller improvement than someone whose sparseness is more about dormancy. you generally can't tell which situation you're in without trying a treatment for several months and seeing how much responds.
minoxidil for brows
this is the single most talked about non-surgical density tool in this space, so it gets a proper breakdown.
mechanism, briefly: minoxidil's actual mode of action isn't fully settled even in the scalp hair literature, but the leading explanation involves potassium channel opening effects that increase blood flow to the follicle and, more importantly for density specifically, shorten the telogen (resting) phase and prolong anagen (growth) phase duration. applied to already-existing but currently dormant brow follicles, this can bring a meaningful number of them into active growth that weren't producing visible hair before.
practical use in the brow-specific community context, since there's no FDA-approved minoxidil product formulated specifically for brows, this is universally an off-label application of either the standard 5% topical solution or foam sold for scalp use:

source: minoxidil's mechanism involving potassium channel activation and hair cycle phase modification is reviewed in Suchonwanit P et al., "Minoxidil and Its Use in Hair Disorders: A Review," Drug Design, Development and Therapy. Off-label brow and eyelash application specifically, including side effect profile, is discussed in the same review's sections on non-scalp applications.
bimatoprost (the active ingredient in Latisse) for brows
worth mentioning here even though it's more commonly discussed for lashes, since it gets used off-label for brow density too, though less commonly than minoxidil in this specific application. bimatoprost is a prostaglandin analog, and its mechanism is genuinely different from minoxidil, it extends the anagen phase duration and increases the percentage of follicles actively in that phase, along with some evidence of increasing actual follicle size and pigmentation, not purely a dormancy-reversal mechanism the way minoxidil primarily is. this gets covered in full depth in 6.5 since that's its primary documented and FDA-approved use case, lashes specifically, but brow application follows the same general logic and comes with the same off-label caveats.
non-pharmaceutical options

density is about how much hair you have. shape is about training and maintaining the direction and outline of what's already there, which interacts with the grooming point already covered in 6.3. brow gel or a similar hold product can train hair direction over time with consistent daily use, and combined with proper shaping to the natural lower border discussed in 6.3, this is a free, zero-risk lever that should be handled before spending money on anything density-related, since a well-shaped moderate-density brow often reads better than a poorly-shaped high-density one.
bottom line for this subsection
if your brow density genuinely bothers you and you haven't tried anything yet, minoxidil is the best-evidenced starting point given the mechanism and track record, applied consistently for a minimum of 4 months before judging results, with the honest caveat that response is variable and not guaranteed for everyone. shape and grooming should be handled regardless of what you decide on density, since it's free and immediate. don't expect either of these tools to change a genuinely low baseline follicle count into a dramatically fuller brow, they're working with what you already have, not creating something from nothing.
this subsection is about the hair itself now, not position or ridge projection, those were 6.3. density, thickness, and fullness of the brow hair, and how much of that you can actually change versus how much is locked in by genetics.
what determines your baseline density
as covered in section 2, brow density comes down to total follicle count, which is mostly fixed genetically and set early, and how many of those existing follicles are actively in the anagen (growth) phase at any given time versus sitting dormant in telogen. this second part is the actual target for basically every intervention in this subsection. nothing here is creating brand new follicles from scratch. every real option works by either extending the growth phase of follicles you already have, or waking up dormant ones that already exist but aren't currently producing visible hair.
this matters because it sets your expectations correctly from the start. if your brows are genuinely sparse due to low follicle count rather than a high proportion of dormant follicles, the tools below will give you a smaller improvement than someone whose sparseness is more about dormancy. you generally can't tell which situation you're in without trying a treatment for several months and seeing how much responds.
minoxidil for brows
this is the single most talked about non-surgical density tool in this space, so it gets a proper breakdown.
mechanism, briefly: minoxidil's actual mode of action isn't fully settled even in the scalp hair literature, but the leading explanation involves potassium channel opening effects that increase blood flow to the follicle and, more importantly for density specifically, shorten the telogen (resting) phase and prolong anagen (growth) phase duration. applied to already-existing but currently dormant brow follicles, this can bring a meaningful number of them into active growth that weren't producing visible hair before.
practical use in the brow-specific community context, since there's no FDA-approved minoxidil product formulated specifically for brows, this is universally an off-label application of either the standard 5% topical solution or foam sold for scalp use:
- application is typically done with a small brush or cotton swab, directly onto the brow area, once daily, being careful to avoid getting it in the eyes since minoxidil is not formulated or tested for ocular safety and irritation is a real risk if it runs.
- results, when they happen, generally take 3 to 4 months minimum to become visible, consistent with the hair cycle timelines discussed in section 2, since you're waiting for dormant follicles to actually cycle into a visible growth phase, not seeing an overnight effect.
- response is genuinely variable person to person and not guaranteed. some guys see meaningful thickening, some see modest improvement, some see close to nothing, and there's no reliable way to predict which category you'll fall into beforehand.
- side effects worth knowing about specifically for facial application: localized irritation, dryness, or redness at the application site is the most common issue. there's also a known and fairly common side effect of minoxidil causing hair growth in areas adjacent to where it's applied due to product migration or absorption spreading slightly beyond the intended area, meaning guys using it on brows sometimes notice minor unwanted hair growth on nearby forehead or temple skin. keep application precise and minimal to reduce this risk.
- discontinuation matters here the same way it does with minoxidil anywhere else on the body: any gains made are generally not permanent once you stop. follicles that were pushed into an active growth phase by continued use tend to cycle back to their natural baseline once the product is discontinued, so this is a maintain-indefinitely tool if you want to keep results, not a one-time fix.
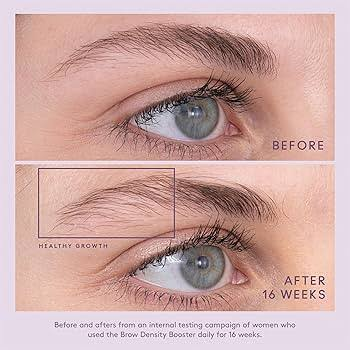
source: minoxidil's mechanism involving potassium channel activation and hair cycle phase modification is reviewed in Suchonwanit P et al., "Minoxidil and Its Use in Hair Disorders: A Review," Drug Design, Development and Therapy. Off-label brow and eyelash application specifically, including side effect profile, is discussed in the same review's sections on non-scalp applications.
bimatoprost (the active ingredient in Latisse) for brows
worth mentioning here even though it's more commonly discussed for lashes, since it gets used off-label for brow density too, though less commonly than minoxidil in this specific application. bimatoprost is a prostaglandin analog, and its mechanism is genuinely different from minoxidil, it extends the anagen phase duration and increases the percentage of follicles actively in that phase, along with some evidence of increasing actual follicle size and pigmentation, not purely a dormancy-reversal mechanism the way minoxidil primarily is. this gets covered in full depth in 6.5 since that's its primary documented and FDA-approved use case, lashes specifically, but brow application follows the same general logic and comes with the same off-label caveats.
non-pharmaceutical options
- microneedling in the brow area, similar to scalp applications, has some evidence suggesting it can improve absorption and effectiveness of topical treatments like minoxidil when combined, through creating micro-channels that improve penetration, though evidence specific to brow application rather than scalp is thin. worth considering as a combination approach rather than a standalone one.
- nutritional factors, biotin supplementation specifically gets mentioned constantly in hair growth spaces generally. the actual evidence for biotin improving hair growth in people who aren't already biotin deficient is weak. if you have a genuine deficiency, correcting it helps, if you don't, supplementing further on top of adequate levels is not going to meaningfully move your brow density. general adequate protein and micronutrient intake matters for hair growth broadly the same way it does for every tissue in your body, but this is a baseline health factor, not a targeted brow intervention.
- brow serums (peptide-based, non-drug), the commercially sold "brow growth serums" that aren't minoxidil or bimatoprost based typically rely on peptide complexes with much weaker evidence behind them than either of the two options above. treat marketing claims here with real skepticism, the strongest evidence in this entire subsection sits with minoxidil and bimatoprost specifically, not with proprietary peptide blends.
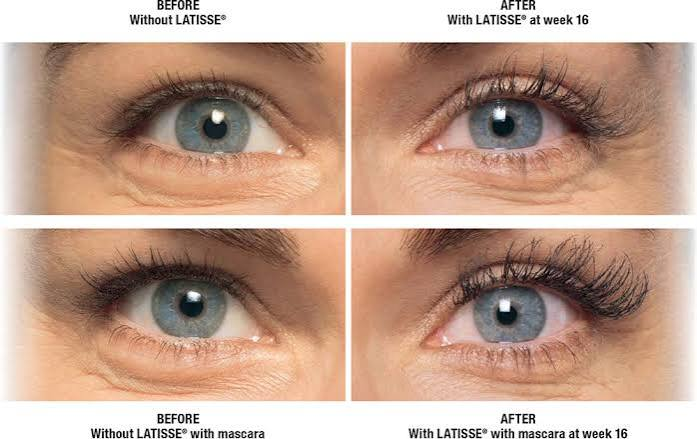
density is about how much hair you have. shape is about training and maintaining the direction and outline of what's already there, which interacts with the grooming point already covered in 6.3. brow gel or a similar hold product can train hair direction over time with consistent daily use, and combined with proper shaping to the natural lower border discussed in 6.3, this is a free, zero-risk lever that should be handled before spending money on anything density-related, since a well-shaped moderate-density brow often reads better than a poorly-shaped high-density one.
bottom line for this subsection
if your brow density genuinely bothers you and you haven't tried anything yet, minoxidil is the best-evidenced starting point given the mechanism and track record, applied consistently for a minimum of 4 months before judging results, with the honest caveat that response is variable and not guaranteed for everyone. shape and grooming should be handled regardless of what you decide on density, since it's free and immediate. don't expect either of these tools to change a genuinely low baseline follicle count into a dramatically fuller brow, they're working with what you already have, not creating something from nothing.
6.5 Eyelash Growth
lashes get their own subsection separate from brows because the actual best evidenced tool here, bimatoprost, has an FDA approved product specifically for this exact application, which is genuinely rare in this entire guide. most of what we cover in section 6 is off label use of things designed for something else. this one isn't.
bimatoprost (Latisse) is the real answer here, so let's cover it properly
Latisse is the brand name for topical bimatoprost 0.03%, and it's FDA approved specifically for hypotrichosis (inadequate or not enough lashes) of the eyelashes. this matters because it means there's actual clinical trial data behind it, not just off label anecdote the way most of section 6 works.
mechanism, as touched on in 6.4: bimatoprost is a prostaglandin analog, originally developed and still used as a glaucoma medication to reduce intraocular pressure, where increased lash growth was noticed as a side effect in patients using it, which is how this application was discovered in the first place. it works by extending the anagen (active growth) phase of the lash cycle, increasing the percentage of follicles actively in that phase at any given time, and there's also evidence of it increasing follicle size, meaning individual lashes grow thicker and more pigmented, not just more numerous. this is a genuinely different and in some ways more complete mechanism than minoxidil's primarily dormancy reversal effect covered in 6.4.
clinical trial results, the pivotal trials supporting FDA approval showed meaningful increases across all three measured categories: lash length, thickness, and darkness, with most users seeing visible results starting around 8 weeks and full effect typically by 16 weeks of consistent nightly use. this is a genuinely well documented timeline compared to most other interventions in this guide.
practical use: applied nightly with the small sterile applicator brushes that come with the product, along the base of the upper lash line only, not the lower lash line, and you want to blot any excess rather than letting it run, since getting this on skin outside the intended area is exactly how you get the side effect covered next.

side effects worth actually knowing about, and this is more important here than almost anywhere else in the guide because some of these are visible and not fully reversible:
generic bimatoprost versus branded Latisse
worth mentioning since cost is a real factor and Latisse specifically is expensive as a branded prescription product. the same active ingredient at the same 0.03% concentration is sold in generic prescription form and also shows up in various online vendor products marketed as lash serums without going through the same prescription and manufacturing oversight as the FDA approved version. the pharmacology is the same molecule either way, but sourcing from unregulated vendors introduces real uncertainty about actual concentration, purity, and sterile handling that a prescription pharmacy product doesn't carry. this is a genuine tradeoff between cost and quality assurance, not a case where the cheaper option is obviously fine.
minoxidil for lashes
briefly, since it's the same substance and mechanism covered in depth in 6.4, minoxidil does get used off label on lashes by some guys in this space, but it's a distinctly worse fit for this specific location than bimatoprost given bimatoprost has actual FDA approval and trial data for this exact use case, while minoxidil doesn't. the eye proximity risk with minoxidil application on lashes specifically is also a real concern, since you're applying much closer to the eye itself than with brow application, increasing irritation risk. if you're choosing between the two specifically for lashes, bimatoprost is the better evidenced and more purpose built option.
non-pharmaceutical options
bimatoprost, whether as branded Latisse or generic prescription equivalent, is the best evidenced option here by a real margin, with actual FDA trial data behind it specifically for this use case rather than the off label extrapolation that covers most of the rest of section 6. the iris pigmentation risk is genuinely worth understanding before starting, particularly if you have lighter colored eyes, rather than dismissing it as forum scaremongering, since it's documented in real clinical literature. minoxidil is a worse fit here specifically compared to its stronger case for brows in 6.4. as with density in 6.4, don't expect either option to work identically well for everyone, and expect to maintain use indefinitely if you want to keep whatever results you get.
lashes get their own subsection separate from brows because the actual best evidenced tool here, bimatoprost, has an FDA approved product specifically for this exact application, which is genuinely rare in this entire guide. most of what we cover in section 6 is off label use of things designed for something else. this one isn't.
bimatoprost (Latisse) is the real answer here, so let's cover it properly
Latisse is the brand name for topical bimatoprost 0.03%, and it's FDA approved specifically for hypotrichosis (inadequate or not enough lashes) of the eyelashes. this matters because it means there's actual clinical trial data behind it, not just off label anecdote the way most of section 6 works.
mechanism, as touched on in 6.4: bimatoprost is a prostaglandin analog, originally developed and still used as a glaucoma medication to reduce intraocular pressure, where increased lash growth was noticed as a side effect in patients using it, which is how this application was discovered in the first place. it works by extending the anagen (active growth) phase of the lash cycle, increasing the percentage of follicles actively in that phase at any given time, and there's also evidence of it increasing follicle size, meaning individual lashes grow thicker and more pigmented, not just more numerous. this is a genuinely different and in some ways more complete mechanism than minoxidil's primarily dormancy reversal effect covered in 6.4.
clinical trial results, the pivotal trials supporting FDA approval showed meaningful increases across all three measured categories: lash length, thickness, and darkness, with most users seeing visible results starting around 8 weeks and full effect typically by 16 weeks of consistent nightly use. this is a genuinely well documented timeline compared to most other interventions in this guide.
practical use: applied nightly with the small sterile applicator brushes that come with the product, along the base of the upper lash line only, not the lower lash line, and you want to blot any excess rather than letting it run, since getting this on skin outside the intended area is exactly how you get the side effect covered next.
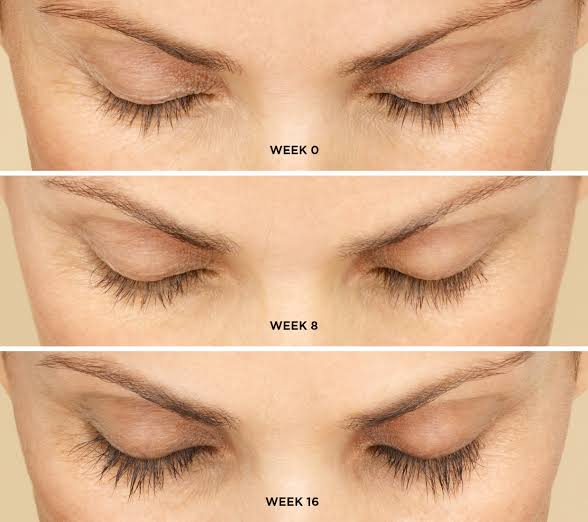
side effects worth actually knowing about, and this is more important here than almost anywhere else in the guide because some of these are visible and not fully reversible:
- periorbital skin hyperpigmentation, this is darkening of the skin where the product contacts it repeatedly, most commonly the upper lid margin. this is generally reversible after discontinuation but can take months to fade and in some cases doesn't fully return to baseline.
- iris hyperpigmentation, this is the one that gets the most attention and rightfully so, prostaglandin analogs used long term as glaucoma medication have been documented to cause a genuine, permanent darkening of the iris itself, meaning your actual eye color changing, typically in lighter colored eyes (blue, green, hazel) more than already dark brown eyes. this risk is well documented in the glaucoma literature at the concentrations and durations used for that condition. it's considered a lower but not zero risk at the lower concentration and more limited application used for lash growth specifically, and this is genuinely worth knowing before you start rather than finding out after months of use.
- conjunctival hyperemia, redness of the eye itself, generally mild and more common at higher concentrations than what's in Latisse specifically.
- as with minoxidil, gains here are not permanent. lashes generally return to baseline density and length within a few months of discontinuing use, so this is another maintain indefinitely tool if you want to keep the results.
generic bimatoprost versus branded Latisse
worth mentioning since cost is a real factor and Latisse specifically is expensive as a branded prescription product. the same active ingredient at the same 0.03% concentration is sold in generic prescription form and also shows up in various online vendor products marketed as lash serums without going through the same prescription and manufacturing oversight as the FDA approved version. the pharmacology is the same molecule either way, but sourcing from unregulated vendors introduces real uncertainty about actual concentration, purity, and sterile handling that a prescription pharmacy product doesn't carry. this is a genuine tradeoff between cost and quality assurance, not a case where the cheaper option is obviously fine.
minoxidil for lashes
briefly, since it's the same substance and mechanism covered in depth in 6.4, minoxidil does get used off label on lashes by some guys in this space, but it's a distinctly worse fit for this specific location than bimatoprost given bimatoprost has actual FDA approval and trial data for this exact use case, while minoxidil doesn't. the eye proximity risk with minoxidil application on lashes specifically is also a real concern, since you're applying much closer to the eye itself than with brow application, increasing irritation risk. if you're choosing between the two specifically for lashes, bimatoprost is the better evidenced and more purpose built option.
non-pharmaceutical options
- lash serums (peptide and conditioning based, non-drug), similar to the brow serum point made in 6.4, these typically contain conditioning agents and peptide complexes marketed for lash growth without the strength of evidence behind bimatoprost specifically. some may modestly improve the health and breakage resistance of existing lashes through conditioning, which can make lashes appear fuller simply through less breakage, but this isn't the same mechanism as actually extending growth phase or increasing follicle activity.
- avoiding mechanical damage, this sounds too basic to mention but genuinely matters, aggressive rubbing of the eyes, harsh mascara removal, and lash extensions applied and removed improperly all cause real mechanical damage and breakage to existing lashes, which reduces apparent fullness independent of any growth factor. addressing this costs nothing and has no downside, unlike every other option in this subsection.
bimatoprost, whether as branded Latisse or generic prescription equivalent, is the best evidenced option here by a real margin, with actual FDA trial data behind it specifically for this use case rather than the off label extrapolation that covers most of the rest of section 6. the iris pigmentation risk is genuinely worth understanding before starting, particularly if you have lighter colored eyes, rather than dismissing it as forum scaremongering, since it's documented in real clinical literature. minoxidil is a worse fit here specifically compared to its stronger case for brows in 6.4. as with density in 6.4, don't expect either option to work identically well for everyone, and expect to maintain use indefinitely if you want to keep whatever results you get.
6.6 Infraorbital Support / Tear Trough Appearance
this subsection ties directly back to two things covered earlier that guys tend to keep separate in their heads when they shouldn't, orbital vector from section 3 and the ORL versus orbitomalar ligament distinction from section 2. if you skipped either of those or skimmed them, go back before reading this, because everything here builds directly on that foundation and won't make sense in isolation.
first, separate what you're actually dealing with

as covered earlier, there are at least three distinct mechanisms that can produce a visible under eye problem, and they get lumped together constantly under the single vague term tear trough when they're genuinely different structures needing different approaches:
what actually helps regardless of which mechanism you have
dermal fillers, the main non-surgical lever for this area
this is where most of the real non-surgical intervention for this subsection actually lives, and it's worth a proper breakdown since it's commonly discussed and commonly done badly.
hyaluronic acid filler injected into the tear trough region works by adding volume either directly into the hollow itself, effectively camouflaging vector driven shadow by filling the gap rather than changing the underlying bone position, or by softening the ORL groove by adding volume that smooths the transition across the ligament attachment point.
this genuinely works well for mild to moderate cases of either mechanism, and it's one of the more commonly performed filler procedures in facial aesthetics generally, not some fringe treatment. but this is also one of the areas with the highest rate of visible bad outcomes in the entire filler world, specifically because the skin here is extremely thin and the tolerance for error is low. overfilled tear troughs are extremely common and extremely recognizable, producing a puffy, sausage like appearance under the eye that often looks worse than the original hollow it was meant to treat, sometimes called the tyndall effect when the filler sits too superficially and takes on a bluish tint visible through the thin skin above it.
practical points if you're actually considering this:
fat grafting as a non surgical adjacent option
worth a brief mention here since it sits between the filler category and true surgery. autologous fat transfer, meaning fat harvested from elsewhere on your own body and injected into the tear trough region, works through a similar volume addition mechanism to filler but with your own tissue rather than a synthetic product. results can last significantly longer than filler, sometimes considered semi permanent since a portion of transferred fat does survive long term, though a meaningful percentage of transferred fat is typically reabsorbed by the body in the months following the procedure and results vary by individual and by the specific technique used. this is a more involved procedure than filler injection, generally performed by a surgeon rather than at a med spa, and worth mentioning here as a middle ground option before we get to true surgical correction in 6.11.
bottom line for this subsection
if your under eye issue is mild and you haven't addressed the basics, sleep, hydration, and topical retinoid use for the discoloration component specifically, do that first since it's free and has zero downside. if you've got genuine moderate hollowing or grooving, filler from a genuinely experienced injector is the real non-surgical lever here and can produce a meaningful improvement, but go in understanding the real risk of a bad outcome in unskilled hands specifically in this area. if your issue is fat pad bulging rather than hollowing, or your vector is severe enough that filler can't reasonably correct it without overfilling, you're looking at a surgical conversation, covered properly in 6.11.
this subsection ties directly back to two things covered earlier that guys tend to keep separate in their heads when they shouldn't, orbital vector from section 3 and the ORL versus orbitomalar ligament distinction from section 2. if you skipped either of those or skimmed them, go back before reading this, because everything here builds directly on that foundation and won't make sense in isolation.
first, separate what you're actually dealing with
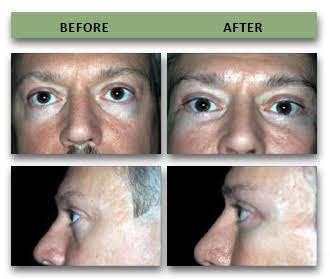
as covered earlier, there are at least three distinct mechanisms that can produce a visible under eye problem, and they get lumped together constantly under the single vague term tear trough when they're genuinely different structures needing different approaches:
- vector driven hollowing, the bone itself sitting behind the cornea, covered extensively in section 3, this is the hard skeletal limit case.
- ORL driven grooving, the ligament creating a sharp defined line between lid and cheek due to uneven volume above and below the attachment point, covered in section 2.
- fat pad bulging, lower lid fat pushing forward, also covered in section 2, which can exist alongside either of the above and often does.
what actually helps regardless of which mechanism you have
- sleep and hydration, I need to be straight with you here since this gets massively overstated in general skincare spaces and massively understated on this site specifically as a reaction to that overstatement. sleep and hydration genuinely do affect skin quality and mild fluid retention around the eyes, and chronic poor sleep can produce real, visible puffiness and a duller, more sallow skin tone that makes any underlying structural issue look worse than it actually is. but neither of these changes vector, ligament position, or fat pad volume. think of this as removing a layer of temporary aggravation sitting on top of your actual structural situation, not as fixing the structural situation itself. a guy with negative vector who fixes his sleep will look somewhat better than the same guy sleep deprived, but he will still have negative vector.
- caffeine or cold based topical products, the classic under eye roller or cold compress advice, these work through mild, very temporary vasoconstriction and fluid movement, genuinely can reduce mild morning puffiness for a few hours, and genuinely do nothing for structural hollowing or grooving. useful as a quick temporary fix before a specific event, not a real intervention.
- topical retinoids and vitamin C, similar to the point made in 6.2 for upper lid skin, these support collagen density and skin thickness in the lower lid area with modest evidence behind them, which can slightly improve how light reflects off thin under eye skin and reduce the appearance of dark circles caused specifically by visible blood vessels showing through thin skin, a genuinely distinct issue from structural hollowing that's worth mentioning since guys often conflate discoloration with structural shadow when assessing themselves. this does nothing for vector or ligament based issues, only for the thin skin discoloration component specifically.
dermal fillers, the main non-surgical lever for this area
this is where most of the real non-surgical intervention for this subsection actually lives, and it's worth a proper breakdown since it's commonly discussed and commonly done badly.
hyaluronic acid filler injected into the tear trough region works by adding volume either directly into the hollow itself, effectively camouflaging vector driven shadow by filling the gap rather than changing the underlying bone position, or by softening the ORL groove by adding volume that smooths the transition across the ligament attachment point.
this genuinely works well for mild to moderate cases of either mechanism, and it's one of the more commonly performed filler procedures in facial aesthetics generally, not some fringe treatment. but this is also one of the areas with the highest rate of visible bad outcomes in the entire filler world, specifically because the skin here is extremely thin and the tolerance for error is low. overfilled tear troughs are extremely common and extremely recognizable, producing a puffy, sausage like appearance under the eye that often looks worse than the original hollow it was meant to treat, sometimes called the tyndall effect when the filler sits too superficially and takes on a bluish tint visible through the thin skin above it.
practical points if you're actually considering this:
- injector skill and specific experience with this exact area matters more here than almost anywhere else on the face, given how thin the tolerance for error is. this is not the area to find the cheapest available injector.
- results typically last 9 to 18 months depending on the specific product used and individual metabolism, meaning this is a recurring cost, not a one time fix.
- this does not work as well, and often doesn't work at all, for pure fat pad bulging, since adding volume to a hollow area is a different problem than reducing volume from a bulging area. if your issue is primarily fat pad bulge rather than hollow, filler is likely the wrong tool and you should be looking toward the surgical options in 6.11 instead.
- severe vector cases sometimes need more volume than filler alone can reasonably or safely provide without risking the overfilled look described above, which is part of why true structural correction for severe cases sits in the surgical category rather than the filler category.
fat grafting as a non surgical adjacent option
worth a brief mention here since it sits between the filler category and true surgery. autologous fat transfer, meaning fat harvested from elsewhere on your own body and injected into the tear trough region, works through a similar volume addition mechanism to filler but with your own tissue rather than a synthetic product. results can last significantly longer than filler, sometimes considered semi permanent since a portion of transferred fat does survive long term, though a meaningful percentage of transferred fat is typically reabsorbed by the body in the months following the procedure and results vary by individual and by the specific technique used. this is a more involved procedure than filler injection, generally performed by a surgeon rather than at a med spa, and worth mentioning here as a middle ground option before we get to true surgical correction in 6.11.
bottom line for this subsection
if your under eye issue is mild and you haven't addressed the basics, sleep, hydration, and topical retinoid use for the discoloration component specifically, do that first since it's free and has zero downside. if you've got genuine moderate hollowing or grooving, filler from a genuinely experienced injector is the real non-surgical lever here and can produce a meaningful improvement, but go in understanding the real risk of a bad outcome in unskilled hands specifically in this area. if your issue is fat pad bulging rather than hollowing, or your vector is severe enough that filler can't reasonably correct it without overfilling, you're looking at a surgical conversation, covered properly in 6.11.
6.7 Skin Quality Around the Eyes
this subsection is the most purely cosmetic, non-structural item in the entire section 6 lineup, and I want to be upfront about that from the start. nothing here changes tilt, vector, UEE cause, brow ridge, or any of the actual bone and tendon driven traits covered earlier. what this does change is texture, tone, and how light reflects off the skin sitting over all of that structure, which genuinely does affect overall perceived quality of the eye area even though it's not touching the underlying architecture at all. think of this as the finishing layer on top of everything else in section 6, not a replacement for it.
why periorbital skin behaves differently than skin elsewhere on your face
the skin around your eyes is genuinely different from skin on the rest of your face in a few specific ways worth knowing before you pick products for this area specifically. it's meaningfully thinner, generally cited around 0.5mm compared to roughly 2mm on most of the rest of the face, it has fewer oil producing sebaceous glands, meaning it dries out faster and shows dehydration more visibly, and it moves constantly with blinking, an average of around 15 to 20 times per minute, which contributes to earlier and more visible fine line formation in this specific area compared to less mobile parts of the face. this is why generic facial skincare routines applied without modification to the eye area sometimes cause irritation that doesn't happen elsewhere, and why dedicated eye specific formulations, when they're actually formulated well rather than just marketing repackaging, tend to be gentler and lower concentration than the equivalent product for the rest of the face.

what genuinely helps
what doesn't meaningfully help, despite heavy marketing
this is genuinely the lowest stakes, lowest risk, most straightforward subsection in the entire section 6 lineup, and also the one with the smallest individual impact relative to something like vector or tilt. it's worth doing consistently because it's essentially free, has minimal downside when done correctly, and does meaningfully improve the finishing quality of whatever your underlying structure looks like. but don't mistake a good skincare routine for addressing any of the actual structural traits covered earlier in this guide. this is polish, not architecture.
this subsection is the most purely cosmetic, non-structural item in the entire section 6 lineup, and I want to be upfront about that from the start. nothing here changes tilt, vector, UEE cause, brow ridge, or any of the actual bone and tendon driven traits covered earlier. what this does change is texture, tone, and how light reflects off the skin sitting over all of that structure, which genuinely does affect overall perceived quality of the eye area even though it's not touching the underlying architecture at all. think of this as the finishing layer on top of everything else in section 6, not a replacement for it.
why periorbital skin behaves differently than skin elsewhere on your face
the skin around your eyes is genuinely different from skin on the rest of your face in a few specific ways worth knowing before you pick products for this area specifically. it's meaningfully thinner, generally cited around 0.5mm compared to roughly 2mm on most of the rest of the face, it has fewer oil producing sebaceous glands, meaning it dries out faster and shows dehydration more visibly, and it moves constantly with blinking, an average of around 15 to 20 times per minute, which contributes to earlier and more visible fine line formation in this specific area compared to less mobile parts of the face. this is why generic facial skincare routines applied without modification to the eye area sometimes cause irritation that doesn't happen elsewhere, and why dedicated eye specific formulations, when they're actually formulated well rather than just marketing repackaging, tend to be gentler and lower concentration than the equivalent product for the rest of the face.
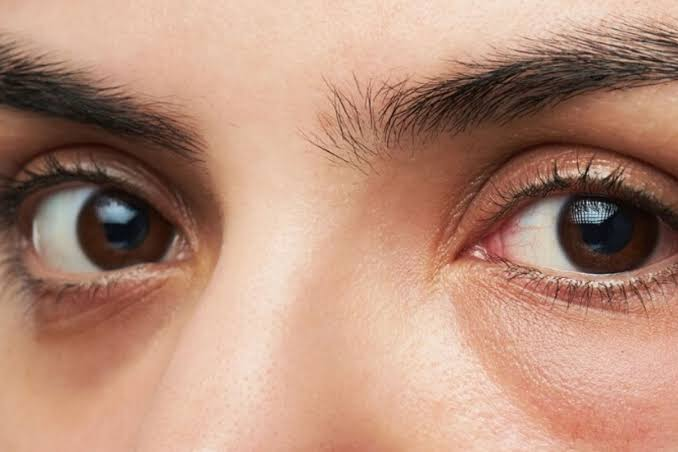
what genuinely helps
- sunscreen, specifically applied to this area and not skipped, this is the single most evidence backed anti-aging intervention that exists for skin generally, and the eye area is not an exception. UV exposure is a primary driver of the collagen breakdown that leads to the skin laxity covered back in 6.2, and consistent daily sunscreen use, including on the lower lid and up to the brow, genuinely slows that process more than any other single intervention on this list. most guys skip sunscreen specifically around the eyes out of irritation concerns or just forgetting the area exists, and it's worth actively correcting that.
- retinoids, already covered in both 6.2 and 6.6 for their specific structural adjacent effects, mentioned again here as the general category leader for skin quality improvement broadly, meaning texture, fine lines, and overall thickness improvement over consistent months long use. start at lower frequency and lower concentration specifically in this area compared to what you might use elsewhere on your face, given the thinness covered above, and expect some initial dryness or mild irritation as skin adjusts.
- vitamin C, a genuinely well evidenced topical antioxidant that supports collagen synthesis and can help with the mild discoloration component covered in 6.6, generally well tolerated in this area at appropriate concentrations formulated for sensitive skin use.
- basic consistent moisturization, given the fewer oil glands point made above, this area dries out faster than the rest of your face and benefits from a dedicated, appropriately gentle moisturizing product used consistently rather than being neglected or having whatever heavier product you use on the rest of your face applied without modification.
- gentle mechanical treatment generally, avoiding aggressive rubbing when removing makeup or product, avoiding harsh exfoliation specifically in this area given the thinness, and being generally mindful that this skin tolerates less mechanical stress than skin elsewhere on your face.
what doesn't meaningfully help, despite heavy marketing
- most dedicated eye creams specifically as a distinct product category from the ingredients listed above, this needs to be said plainly, a huge amount of the eye cream market is the same active ingredients available in regular facial products, sold at a premium specifically because it's marketed as eye specific, in a smaller volume container. what actually matters is the active ingredient and its concentration, not whether the product is labeled specifically for eyes. some dedicated eye formulations are genuinely gentler and better suited to this area's specific sensitivity, which has real value, but plenty are just standard actives repackaged at a markup, and there's no ingredient that only works around the eyes and doesn't work anywhere else on the face.
- caffeine as a long term skin quality intervention, useful for the very temporary puffiness reduction covered in 6.6, not a meaningful driver of actual skin quality improvement over time.
- gold, snail mucin, or other trend ingredient of the month claims specific to eye area transformation, treat marketing claims for any single novel ingredient promising dramatic eye area transformation with real skepticism. the evidence base overwhelmingly supports the handful of ingredients listed above, retinoids, vitamin C, sunscreen, consistent moisturization, and most novel trend ingredients don't have comparable evidence behind them regardless of how they're marketed.
this is genuinely the lowest stakes, lowest risk, most straightforward subsection in the entire section 6 lineup, and also the one with the smallest individual impact relative to something like vector or tilt. it's worth doing consistently because it's essentially free, has minimal downside when done correctly, and does meaningfully improve the finishing quality of whatever your underlying structure looks like. but don't mistake a good skincare routine for addressing any of the actual structural traits covered earlier in this guide. this is polish, not architecture.
6.8 Posture, Head Position, and Lighting
this subsection is short compared to the last several, and deliberately so, because unlike everything else in section 6 up to this point, nothing here is actually changing anything about your eye area. this is entirely about how what you already have gets presented and perceived in real world conditions and in photos, which matters practically even though it's not a structural intervention in any sense.
head position and its effect on perceived tilt and vector
this connects directly back to the Frankfort horizontal plane point made repeatedly since section 3. in everyday interaction, not just in photos, a slightly downward head tilt, chin very mildly tucked rather than jutted forward or held level, tends to present canthal tilt more favorably for most people, since it works with the natural angle of positive tilt rather than flattening it out. this is genuinely a small effect and not a substitute for actual positive tilt if you don't have it, but it's a real, free, zero effort adjustment.
more importantly, head position affects perceived vector and scleral show far more than it affects tilt. holding your head slightly elevated, chin not tucked down but not jutted up either, tends to reduce the appearance of inferior scleral show and can make a borderline vector look somewhat less hollow by changing the angle at which shadow falls across the lower lid. guys with genuinely negative vector will still read as negative vector from any angle eventually, this isn't erasing the structural issue, but poor habitual head position, chronic forward head posture specifically, chin jutted down and forward which is extremely common from prolonged phone and screen use, can make an already borderline situation look meaningfully worse than it needs to in everyday presentation.
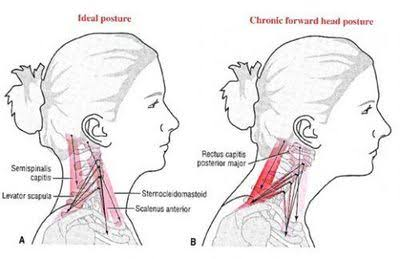
forward head posture specifically
worth calling out on its own since it's likely the single most common postural issue in this entire community given how much time gets spent on phones and screens. chronic forward head posture, where the head sits pushed forward relative to the shoulders rather than stacked directly above them, changes the resting angle of the entire face relative to anyone looking at you, and tends to push the chin down and forward in a way that specifically worsens the appearance of both scleral show and negative vector simultaneously, on top of the general negative effect it has on jawline and neck appearance that's more commonly discussed elsewhere on this site. this is genuinely correctable with consistent conscious effort and, if it's significant, targeted exercises for the deep neck flexors and upper back, though that's more of a general posture topic than something this guide is going to cover in depth.

lighting in real world social contexts
you don't control lighting in most day to day interactions the way you can control it for a photo, but it's worth understanding how different lighting conditions interact with your specific traits so you at least understand what's happening in situations where you do have some influence over it, choosing where to sit at a table, which side of a room to stand on, whether to angle toward or away from a window.
since a lot of this community's actual day to day concern is how they present in photos specifically, not just in person, applying the above deliberately: front facing, soft, even light, head held level to very slightly elevated rather than tucked down, and camera positioned at or slightly above eye level rather than shooting up from below, which is a separate point worth adding here, a low camera angle shooting upward exaggerates nostril visibility and can make UEE and hooding look worse by changing the angle at which the upper lid is being viewed from, while a level or very slightly elevated camera position tends to present the eye area closer to how it actually looks to someone standing across from you at a normal conversational distance and angle.
bottom line for this subsection
none of this changes your actual eye area in any structural sense, and I want that stated clearly rather than implied, given how much of this guide up to this point has been about real structural and semi structural interventions. what this subsection changes is presentation, in person and in photos, and correcting genuinely poor habitual posture specifically is worth doing regardless of your eye area concerns given its broader effect on overall appearance, not just this one area. treat this as a free layer on top of whatever your actual traits are, not a way to disguise or avoid addressing them.
this subsection is short compared to the last several, and deliberately so, because unlike everything else in section 6 up to this point, nothing here is actually changing anything about your eye area. this is entirely about how what you already have gets presented and perceived in real world conditions and in photos, which matters practically even though it's not a structural intervention in any sense.
head position and its effect on perceived tilt and vector
this connects directly back to the Frankfort horizontal plane point made repeatedly since section 3. in everyday interaction, not just in photos, a slightly downward head tilt, chin very mildly tucked rather than jutted forward or held level, tends to present canthal tilt more favorably for most people, since it works with the natural angle of positive tilt rather than flattening it out. this is genuinely a small effect and not a substitute for actual positive tilt if you don't have it, but it's a real, free, zero effort adjustment.
more importantly, head position affects perceived vector and scleral show far more than it affects tilt. holding your head slightly elevated, chin not tucked down but not jutted up either, tends to reduce the appearance of inferior scleral show and can make a borderline vector look somewhat less hollow by changing the angle at which shadow falls across the lower lid. guys with genuinely negative vector will still read as negative vector from any angle eventually, this isn't erasing the structural issue, but poor habitual head position, chronic forward head posture specifically, chin jutted down and forward which is extremely common from prolonged phone and screen use, can make an already borderline situation look meaningfully worse than it needs to in everyday presentation.
forward head posture specifically
worth calling out on its own since it's likely the single most common postural issue in this entire community given how much time gets spent on phones and screens. chronic forward head posture, where the head sits pushed forward relative to the shoulders rather than stacked directly above them, changes the resting angle of the entire face relative to anyone looking at you, and tends to push the chin down and forward in a way that specifically worsens the appearance of both scleral show and negative vector simultaneously, on top of the general negative effect it has on jawline and neck appearance that's more commonly discussed elsewhere on this site. this is genuinely correctable with consistent conscious effort and, if it's significant, targeted exercises for the deep neck flexors and upper back, though that's more of a general posture topic than something this guide is going to cover in depth.
lighting in real world social contexts
you don't control lighting in most day to day interactions the way you can control it for a photo, but it's worth understanding how different lighting conditions interact with your specific traits so you at least understand what's happening in situations where you do have some influence over it, choosing where to sit at a table, which side of a room to stand on, whether to angle toward or away from a window.
- harsh overhead lighting, the kind common in a lot of indoor commercial and office spaces, casts shadow downward and tends to exaggerate any existing under eye hollowing or vector related shadow specifically, making borderline cases look worse than they do in more neutral conditions.
- soft, diffused, front facing light, natural window light being the most common everyday example, minimizes harsh shadow casting generally and tends to be the most flattering and most representative condition for how your eye area actually looks day to day, which is also exactly why this was recommended back in section 5 for self assessment photos specifically.
- side lighting, whether from a window or an artificial source, creates asymmetric shadow and can exaggerate any real asymmetry in tilt, brow height, or vector between your two sides, which is worth knowing if you've ever wondered why you look noticeably different in photos taken in different rooms or at different times of day despite nothing actually changing about your face itself.
since a lot of this community's actual day to day concern is how they present in photos specifically, not just in person, applying the above deliberately: front facing, soft, even light, head held level to very slightly elevated rather than tucked down, and camera positioned at or slightly above eye level rather than shooting up from below, which is a separate point worth adding here, a low camera angle shooting upward exaggerates nostril visibility and can make UEE and hooding look worse by changing the angle at which the upper lid is being viewed from, while a level or very slightly elevated camera position tends to present the eye area closer to how it actually looks to someone standing across from you at a normal conversational distance and angle.
bottom line for this subsection
none of this changes your actual eye area in any structural sense, and I want that stated clearly rather than implied, given how much of this guide up to this point has been about real structural and semi structural interventions. what this subsection changes is presentation, in person and in photos, and correcting genuinely poor habitual posture specifically is worth doing regardless of your eye area concerns given its broader effect on overall appearance, not just this one area. treat this as a free layer on top of whatever your actual traits are, not a way to disguise or avoid addressing them.
6.9 Makeup and Visual Tricks (Softmax)
this subsection covers the pure camouflage and illusion category, techniques that change nothing structurally and don't even claim to, but change how the eye area is perceived through visual trickery alone. worth being upfront that this space, called softmax in the community shorthand your outline already uses, gets a mixed reception on here specifically for guys, some treat it as a legitimate tool, some treat it as something to be quietly done rather than openly discussed. I'm covering it straight, no judgment either way, since it's a real lever regardless of the social baggage around it.
concealer and color correction for the infraorbital area
this is the most commonly used tool in this entire subsection and connects directly back to 6.6 and 6.7, specifically targeting the discoloration component of under eye appearance rather than the structural hollow or bulge itself.

brow makeup and grooming products
connects back to 6.3 and 6.4, using product rather than actual density or growth to change how full and defined the brow appears.

subtle definition around the lash line
bottom line for this subsection
everything here is genuinely reversible, low cost, and low risk, which makes it a reasonable tool to have in the toolkit regardless of where you land on the broader social question of guys using makeup. the honest limitation running through all of it is the same one that showed up with the fake tilt discussion in section 3, none of this survives close inspection, bad lighting, or unfavorable angles the way an actual structural change does, and heavy or poorly blended application specifically in this area tends to be more noticeable than in almost any other part of the face given how thin and mobile the skin is. use it as a finishing layer for specific moments, not a substitute for the structural work covered in the rest of section 6.
this subsection covers the pure camouflage and illusion category, techniques that change nothing structurally and don't even claim to, but change how the eye area is perceived through visual trickery alone. worth being upfront that this space, called softmax in the community shorthand your outline already uses, gets a mixed reception on here specifically for guys, some treat it as a legitimate tool, some treat it as something to be quietly done rather than openly discussed. I'm covering it straight, no judgment either way, since it's a real lever regardless of the social baggage around it.
concealer and color correction for the infraorbital area
this is the most commonly used tool in this entire subsection and connects directly back to 6.6 and 6.7, specifically targeting the discoloration component of under eye appearance rather than the structural hollow or bulge itself.
- color correcting before concealer, dark circles caused by visible blood vessels showing through thin skin, covered in 6.6, often have a blue or purple undertone, which a peach or orange based color corrector neutralizes before concealer goes on top, since orange sits opposite blue on the color wheel and cancels it out visually.
- concealer shade and placement, going one shade lighter than your actual skin tone specifically under the eye, rather than matching exactly, creates a subtle highlighting effect that can make the area look slightly more lifted and less shadowed. placement matters as much as shade, applying in a triangle shape extending slightly below the actual dark area rather than just directly on it blends more naturally and avoids a harsh demarcation line.
- the hard limit here, concealer does nothing for structural vector driven shadow beyond a very superficial level, and heavy application specifically to disguise a genuine structural hollow tends to look worse than a lighter, more honest application, since thick concealer sits in fine lines and creases in this specific thin skin area more visibly than anywhere else on the face, an effect commonly called creasing.
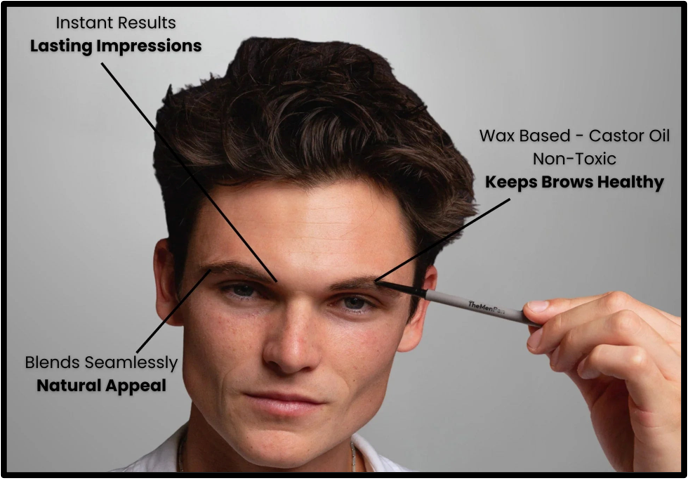
brow makeup and grooming products
connects back to 6.3 and 6.4, using product rather than actual density or growth to change how full and defined the brow appears.
- brow pencil or powder, filling in sparse areas following your natural growth pattern rather than drawing a harsh new shape on top of it, tends to look far more natural specifically for guys, since an obviously drawn on brow reads as more feminine or made up than most guys in this community are going for.
- tinted brow gel, adds both hold and very subtle color deposit, generally the most natural looking and lowest effort option, and connects directly to the shape training point made in 6.3.
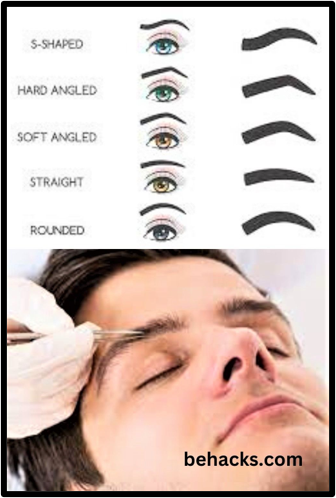
subtle definition around the lash line
- lash line enhancement, a very thin, tight line of brown or dark brown, not black, eyeliner or khol pencil applied specifically along the upper lash line, tucked into the lash roots rather than as a visible line above them, can create the visual effect of thicker natural lashes and slightly more defined eye shape without reading as makeup at all when done subtly and in a matte brown rather than black. this is the technique most commonly used by guys who do use any product in this category at all, specifically because it's the hardest for anyone to consciously detect as makeup.
- the winged extension technique for tilt, briefly touched on back in section 3, extending a thin line very slightly past the actual lateral canthus and angled upward can create a mild illusion of increased positive tilt, but as covered extensively back in section 3, this only holds up from a completely straight on angle and falls apart immediately in profile or 3/4 view, so treat this as a limited, angle dependent tool rather than a real fix.
- under eye area hydration immediately before photos or events, a hydrating, slightly cooling eye patch or gel used briefly beforehand can reduce very temporary puffiness and make skin appear smoother and more light reflective for a few hours, connecting back to the temporary fixes covered in 6.6, genuinely useful for a specific event, not a daily routine necessity.
- strategic facial hair and hairstyle framing, not eye area specific directly, but worth a brief mention since overall facial framing affects how much relative attention and contrast the eye area gets. this is more of a broader styling topic than something this subsection is going to cover in depth.
bottom line for this subsection
everything here is genuinely reversible, low cost, and low risk, which makes it a reasonable tool to have in the toolkit regardless of where you land on the broader social question of guys using makeup. the honest limitation running through all of it is the same one that showed up with the fake tilt discussion in section 3, none of this survives close inspection, bad lighting, or unfavorable angles the way an actual structural change does, and heavy or poorly blended application specifically in this area tends to be more noticeable than in almost any other part of the face given how thin and mobile the skin is. use it as a finishing layer for specific moments, not a substitute for the structural work covered in the rest of section 6.
6.10 Non-Surgical Treatments (High-Level)
this subsection pulls together and expands on the injectable and device based treatments that got mentioned piecemeal across 6.2, 6.3, and 6.6, into one proper reference. think of this as the consolidated non-surgical toolkit for the eye area, with the honest scope and limits of each option laid out clearly rather than scattered across five different subsections.
botulinum toxin (botox and equivalents)
already covered in pieces in 6.2 and 6.3, brought together here properly. botox works by temporarily blocking nerve signal to the targeted muscle, causing it to relax, and its relevant applications in the eye area specifically are:
dermal fillers
covered in depth for the tear trough specifically in 6.6, worth a brief consolidated note here since filler does get used in a couple of other eye adjacent locations too.
lighter mention since these are more skin quality tools connecting back to 6.7 than structural interventions, but worth including at this treatment intensity level since they sit above basic topical skincare.
this subsection pulls together and expands on the injectable and device based treatments that got mentioned piecemeal across 6.2, 6.3, and 6.6, into one proper reference. think of this as the consolidated non-surgical toolkit for the eye area, with the honest scope and limits of each option laid out clearly rather than scattered across five different subsections.
botulinum toxin (botox and equivalents)
already covered in pieces in 6.2 and 6.3, brought together here properly. botox works by temporarily blocking nerve signal to the targeted muscle, causing it to relax, and its relevant applications in the eye area specifically are:
- depressor muscle relaxation for brow lift, targeting procerus, corrugator, and depressor supercilii, allowing frontalis to elevate the brow with less opposition, covered in 6.2 and 6.3. modest but real effect, typically 3 to 4 months duration.
- crow's feet reduction, relaxing the lateral orbicularis oculi to soften the fine lines that form at the outer corner of the eye during expression, a separate application from the brow lift effect above and probably the single most commonly performed botox treatment in the entire face, this specific area included.
- lower lid tightening in select cases, a small, more advanced technique sometimes called a "lower lid flick" or "baby botox" around the lower lid, using a very small dose to produce mild lower lid tightening and a subtle change in eye shape at rest. this is a genuinely more technique sensitive application than the two above, results are inconsistent, and it carries real risk of temporary lower lid weakness or asymmetry if overdone, so injector experience specifically with this application matters even more than usual.
- general limits, botox is temporary, requires ongoing maintenance treatments to sustain any effect, does nothing for skin laxity or structural bone position, and works purely on muscle activity. it's a maintenance tool for guys who want to keep using it, not a one time fix.
dermal fillers
covered in depth for the tear trough specifically in 6.6, worth a brief consolidated note here since filler does get used in a couple of other eye adjacent locations too.
- tear trough filler, the main application, full detail already covered in 6.6.
- temple filler, not eye area tissue directly, but temple hollowing can affect the overall framing and perceived width of the upper eye area, worth a passing mention since it's a commonly paired treatment with tear trough work for guys pursuing a full upper face refresh.
- general limits, same as covered in 6.6, high skill requirement specifically in thin skin areas, temporary requiring reinjection every 9 to 18 months typically, and real risk of a visibly bad outcome in unskilled hands, more so in this area than almost anywhere else on the face.
lighter mention since these are more skin quality tools connecting back to 6.7 than structural interventions, but worth including at this treatment intensity level since they sit above basic topical skincare.
- light chemical peels, using mild acids to encourage skin cell turnover, can improve texture and mild discoloration in the periorbital area, generally needs to be a specifically formulated lower strength product given the thinness of this skin covered in 6.7, standard facial strength peels can cause real irritation or damage if used undiluted this close to the eye.
- microneedling, briefly mentioned in 6.4 for absorption enhancement, also has standalone evidence for modest collagen stimulation and texture improvement in the periorbital area specifically when performed by someone experienced with this particular location, given the increased risk of bruising and the thin skin tolerance already discussed repeatedly in this guide.
- fractional laser resurfacing, a more intensive option than peels or microneedling, working by creating controlled micro injury that stimulates collagen remodeling over the following weeks to months. can produce a meaningful improvement in fine lines and skin texture around the eyes with appropriate downtime, generally more effective than topicals alone for guys with more significant photoaging or fine line concerns specifically, but requires real recovery time and carries higher cost and higher risk than the lighter options above.
- general limits across this category, none of these device based skin quality treatments touch bone position, tendon insertion, or fat pad volume in any meaningful way, they're operating in the same skin quality lane as 6.7, just at a higher intensity and cost tier with correspondingly stronger results for that specific lane.
6.11 Surgical Options (High-Level Overview Only)
I want to open this subsection the same way the intro to this entire guide opened, this is not the starting point, and it's not something everyone reading this needs. every non-surgical option covered from 6.1 through 6.10 should genuinely be exhausted or ruled out as insufficient for your specific case, based on an honest section 5 assessment, before surgery belongs in the conversation at all. this subsection is high level only, as your outline specifies, meaning the goal here is understanding what exists and what it actually addresses, not a how-to or a push toward any specific procedure. surgery carries real cost, real recovery time, real risk of complication, and genuinely irreversible downside if done badly or on the wrong candidate, and none of that should be treated lightly just because a procedure name gets thrown around casually on this site.
blepharoplasty (upper and lower)
the most commonly performed eye area surgery and the one most directly relevant to several traits covered earlier in this guide.


canthoplasty and canthopexy
directly relevant to canthal tilt specifically, and worth understanding as two related but distinct procedures rather than one interchangeable term.
directly relevant to negative orbital vector specifically, one of the few traits repeatedly flagged throughout this guide as having essentially no non-surgical fix.
for cases where the non-surgical brow position tools covered in 6.3 aren't sufficient, meaning cases with either significant soft tissue brow ptosis or where a guy wants a permanent rather than temporary elevation without ongoing botox maintenance.
worth mentioning since it's common in practice, guys pursuing more comprehensive eye area correction often end up combining two or more of the above in a single procedure or a staged sequence, blepharoplasty alongside canthoplasty for instance, since several of these traits interact and addressing one in isolation can sometimes look slightly incomplete or imbalanced without also addressing an adjacent trait from the same cluster covered in your section 5 assessment. this is exactly why an honest, full cluster assessment before ever consulting a surgeon matters so much, walking in already understanding your specific combination of traits, rather than fixating on one procedure name you saw discussed the most on this site, leads to a far more informed conversation with an actual surgeon.
I want to open this subsection the same way the intro to this entire guide opened, this is not the starting point, and it's not something everyone reading this needs. every non-surgical option covered from 6.1 through 6.10 should genuinely be exhausted or ruled out as insufficient for your specific case, based on an honest section 5 assessment, before surgery belongs in the conversation at all. this subsection is high level only, as your outline specifies, meaning the goal here is understanding what exists and what it actually addresses, not a how-to or a push toward any specific procedure. surgery carries real cost, real recovery time, real risk of complication, and genuinely irreversible downside if done badly or on the wrong candidate, and none of that should be treated lightly just because a procedure name gets thrown around casually on this site.
blepharoplasty (upper and lower)
the most commonly performed eye area surgery and the one most directly relevant to several traits covered earlier in this guide.
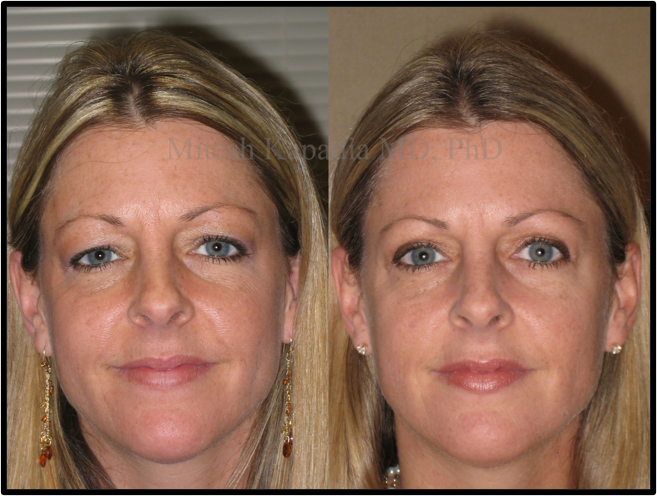
- upper blepharoplasty, removes excess skin and, when indicated, a controlled amount of fat from the upper lid, directly addressing the excess skin and excess fat causes of hooding and high UEE covered in 6.2 that topical and non-surgical options genuinely cannot fix once significant. this is one of the higher satisfaction procedures in facial aesthetic surgery generally, specifically because it's treating a mechanical excess problem with a mechanical removal solution, a relatively direct fix compared to procedures addressing more complex structural relationships.
- lower blepharoplasty, addresses lower lid fat pad bulging covered in section 2 and 6.6, either through fat removal, fat repositioning to fill an adjacent hollow rather than discarding it entirely, or a combination depending on the specific presentation. repositioning rather than pure removal has become the more common modern approach specifically because it can address fat pad bulge and adjacent vector related hollowing in the same procedure, since simply removing fat without addressing volume distribution can sometimes worsen an existing hollow appearance.
- general limits, blepharoplasty does not change canthal tilt, does not change orbital vector, and does not change brow position, it's specifically addressing skin and fat volume within the lid itself, not the bone or tendon relationships covered elsewhere in this guide. guys expecting a blepharoplasty to fix their tilt or vector are going to be disappointed regardless of how well the actual procedure is performed.
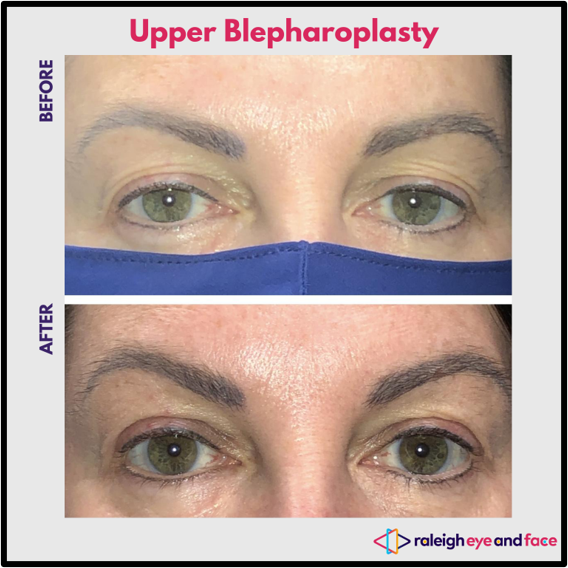
canthoplasty and canthopexy
directly relevant to canthal tilt specifically, and worth understanding as two related but distinct procedures rather than one interchangeable term.
- canthoplasty, involves actually detaching and repositioning the lateral canthal tendon to a new anchor point, genuinely changing the tilt angle itself, this is the procedure capable of a real structural change to a trait otherwise covered as a hard skeletal limit throughout this entire guide.
- canthopexy, a less invasive variant that tightens and slightly repositions the tendon without full detachment and reanchoring, generally used more for correcting mild lower lid laxity or scleral show than for a dramatic tilt change specifically.
- general limits and risk profile, this is a technically demanding procedure with a real risk of visible asymmetry, overcorrection, or an unnatural "operated on" look if performed by someone without extensive specific experience in this exact procedure, more so than most other items on this list. this is also one of the areas where checking a surgeon's specific portfolio and experience with canthoplasty specifically, not oculoplastic surgery generally, matters the most.
directly relevant to negative orbital vector specifically, one of the few traits repeatedly flagged throughout this guide as having essentially no non-surgical fix.
- implants, solid, biocompatible implant material placed along the orbital rim or malar region to physically increase forward bone projection, directly correcting the vector relationship itself rather than camouflaging it the way filler does. this is a more invasive procedure than filler or fat grafting, generally involving direct surgical placement, and a more permanent one, without the recurring maintenance requirement that filler carries.
- general limits, this is a less commonly performed and less commonly discussed procedure than blepharoplasty specifically because it's more invasive for a purely aesthetic indication, and finding a surgeon with genuine specific experience in aesthetic orbital rim augmentation, as opposed to reconstructive cases following trauma, is a real limiting factor for guys actually considering this.
for cases where the non-surgical brow position tools covered in 6.3 aren't sufficient, meaning cases with either significant soft tissue brow ptosis or where a guy wants a permanent rather than temporary elevation without ongoing botox maintenance.
- general approach, various surgical techniques exist, endoscopic approaches with smaller incisions being more common in current practice than older open techniques, working by actually repositioning and securing the brow and forehead soft tissue at a higher position.
- general limits, same as blepharoplasty, this addresses soft tissue position specifically, not the underlying bone ridge projection covered in section 2 and 6.3, a flat brow ridge remains flat regardless of where the soft tissue sitting on top of it gets repositioned to.
worth mentioning since it's common in practice, guys pursuing more comprehensive eye area correction often end up combining two or more of the above in a single procedure or a staged sequence, blepharoplasty alongside canthoplasty for instance, since several of these traits interact and addressing one in isolation can sometimes look slightly incomplete or imbalanced without also addressing an adjacent trait from the same cluster covered in your section 5 assessment. this is exactly why an honest, full cluster assessment before ever consulting a surgeon matters so much, walking in already understanding your specific combination of traits, rather than fixating on one procedure name you saw discussed the most on this site, leads to a far more informed conversation with an actual surgeon.
Sections 1, 2, 3, 4, 5 <- Sections 1, 2, 3, 4, 5 (The first post)
Section 7, 8 ,9 <- Sections 7, 8, 9 (The finale)
Last edited:


