D
Deleted member 77427
Diamond
- Joined
- Jun 14, 2024
- Posts
- 1,498
- Reputation
- 2,480
HOW TO INJECT ANYTHING & EVERYTHING
Please note that I am not a medical professional, all the information presented here is research-based. Before attempting to pin/inject, consult a medical professional. You are solely responsible for your own actions. Not me or anyone else.
BACKGROUND
A while back I had created an "How To Inject" guide, I felt that the guide was incomplete and rather rushed. A few users also pointed mistakes and crucial methods I had left out. So this is a more complete and bigger guide built upon my last guide. Hence, I now present to you the 2nd version on how to inject almost anything (from GLP-1 Agonists, Steroids, Peptides, etc..).
Please do note that this guide is very exhaustive. If you just want to learn how to inject, skip to the "TLDR" section. Make sure to read the "Red Flags" section, it is highly important you know what to do when things go wrong.
INTRODUCTION

A few months ago I had ordered myself some peptides & appetite suppressants, but when they arrived I was utterly confused on what to do and how exactly I was going to inject.
My low IQ brain then found out that I needed a whole list of items and needles that I had to wait a month for, I was stressing out over this and gradually, pinning these compounds seemed so much more difficult for me. Eventually I had everything I needed but ended up running into another obstacle. That obstacle was finding a reliable guide to follow, something perhaps others have tried.
My first idea was to search the forum for a guide, which shockingly there were barely any comprehensive guides on how to inject. Anything I did find was just tailored to something else, I ended up just watching a YouTube video and my cycle was so ineffective.

So after that, I decided to why not create a guide that will have EVERYTHING a person will need to inject, so I spent countless hours creating this guide. It should cover everything in regards to pinning or injecting. It also contains some bonus information that may be useful to you.
WHAT I WILL COVER IN THIS GUIDE
- Injection types & when you should use Each
- Compound categories & their Requirements
- Tier Lists
- A Tier List of Intramuscular Injection Sites
- A Tier List of Subcutaneous Injection Sites
- A List of Items you will Need + Selecting a Needle
- Reconstitution of Peptides
- How to Inject Step by Step
- Intramuscular Injection
- Subcutaneous Injection
- Using Pre-filled Pens
- Z-Track Method
- Air Bubbles + Air-lock Technique
- Reducing PIP
- Rotation Schedule
- Scar Tissue & Lipodystrophy
- Storage & Handling
- Red Flags to Look out For
- Common Mistakes for Newbies
- TLDR
INJECTION TYPES & WHEN TO USE EACH

In this section, I will discuss the two types of injection & how do you know which one is for you? It all comes down to what compound you are using.
Intramuscular injection is where the needle deposits the compound directly into muscle tissue where dense vascularity allows for a fast & efficient absorption into the bloodstream. 
So, when do you use this injection type?
Generally, you will use the intramuscular injection for:
So, when do you use this injection type?
Generally, you will use the intramuscular injection for:
- Any oil-based AAS (ex. vials)
- Water-based suspensions (ex. Winstrol depot)
- Injectable L-Carnitine
- B12
Now subcutaneous is where the needle deposits the compound into the fat layer that is between the skin and muscle. Absorption is slower than IM but this is desirable for many compounds.
When would you use this injection type?
Usually you will use it for:
Note: Some compounds such as HCG & small dose test can go IM or SubQ but SubQ is simpler and less painful for these compounds.
When would you use this injection type?
Usually you will use it for:
- Peptides (ex. CJC-1295)
- GLP-1 agonists (ex. Semaglutide)
- HGH
- HCG
- Insulin
- Melanotan II (MT2)
- Small volume testosterone (TRT-dose protocols)
- Gonadorelin
Note: Some compounds such as HCG & small dose test can go IM or SubQ but SubQ is simpler and less painful for these compounds.
COMPOUND CATEGORIES & THEIR REQUIREMENTS
So moving on, this section will serve for those who may not quite be sure where their compound would fall, so I have created a table for you to ensure you know what you might need.
| Category | Examples | Route | Syringe Type | Extra Info |
|---|---|---|---|---|
| Oil-based AAS | Test E/C/U, Deca, Tren E/A, Mast E/P, EQ, Primo | Intramuscular (IM) | Luer-lock (1 mL or 3 mL) | Make sure to warm your oil pre-injecting for easier flow. |
| Water-based AAS | Test Suspension, Winstrol Depot | Intramuscular (IM) | Luer-lock | Just know that these are known for significant post injection pain (known as PIP) |
| GLP-1 Agonists | Semaglutide (Ozempic/Wegovy), Tirzepatide (Mounjaro/Zepbound), Liraglutide (Saxenda/Victoza), Retatruide | Subcutaneous (SubQ) | Pre-filled pen or an insulin syringe for vials | These usually come with pre-filled pens most of the time |
| HGH | Generic somatropin, Norditropin, Genotropin, Omnitrope | Subcutaneous (SubQ) | Insulin syringe or a pen device | Reconstitute if it is lyophilized but sometimes brands come pre-mixed |
| HCG | Human Chorionic Gonadotropin | Subcutaneous (SubQ) or Intramuscular (IM) | Insulin syringe | Reconstitute with BAC water |
| Peptides | BPC-157, TB-500, CJC-1295, Ipamorelin, GHRP-2/6, Tesamorelin, GHK-Cu, Kisspeptin | Subcutaneous (SubQ) | Insulin syringe | Reconstitute with BAC water |
| Melanotan II | MT2 | Subcutaneous (SubQ) | Insulin syringe | Reconstitute with BAC water |
| Insulin | Humalog, NovoRapid, Lantus, Levemir | Subcutaneous (SubQ) | Insulin syringe or pen | Don't be low IQ with this one, know what you are doing. |
| B12 | Cyanocobalamin, Methylcobalamin | Intramuscular (IM) or Subcutaneous (SubQ) | Luer-lock or insulin syringe | Pretty straightforward water-based injection. |
| L-Carnitine | Injectable L-carnitine | Intramuscular (IM) | Luer-lock | Inject slowly as post injection pain is common here. |
INJECTION SITE TIER LIST FOR INTRAMUSCULAR
TIER 1: HIGHLY RECOMMENDED FOR ALL

This is the Gold standard.
The ventrogluteal site sits in between the gluteus medius & minimus muscles on the lateral hip. Must be pretty big words for you but do not worry. This injection site is the SAFEST in all of nursing literature and it is the preferred adult IM site.
If I had to give a rating out of 10, it would be 8.5/10.
Why is the injection site in tier 1 and highly rated?
Now where the hell is this injection zone?


If you still can't find it, use these steps to accurately locate it.
The ventrogluteal site sits in between the gluteus medius & minimus muscles on the lateral hip. Must be pretty big words for you but do not worry. This injection site is the SAFEST in all of nursing literature and it is the preferred adult IM site.
If I had to give a rating out of 10, it would be 8.5/10.
Why is the injection site in tier 1 and highly rated?
- Thickest and consistently developed muscle in all body types
- There are no major nerves or blood vessels in the site
- The lowest documented infection & complication rate of any IM site
- Accommodates large volumes
- And lastly, it has the lowest post injection pain by most users
Now where the hell is this injection zone?


If you still can't find it, use these steps to accurately locate it.
- Stand with weight on opposite leg or you can lie on your side
- Find the greater trochanter, you can feel it by rotating your leg, it is the bony prominence on the side of your hip
- Place the heels of your opposite palms on this greater trochanter (left hand for right hip & right hand for left hip).
- Point your index finger toward the anterior superior iliac spine (the bony point you can feel at the front of your pelvis)
- Extend your middle finger back toward the top of the hip bone running toward your back (the iliac crest).
- The center of the V formed by your two fingers is the injection site
Why is this great?
How do you locate this?

- Easiest site to see & reach
- Hard to hit any important structures if correctly placed
- It's very fast, by the time you are experienced you can pin in under 30 seconds
- A 1/2" needle will reliably reach the muscle in most body compositions
How do you locate this?
- Identify the bony point at the very top of your shoulder, the acromion process.
- Go 2–3 finger widths directly below the acromion on the lateral head of the deltoid
- The thickest part of the muscle belly is your target, just flex the delt to confirm
- And do not go too low otherwise you'll just set yourself up to hit a nerve.

TIER 2: GOOD ALTERNATIVES

This is the classic "glute injection" that used to be the Gold standard about 8~9 years ago.
It injects in the upper outer quadrant of a buttock.
I'd give this a rating of 5/10.
Why might you want to do this?
But why might you also not want to do this?
It injects in the upper outer quadrant of a buttock.
I'd give this a rating of 5/10.
Why might you want to do this?- A very large muscle
- Handles up to 3 mL
But why might you also not want to do this?- Harder to reach when you are self-injecting
- Sciatic nerve risk
- More subcutaneous fat coverage so you need a longer needle
- It's nothing compared to VG according to clinical recommendations
To find the most appropriate location, expose the buttocks, and imagine dividing each buttock into 4 parts.

The injection is aimed at the upper, outer quarter of the buttock towards the hip bone, so like where a pants pocket would be.
TIER 3: NOT RECOMMENDED
This injection site is avoided generally by most experienced users and for good reasons.

- It has a significantly higher PIP than VG or delts
- Commonly reported as the most painful site
- SubQ leak is very common
- Lateral thigh has more nerve branches running through
- Hitting a nerve means involuntary muscle spasms, sharp shooting pain & leaves lasting soreness
- Some users report limping for days after quad injections

- There are also multiple large blood vessels in the area

To find the best and most appropriate location, look at the top of your thigh and imagine dividing it into a 3x3 grid.
The injection will go into the outer middle third as shown in the image.
With VG & delts available, you really shouldn't have a practical reason to use quads, both alternatives are easier, safer & less painful.
Some might try to resort to other sites I still don't know why you would do that . But for biceps, triceps, calves, lats, traps or pecs
. But for biceps, triceps, calves, lats, traps or pecs- Wouldn't recommend at all for pinning
- Small muscles
- High nerve density
- Awkward angles
- Close to vital structures
Now my advice would be, if you are a newbie to pinning/injecting. Start with delts as you move to a intermediate stage, go for ventrogluteal next. You will need only these two sites ever for injecting.INJECTION SITE TIER LIST FOR SUBCUTANEOUS
Now subcutaneous injection sites are generally simpler as you are targeting the fat layer which is more merciful and has fewer structures to worry about.
| Site | Notes |
|---|---|
| Lower abdomen | Most common SubQ site. Stay at least 2 inches away from the navel area in every direction. Alternate left and right sides. |
| Flanks / love-handles | Excellent alternative because it's easy to pinch & reach |
| Upper-outer thigh | Works well for most people and usually leaner individuals have enough fat here |
| Back of upper arm | Usable but slightly awkward to pinch and inject solo. |

ESSENTIAL SUPPLIES

In this section, I will provide you with what you will need, most of the items work for both IM & SubQ injection but the syringes and needles will be different so be sure to read carefully.
| Item | Purpose |
|---|---|
| Drawing needles (18G x 1~1.5") | To pull oil/liquid from vials quickly. Swap to injection needle before pinning |
| Bacteriostatic water (BAC water) | For reconstituting lyophilized peptides, HCG, HGH |
| Alcohol swabs (70% isopropyl alcohol) | To sterilize vial tops and injection sites |
| Sharps container | Safe needle disposal, don't be that guy throwing it in the regular trash. |
| Gauze pads or cotton balls | Post-injection pressure |
| Band-aids | Completely optional just for extra measures. |
| Item | Purpose |
|---|---|
| Luer-lock syringes (1 mL or 3mL) | Needles screw on securely and won't pop off under pressure |
| Item | Purpose |
|---|---|
| Insulin syringes (0.5mL or 1 mL, typically 29-31G x 1/2") | Needle is permanently attached |
Now for needles, the gauge & length are very specific so it is important that you read CAREFULLY and decide which one is best for your case.
| Use Case | Gauge | Length | Quick Notes |
|---|---|---|---|
| Drawing from vial | 18G | 1~1.5" | This is only for drawing never inject with this needle. Thick bore pulls oil quickly. |
| IM Delts for lean to moderate body fat percent | 29G | 1/2" | 1/2" reliably reaches deltoid muscle in most body types. Very painless. |
| IM Delts for higher body fat percent | 27~29G | 1/2~1" | If you carry significant fat over the deltoid, consider 1" to ensure IM is effective. |
| IM VG for the lean | 29G | 1/2" | Works effectively for lean individuals but might be shallow IM in others. |
| IM VG for moderate body fat percent | 27~29G | 1" | 1" ensures the needle reaches muscle through the fat layer. |
| IM VG for higher body fat percent | 27G | 1~1.5" | Higher body fat over the hip requires a longer needle. |
| IM VG for Dorsogluteal | 25-27G | 1~1.5" | More subcutaneous fat coverage here in most people. |
| SubQ for all compounds | 29-31G | 1/2" or 5/16" | Standard insulin syringe |
| SubQ for small volume oil (TRT) | 29G | 1/2" | For 0.5ml or less testosterone SubQ protocols |

- 29G 1/2" is the go to for most users who are pinning in delts IM and even VG. The oil takes longer to push through but the painless and limited tissue damage make up for it immensely.
- 27G is very versatile, it flows faster than 29G but is not as comfortable as 29G. Think of it like the balance between 29G and 25G.
- 25G 1" is still an ok option especially for large volumes or viscous oils but it has more downsides than 29G.
- 23G & below for injection is outdated. You don't need a needle this thick and it should be only for drawing.
- But regardless of any gauge, any needle causes scar tissue with repeated use at the same site.
Note
Concerning Insulin Syringes
Insulin syringes measure in units (IU) not ML but conversion is fairly easy.
100-unit syringe is 1mL; each small line is 1 unit = 0.01mL
50-unit syringe is 0.5mL; each small line is 1 unit - 0.01mL
30-unit syringe is 0.3mL; each small line = 1 unit = 0.01mL
You can also use an online insulin unit to mL calculator.


RECONSTITUTION

Most peptides, HCG, some HGH, MT-2 and compounded Semaglutide and Tirzepatide are relevant to reconstitution. They come as small white lyophilized powder cake/puck inside a sterile vial. They have to be mixed with a liquid (reconstituted) before injecting.
You will need to assemble the following:

1. Clean your workspace and wash your hands properly
2. Remove the caps from the peptide vial and the BAC water vial
3. Sanitize the rubber stoppers on both vials with alcohol wipes and let them air dry
4. Draw the desired amount of BAC water into the syringe
5. Insert the needle into the peptide vial at a slight angle so the tip touches the glass wall, then slowly push the plunger so the water trickles down the side of the vial onto the powder. Do not spray directly onto the powder.
6. Gently swirl the vial until the powder has dissolved. DO NOT shake.
7. Store the peptide in the refrigerator.
VIDEO FORM OF STEPS
- Vial of lyophilized powder
- BAC water
- Sterile water preserved w/ 0.9% benzyl alcohol which prevents bacterial growth and allows use over weeks
- Plain sterile water has no preservatives, if used, then the reconstituted vial must be used within 24hrs and cannot be stored.
- Insulin syringe (1 mL / 100-unit)
- Alcohol swabs

1. Clean your workspace and wash your hands properly
2. Remove the caps from the peptide vial and the BAC water vial
3. Sanitize the rubber stoppers on both vials with alcohol wipes and let them air dry
4. Draw the desired amount of BAC water into the syringe
5. Insert the needle into the peptide vial at a slight angle so the tip touches the glass wall, then slowly push the plunger so the water trickles down the side of the vial onto the powder. Do not spray directly onto the powder.
6. Gently swirl the vial until the powder has dissolved. DO NOT shake.
7. Store the peptide in the refrigerator.
VIDEO FORM OF STEPSSome useful dosing math and universal formulas that can help you:
Concentration = Total compound in vial (mcg) / BAC Water added (mL)
Dose in mL = Desired dose (mcg) / Concentration (mcg/mL)
Dose in units = Dose in mL x 100 (on a 100 unit syringe)
- 5 mg = 5000 mcg
- Concentration = 5000 / 2 = 2500mcg per mL
- For a 250 mcg dose: 250 / 2500 = 0.10 mL = 10 units on insulin syringe
Now before you continue on to the next section, just know that the BAC water shelf life is around 28 days, even though the benzyl alcohol preservative keeps it sterile for a much longer time. Store at room temperature or refrigerated. Discard it if you see cloudiness or particulates.
HOW TO DO INTRAMUSCULAR INJECTION
1. First and foremost, find yourself a well-lit environment, and remember to inject at the same time of day each time when you do your injection.
Begin by assembling your supplies and washing your hands properly.
2. Warm the oil (if you can). Hold the vial between your palms for about 2 to 3 minutes or put it in a cup of warm (make sure it isn't hot) water. Warmed oil is thinner, flows through small-gauge needles more easily & causes less post injection pain. This step matters even more if you are using 29G needles.
3. We will now prepare the injection dose. Start by carefully taking the cap off the vial, then clean the rubber stopper with an alcohol swab as shown here. Let it dry.

4. Attach the drawing needle (18G) to a luer-lock syringe
5. Draw air into the syringe equal to your desired dose volume
6. Insert the needle through the vial stopper, inject the air (which will equalize pressure inside the vial and makes drawing a ton easier)

7. Push the plunger of the syringe down and push the air from the syringe all the way into the vial like so.

8. Now, keeping the needle in the vial, turn the vial upside down. Then position the needle so the liquid is covering the tip of the needle. You might need to pull the needle out slightly to make sure the tip is completely covered by the liquid.
9. We're nearly there. Keep the vial upside down, then slowly pull back on the plunger to fill the syringe with the oil until the desired amount is obtained.

10. Tap the syringe barrel to float any air bubbles to the top (near the needle), and then gently push the plunger to expel them back into the vial.
11. Make sure to double-check you have the desired amount before injecting.

12. Withdraw your needle from the vial
13. Remove the drawing needle & attach your fresh injection needle (for ex. 29G 1/2")
* The swap is highly important pulling through the rubber stopper dulls the needle tip and can core tiny rubber particles.
Now for the fun part, injecting your needle.1. Clean the injection site with a new alcohol swab; let the skin air dry (do not pat or blow on skin to dry it)

2. Pull the skin tight around the injection site.
3. Insert the needle into the muscle at a 90-degree angle with one quick and strong motion.
4. Once the needle is inserted into the muscle, keep the skin pulled tight. Pull the syringe back; this is called aspirating. If blood fills into the syringe, remove the needle and pick a new location. It means you've hit a vein or blood vessel. If you decide to inject for whatever reason, you will fall victim to the "Tren Cough." Now, with the right location, firmly push the plunger down slowly and completely to finish the injection.

You may feel some burning or pressure as the steroid enters the muscle, which is normal
5. After the steroid is injected, pull the syringe and needle out of your skin at the SAME ANGLE as you injected. Let go of your skin once the needle is out. Dispose of the syringe and needle properly.
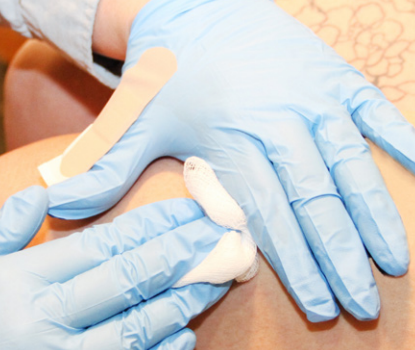
6. Gently press with sterile gauze on the injection site. Hold pressure on the site until there is no bleeding.

Post Injection, expect the following.
- Small drop of blood at injection site is normal
- Mild soreness at site for 24-72 hrs is normal, especially in a "virgin muscle" (a site you have taken a hymen of
, meaning have not injected there before).The hymen post injection pain goes away significantly after the first 2-3 injections in that site.- A small firm lump that will go away after several days means a minor SubQ leak, it isn't dangerous and you won't need to worry about it.
HOW TO DO SUBCUTANEOUS INJECTION
Subcutaneous injection as compared to intramuscular is so much easier, within this section I will describe the procedure complemented with visuals.
Before we dose, we should ensure the vial pressure is optimal.
Here is how we will do it.
1. Wash your hands and clean your injection area
2. Gather all of your materials, like your reconstituted peptide, injection syringe, and alcohol wipes.
3. Decide where you want to inject by heading over to the "Where to Inject" section.
4. Clean the injection site with an alcohol wipe and allow it to air dry completely
5. Pinch a small fold of skin at the desired location
6. Insert the needle at a 45 degree angle if you are lean, or 90 degrees if you have more body fat in that area
7. Inject slowly and steadily
8. Remove the needle and dispose of it
VIDEO DEMONSTRATION
Here is how we will do it.
- Fill a syringe halfway with air
- Insert the needle into the vial without pushing or pulling the plunger
- Observe, and it should remain neutral
- If the plunger moves on its own, allow the vial to equalize before drawing from the vial.
1. Wash your hands and clean your injection area
2. Gather all of your materials, like your reconstituted peptide, injection syringe, and alcohol wipes.
3. Decide where you want to inject by heading over to the "Where to Inject" section.
4. Clean the injection site with an alcohol wipe and allow it to air dry completely
5. Pinch a small fold of skin at the desired location
6. Insert the needle at a 45 degree angle if you are lean, or 90 degrees if you have more body fat in that area
7. Inject slowly and steadily
8. Remove the needle and dispose of it
VIDEO DEMONSTRATION
PRE-FILLED PENS
Many GLP-1 receptor agonists & some HGH/insulin products come in pre-filled auto inject pens with built in dose dials.
Here's how one would go about injecting pre-filled pens.
- If stored in the fridge, remove the pen 15 to 30 mins prior to injecting so that it reaches room temperature (cold solution can sting).
- Wash your hands.
- Attach a new pen needle, twist or click as per the pen's design. Pen needles are single use and come in 30-32G (very thin and short). Do not reuse pen needles.
- Remove both the outer and inner needle caps.
- Prime the pen by dialing to the smallest increment (often 2 units) or to the specific "prime" mark.
- Hold the pen with the needle pointing up and press the injection button until a droplet of liquid appears at the tip. This confirms the pen is flowing and gets rid of air. You might need to prime 2-3 times for a brand new pen.
- Dial your prescribed dose using the dose selector.
- Swab the injection site with alcohol and let it air dry.
- Pinch skin at the chosen site, insert the needle at 90 degrees.
- Press the injection button all the way down with your thumb.
- Hold the pen in place for at least 10 seconds after the button is fully depressed. This is important because the pen needs time to deliver the full dose. Some pens have a confirmation click or a counter that reaches "0."
- Withdraw the needle.
- Remove and dispose of the pen needle in a sharps container. Store the pen without a needle attached (leaving a needle on can cause air entry or leakage).
- Replace the pen cap and return to the fridge (or store at room temp if in use, see the Storage section).
Now you might be using one of the more popular pens or a pen straight out of India, so here's a quick breakdown for the brands that you will most likely encounter.
| Company | Compound | How Many Times? | Starting Dose | Titrating the Dose | Shelf Life |
|---|---|---|---|---|---|
| Ozempic | Semaglutide | Once weekly | 0.25 mg for 4 weeks | 0.25 -> 0.5 --> 1.0 -> 2.0 mg | 56 days (room temp or fridge) |
| Wegovy | Semaglutide (higher doses) | Once weekly | 0.25 mg for 4 weeks | 0.25 -> 0.5 -> 1.0 -> 1.7 -> 2.4 mg | 28 days (room temp or fridge) |
| Mounjaro / Zepbound | Tirzepatide | Once weekly | 2.5 mg for 4 weeks | 2.5 -> 5 -> 7.5 -> 10 -> 12.5 -> 15 mg | 21 days at room temp (single-dose pens) |
| Saxenda | Liraglutide | Once daily | 0.6 mg for 1 week | 0.6 -> 1.2 -> 1.8 -> 2.4 -> 3.0 mg | 30 days (room temp or fridge) |
| Victoza | Liraglutide (diabetes) | Once daily | 0.6 mg for 1 week | 0.6 -> 1.2 -> 1.8 mg | 30 days (room temp or fridge) |
Always check the patient leaflet that comes inside the pen box for exact instructions because designs do vary between brands and manufacturers. If your pen looks even slightly different to what you expected, read the leaflet before jabbing yourself.
When it comes to SubQ compounds, timing actually matters so much more than most people realize.
| Compound | Timing Notes |
|---|---|
| BPC-157 | I would recommend injecting as close to the injury site as possible for localized healing. Abdomen for systemic. Usually 250-500 mcg, 1-2x daily. |
| TB-500 | Systemic compound so it doesn't really matter where you pin SubQ. Loading phase then maintenance. |
| CJC-1295 / Ipamorelin | Pin before bed or morning on an EMPTY stomach. GH-releasing peptides are blunted by food especially carbs and fats. Fast ~1 hour before and ~30 min after. I have personally felt it is way more effective. |
| GHRP-2 / GHRP-6 | Same fasting rules as above. GHRP-6 will make you hungry enough to eat your pillow so be warned. |
| HGH | Most people inject first thing in the morning or before bed. Some split AM/PM doses. I inject fasted for best GH pulse. |
| HCG | Timing is not critical. Usually every other day or 2-3x per week. |
| GLP-1 Agonists | Same day each week (Semaglutide, Tirzepatide) or same time daily (Liraglutide). No food timing needed. Personally I do it at the same time and it feels more efficient. |
| MT-II | Best injected before bed so you can sleep through any nausea. Start at a very low dose (100-250 mcg) to see how you react. |
| Insulin | Timing relative to meals is CRITICAL and depends on the type (rapid-acting vs long-acting). Follow your protocol exactly. Have fast-acting sugar nearby at ALL times. |
Z-TRACK METHOD

This is a technique that prevents your injected oil from tracking back through the needle path and leaking into the subcutaneous fat layer. If you have ever had a random lump or welt form near your injection site after pinning, that was probably a SubQ leak. The Z-Track method prevents this.
Think of it like this- you are creating a zigzag path through your tissue so the oil has no straight channel to leak back out of.
Step by Step:
That offset path effectively seals the injection channel so oil cannot track back to the surface.
Step by Step:
- After you have prepped and have the loaded syringe ready, use your non-dominant hand to pull the skin and underlying tissue to one side about 1 inch (2-3 cm) laterally from the injection site
- While holding the skin displaced, insert the needle at 90 degrees and inject normally
- Inject slowly. Wait 10 seconds after the plunger is fully depressed.
- Withdraw the needle while still holding the skin to the side
- Now release the skin, it slides back to its natural position, creating a zigzag (like a Z-shaped) path through the tissue layers
That offset path effectively seals the injection channel so oil cannot track back to the surface.
This technique is especially useful for VG and glute injections when you are pushing larger volumes (1-3 mL). For small delt injections of like 0.5 mL, it is optional but still a nice habit to build.

From personal experience, the first time I tried this I felt like I was playing twister with myself but after a while I geniunely got used to it and the difference in leakage is so clear.
AIR BUBBLES & AIR-LOCK

I know a lot of you newbies are going to panic when you see a tiny air bubble in your syringe. So let me address this before you have a heart attack
.No.
A small air bubble in an IM or SubQ syringe is not dangerous. The amount of air needed to actually cause an air embolism is estimated to be around 50+ mL of air injected directly into a vein. Your syringe holds 1–3 mL total and you are not injecting into a vein. So relax.
That said, you should still minimize air bubbles because:
To remove them- Tap the syringe with the needle pointing up, let the bubbles rise to the top, gently push the plunger until a tiny droplet appears at the needle tip. Done.
A small air bubble in an IM or SubQ syringe is not dangerous. The amount of air needed to actually cause an air embolism is estimated to be around 50+ mL of air injected directly into a vein. Your syringe holds 1–3 mL total and you are not injecting into a vein. So relax.
That said, you should still minimize air bubbles because:
- They take up space in the syringe which reduces dose accuracy
- Large bubbles can cause the plunger to "jump" during injection which feels weird
To remove them- Tap the syringe with the needle pointing up, let the bubbles rise to the top, gently push the plunger until a tiny droplet appears at the needle tip. Done.
Now here is where it gets interesting. There is actually a technique where you deliberately use a small air bubble to your advantage. We already covered this in one of the other sections partially.
The air-lock technique uses a tiny air bubble to improve efficiency and reduce leakage. Here's how it works
What this does:
It's simple, harmless and ensures you are not wasting compound. Combine this with the Z-Track method and you have basically zero leakage.
- After drawing your dose of oil, pull back the plunger slightly to draw in a small amount of air (about 0.1 mL, just a small bubble)
- When you inject, the syringe is held needle-down. The air bubble rises to the plunger end.
- As you push the plunger down, the oil gets injected first and the air bubble is the last thing pushed through the needle
What this does:
- Pushes all remaining oil out of the needle dead space so you actually get your full measured dose (otherwise a tiny amount of oil stays trapped in the needle)
- The small air pocket also acts as a "plug" that helps seal the injection track, similar to the Z-Track concept

It's simple, harmless and ensures you are not wasting compound. Combine this with the Z-Track method and you have basically zero leakage.
REDUCING PIP (POST INJECTION PAIN)

PIP (stands for Post Injection Pain) is the soreness you feel at the injection site after pinning. Some PIP is completely normal, especially for virgin muscle (which just means in other words, you took your muscle's hymen). But there is a lot you can do to reduce it. So if you are sitting here wondering why your delt feels like someone punched it, this section is for you.
| Tip | Why? |
|---|---|
| Use 27-29G needles | Smaller gauge = less tissue trauma = less pain. This single change will transform your pinning experience. |
| Warm the oil before injecting | Thins the carrier oil so it flows more easily through thin needles and causes less pressure on tissue. |
| Inject slowly | Allows the tissue to gradually accommodate the fluid. Rushing tears muscle fibers and that is where the nasty PIP comes from. |
| Always swap drawing and injection needles | Drawing through rubber dulls the tip. A factory-sharp needle glides in, a dulled one tears. You can literally feel the difference. |
| Let alcohol dry completely | Wet alcohol dragged into subcutaneous or muscle tissue causes a burning and stinging sensation. Wait a full 30 seconds after swabbing. |
| Relax the target muscle | Injecting into a flexed or tensed muscle dramatically increases pain and PIP. Let the arm hang loose for delts. Shift weight for VG. |
| Use the Z-Track method | Prevents SubQ leak which causes those surface lumps and prolonged soreness near the injection site. |
| Pin VG or delts | These two sites consistently produce the least PIP compared to quads, glutes, etc. |
| Rotate injection sites | Reduces cumulative tissue trauma at any single site. More on this in the next section. |
| Avoid high-concentration brews | Compounds brewed at very high mg/mL like "Test 400" require more solvents (guaiacol, ethyl oleate, high benzyl alcohol). These solvents irritate tissue and cause brutal PIP. |
| Accept virgin muscle PIP | The first 2-3 injections in any new site WILL be sore. This is your body's normal response. It gets dramatically better after a few pins. Do not give up on a site because of first-time soreness. |
If you do all of the above and you are still getting horrible PIP, the issue is most likely the compound itself. High-concentration blends and certain compounds like Testosterone Propionate and Winstrol Depot are just known for being painful. That is not a you problem, that's a compound problem. When I first started pinning I was using 25G & my delt was sore for 3 days around the time when I wrote the first version of the guide. When a user pointed out to me the reason why it was sore and recommended to use 29G. I made the switch and it was like the PIP disappeared.
ROTATION SCHEDULES

If you pin the same site every single time, you are going to build up scar tissue and make your life harder down the line. Rotation is not optional, it is essential. Just think of it like a schedule so each site gets proper rest before you use it again.
Me personally I run IM Rotation 2x week since it works perfectly for my cycle but you do you.
If you are pinning twice a week (like most people running Test E or Test C), here is a clean 4-site rotation that gives each site 2 full weeks of rest.
| Pin # | Site |
|---|---|
| 1 | Left Deltoid |
| 2 | Right Deltoid |
| 3 | Left Ventrogluteal |
| 4 | Right Ventrogluteal |
| 5 | Repeat from Pin 1 |
Simple. 4 sites is all you need for twice per week. Each muscle gets plenty of recovery time.
If you are running short esters like Test Prop, Tren Ace, or anything that requires ED or EOD pinning, you need more sites. Here's a 6-site rotation.
| Pin # | Site |
|---|---|
| 1 | Left Deltoid |
| 2 | Right Deltoid |
| 3 | Left Ventrogluteal |
| 4 | Right Ventrogluteal |
| 5 | Left Dorsogluteal (optional) |
| 6 | Right Dorsogluteal (optional) |
| 7 | Repeat from Pin 1 |
With EOD pinning and 6 sites, each individual site gets roughly 1.5 to 2 weeks of rest which is enough to prevent scar tissue buildup. If you only want to use 4 sites (delts and VG), that still works for EOD but the rest periods are shorter.
For daily SubQ injections like peptides, HGH, or insulin, rotate through these zones. Keep each injection at least 1 inch away from any recent injection point within the same zone.
| Day | Site |
|---|---|
| 1 | Left abdomen |
| 2 | Right abdomen |
| 3 | Left flank |
| 4 | Right flank |
| 5 | Left upper-outer thigh |
| 6 | Right upper-outer thigh |
| 7 | Repeat from Day 1 |
If you want to keep things dead simple, just alternate left and right sides of the abdomen each day. That alone works for most daily peptide users.
For weekly GLP-1 injections like Semaglutide or Tirzepatide, just pick a different spot each week from the approved areas:
- Abdomen (left side one week, right side next)
- Thighs (left and right, alternating)
- Back of upper arms (left and right, alternating)
SCAR TISSUE & LIPODYSTROPHY

This is the section that people ignore until it becomes a problem. Please don't be that person. Understanding scar tissue and lipodystrophy now will save you headaches later.
What is it?
Every time a needle punctures muscle tissue, your body repairs that tiny wound with fibrous tissue. Over time, if you keep pinning the same exact spot, that fibrous tissue builds up into what we call scar tissue.
Why should you care?
Important- Any gauge needle causes scar tissue with repeated use at the same site. Yes, even insulin syringes. Even 31G. The gauge affects how fast scar tissue builds up (thicker needles = faster buildup), but no gauge is immune to this. This is why rotation is your best defense.
Prevention
If you follow the 4-6 site rotation schedules listed above, scar tissue will never become a real issue for you.
Every time a needle punctures muscle tissue, your body repairs that tiny wound with fibrous tissue. Over time, if you keep pinning the same exact spot, that fibrous tissue builds up into what we call scar tissue.
Why should you care?
- Makes future injections in that spot more difficult and more painful
- Reduces absorption of the compound because the scar tissue has poor blood supply
- Can create hard lumps under the skin
- Once scar tissue forms, it does not go away easily
Important- Any gauge needle causes scar tissue with repeated use at the same site. Yes, even insulin syringes. Even 31G. The gauge affects how fast scar tissue builds up (thicker needles = faster buildup), but no gauge is immune to this. This is why rotation is your best defense.
Prevention
- Rotate sites consistently (see the Rotation schedules section)
- Use the thinnest practical needle gauge (less tissue damage per individual injection)
- Don't re-inject into a site that is still sore from a previous pin
- Allow at least 1-2 weeks between injections at the same site
If you follow the 4-6 site rotation schedules listed above, scar tissue will never become a real issue for you.
What is it?
Repeated SubQ injections in the same spot can cause visible changes in the fat layer beneath your skin. There are two types...
This is most commonly seen in diabetics who inject insulin in the same spot for months or years. But it can happen to anyone doing daily SubQ injections (peptide users, HGH users, etc.) if you are lazy with rotation.
Repeated SubQ injections in the same spot can cause visible changes in the fat layer beneath your skin. There are two types...
- Lipohypertrophy- The fat tissue at that spot thickens and hardens, creating raised lumps. This is the more common one.
- Lipoatrophy- The fat tissue wastes away, creating dents or depressions. Less common with modern compounds but still possible.
This is most commonly seen in diabetics who inject insulin in the same spot for months or years. But it can happen to anyone doing daily SubQ injections (peptide users, HGH users, etc.) if you are lazy with rotation.
Lipodystrophy does not just look bad. It actually impairs absorption of whatever you are injecting. So your dose becomes less effective in those areas, which means you are literally wasting your money.
Prevention
- Rotate SubQ sites consistently
- Keep each injection at least 1 inch away from any recent injection point
- If you notice any lumps or texture changes at a site, stop using that area and let it recover
STORAGE & HANDLING

Storing your compounds incorrectly is one of the easiest ways to waste your money and potentially harm yourself. This table covers how to store basically everything you might encounter. Unfortunately I have barely enough hiding experience to tell how to hide stuff so I am not going to talk about that. Just know if you are hiding anything you fulfill these conditions in the chart.
| Compound | Unopened Storage | In-Use Storage | Notes |
|---|---|---|---|
| Oil-based AAS (sealed vials) | Room temperature, away from light and heat | Room temperature | Stable for years. Check the expiration on the label. |
| Reconstituted peptides (with BAC water) | N/A | Refrigerator (2-8°C / 36-46°F) | Use within 4-6 weeks. NEVER freeze reconstituted peptides. |
| Unreconstituted peptides (powder) | Refrigerator (ideal) or freezer for long-term | N/A | Stable for months in the fridge and years frozen. Freeze-drying makes them very durable. |
| BAC water | Room temperature | Room temperature or fridge | Use within 28 days of first puncture per USP guidelines. |
| Ozempic pens (unused) | Refrigerator. Do not freeze. | Room temp or fridge | 56 days from first use |
| Wegovy pens (unused) | Refrigerator. Do not freeze. | Room temp or fridge | 28 days from first use |
| Mounjaro / Zepbound pens (unused) | Refrigerator. Do not freeze. | Room temp (keep under 86°F / 30°C) | 21 days at room temp. Single-dose pens. |
| Saxenda / Victoza pens (unused) | Refrigerator. Do not freeze. | Room temp or fridge | 30 days from first use |
| HGH (reconstituted) | N/A | Refrigerator | 4-6 weeks with BAC water. Much shorter with plain sterile water. |
| HCG (reconstituted) | N/A | Refrigerator | 30-60 days with BAC water. 24 hours with sterile water. |
| Insulin (unopened) | Refrigerator | Room temperature | 28 days at room temp once in use. Check your specific brand. |
| MT-II (reconstituted) | N/A | Refrigerator | 4-6 weeks with BAC water |
Golden rules of storage:- Never expose any injectable to extreme heat (like your car in summer). Heat degrades peptides rapidly and can alter oil-based compounds.
- Never freeze reconstituted peptides or pre-filled pens. Freezing destroys the compound structure and can crack the delivery device.
- Never store anything in direct sunlight. Keep your compounds in a drawer, cabinet, or fridge.
Don't learn the hard way like I did when I accidentally left my CJC-1295 at room temperature, it went cloudy 4 days after that incident. Pure waste of money.
RED FLAGS

This section is not optional reading. I don't care if you skipped everything else and went straight to the TLDR, at least read this. It's my responsibility to inform you what to do & I am not trying to make anyone fear monger but take pre-cautions. Most injection complications are 100% treatable if you catch them early but they can spiral real fast if you ignore them and hope they go away.
| Symptoms | What It Could Be | What to Do |
|---|---|---|
| Redness, swelling, warmth at the site that keeps getting WORSE after 48-72 hours | Developing infection or abscess | See a doctor. You will probably need antibiotics. |
| Fever and/or chills after injecting | Systemic infection | Get to a doctor as soon as possible. Do not sleep on this. |
| Pus or any kind of discharge from the injection site | Abscess has formed | Doctor. It will likely need to be drained and you will need antibiotics. |
| A hard painful lump that will not go away after 2 weeks | Encapsulated oil, granuloma, or deep scar tissue | Get it checked out by a doctor. |
| Numbness, tingling, or a sharp shooting/electric pain DURING the injection | You just touched a nerve | Pull the needle out immediately. Do not inject. Move to a different spot. Temporary numbness usually goes away on its own. If it persists for days then see a doctor. |
| Hives, face or throat swelling, difficulty breathing | Anaphylaxis (severe allergic reaction) | Call emergency services asap (911 / 999 / 112). This can kill you. |
| Sudden cough, tightness in your chest, or a metallic taste right after an IM oil injection | Pulmonary oil microembolism, a tiny bit of oil got into a blood vessel and reached your lungs | Sit down, stay calm, breathe. This almost always passes within 1-5 minutes. Tren is notorious for this. If it does not pass after 10 minutes or gets worse then get medical help. |
| Insulin users: Dizziness, sweating, shaking, confusion, rapid heartbeat, blurry vision | Hypoglycemia, your blood sugar just dropped dangerously low | Eat or drink fast-acting sugar RIGHT NOW (glucose tablets, juice, candy, regular soda). If you or the person passes out, call emergency services immediately. This is life-threatening. |
When in doubt, go see a doctor. No one at the ER is going to judge you. They have seen everything before. Your ego is not worth losing a limb or worse. Infections from bad injection technique can become life-threatening if left untreated. Do not be that guy who waits until his arm is the size of a watermelon to go get help.
COMMON MISTAKES

I have seen some truly horrifying injection practices on this forum and on the internet. Please read through this entire list so you do not reincarnate. These are the things that will either hurt you, waste your compound, or give you an infection that you did not want.
| Mistake | Why It's a Problem | The Fix |
|---|---|---|
| Reusing needles | Dulled tip, contaminated, dramatically increased infection risk. Even one reuse significantly degrades the needle. | Fresh needle every single time. They cost pennies. |
| Not swapping draw and pin needles | Drawing through rubber dulls the tip and can carry microscopic rubber particles into your muscle. | Always draw with 18G, then swap to a fresh injection needle before pinning. |
| Shaking reconstituted peptides | Creates foam and shearing forces that denature (destroy) delicate peptide chains. You are literally turning your expensive peptide into garbage. | Always gently swirl. Or just let the vial sit and dissolve on its own. |
| Spraying BAC water directly onto peptide powder | The force of the water stream can damage the peptide structure. | Aim the needle at the glass wall and let water trickle down gently onto the powder. |
| Using quads as a primary IM site | High PIP, nerve risk, SubQ leak, unnecessary pain. | Use VG and delts. Superior in every measurable way. |
| Injecting too fast | Causes micro-tears in muscle tissue and dramatically increases PIP. Also increases chance of SubQ leak. | Slow and steady. 30-60 seconds per mL with 29G. It is not a race. |
| Not letting alcohol dry before pinning | Alcohol dragged into tissue causes burning and stinging. | Wait a full 30 seconds after swabbing. Let it air dry. |
| Skipping hand washing | Your hands touch the needle hub, syringe, and skin. Bacteria transfer directly to everything. | Wash hands before every single injection. Non-negotiable. |
| Storing reconstituted peptides at room temp | Peptides degrade rapidly without refrigeration. That expensive vial becomes useless within days. | Always refrigerate reconstituted peptides immediately after mixing. |
| Recapping needles after use | High risk of accidental needlestick injury. | Go directly from injection into the sharps container. Never recap. |
| Sharing needles or multi-dose vials | Risk of transmitting bloodborne pathogens (HIV, Hepatitis B and C). | Never share any injection equipment with anyone. Ever. |
| Not rotating injection sites | Leads to scar tissue buildup (IM) or lipodystrophy (SubQ), both of which impair absorption and cause cosmetic issues. | Follow a consistent rotation schedule as outlined in this guide. |
| Panicking and pulling out mid-injection | Causes more tissue damage than completing the injection calmly. Also wastes your dose and causes oil to leak everywhere. | Commit to the motion. Stay calm. If you hit a nerve (sharp shooting pain), withdraw smoothly and try a different spot. |
| Injecting with a flexed or tense muscle | Dramatically increases pain, PIP, and difficulty of the injection. | Consciously relax the muscle. Let it go limp. Then pin. |
| Using 23G or thicker for injection because "that's what the forum told me" | Causes unnecessary tissue trauma and pain when 27-29G works perfectly for oils. | Upgrade to 27-29G. You will wonder why you ever used anything else. |
| Not warming oil before injection | Cold thick oil is harder to push through thin needles and causes more PIP. | Hold the vial in your hands for 2-3 minutes or stand it in warm water before drawing. |
| Injecting into visibly irritated or infected skin | Introducing a needle through compromised skin can push bacteria into deeper tissue. | Only inject through clean, healthy, intact skin. If a site looks red or irritated, skip it and use another. |
TLDNRD

For those of you who just want to see what you need at a glance without reading through the entire guide, here's a TLDR.
| I'm Injecting... | Route | Syringe | Draw Needle | Pin Needle | Best Sites |
|---|---|---|---|---|---|
| Testosterone (E, C, U) | IM | 1-3 mL luer-lock | 18G × 1.5" | 29G × 1/2" (delts) or 27G × 1" (VG) | Delts, VG |
| Other AAS oils (Tren, Mast, Primo, EQ, Deca) | IM | 1-3 mL luer-lock | 18G × 1.5" | 29G × 1/2" (delts) or 27G × 1" (VG) | Delts, VG |
| BPC-157, TB-500 | SubQ | Insulin syringe (fixed needle) | N/A | 29-31G × 1/2" (built in) | Near injury (BPC) or abdomen |
| CJC-1295 / Ipamorelin / GHRP | SubQ | Insulin syringe | N/A | 29-31G × 1/2" | Abdomen, flank |
| HGH | SubQ | Insulin syringe | N/A | 29-31G × 1/2" | Abdomen |
| HCG | SubQ | Insulin syringe | N/A | 29-31G × 1/2" | Abdomen, flank |
| Semaglutide (vial) | SubQ | Insulin syringe | N/A | 29-31G × 1/2" | Abdomen, thigh, back of arm |
| Semaglutide (Ozempic pen) | SubQ | Pre-filled pen | N/A | Pen needle (included) | Abdomen, thigh, back of arm |
| Tirzepatide (Mounjaro pen) | SubQ | Pre-filled pen | N/A | Pen needle (included) | Abdomen, thigh, back of arm |
| Liraglutide (Saxenda pen) | SubQ | Pre-filled pen | N/A | Pen needle (included) | Abdomen, thigh, back of arm |
| Liraglutide (Saxenda pen) | SubQ | Pre-filled pen | N/A | Pen needle (included) | Abdomen, thigh, back of arm |
| Insulin | SubQ | Insulin syringe or pen | N/A | 29-31G × 5/16"-1/2" | Abdomen, thigh, back of arm |
| MT-II | SubQ | Insulin syringe | N/A | 29-31G × 1/2" | Abdomen |
| L-Carnitine | IM | 3 mL luer-lock | 18G × 1.5" | 27-29G × 1/2"–1" | Delts, VG |
| B12 | IM or SubQ | 1-3 mL luer-lock or insulin syringe | 18G (if from multi-dose vial) | 27-29G × 1/2"–1" | Delts |
CONCLUSION

And that's a wrap.
If you have read through this entire guide, you now know more about safe injection practice than probably 99% of the people on this forum. The whole point of writing this was to combat the amount of misinformation I constantly kept seeing and for myself to look back on, so if this guide helped even one person avoid an abscess, a nerve hit or a wasted peptide cycle then it was worth the time.
Quick recap of the things that matter most
- Pin delts or VG. That's it. That's all you need.
- Use 27-29G needles. Stop using harpoons.
- Always swap your draw and pin needles.
- Rotate your sites. Scar tissue is real regardless of needle gauge.
- Never shake peptides. Swirl like a civilized person.
- Store reconstituted compounds in the fridge.
- If something looks or feels wrong after an injection, go see a doctor. Your pride ain't worth an infection.
The information in this guide is backed by nursing literature, clinical guidelines, and the FDA. Here are the key sources. I used a citation generator so that they are in MLA 9 format. If you want to fact-check anything yourself, search the title on PubMed or Google Scholar.
Ventrogluteal Site, IM Best Practices & Site Safety
Cocoman, A., and J. Murray. "Intramuscular Injections: A Review of Best Practice for Mental Health Nurses." Journal of Psychiatric and Mental Health Nursing, vol. 15, no. 5, 2008, pp. 424–434.
Greenway, Kathleen. "Using the Ventrogluteal Site for Intramuscular Injection." Nursing Standard, vol. 18, no. 25, 2004, pp. 39–42.
Nicoll, Leslie H., and Amy Hesby. "Intramuscular Injection: An Integrative Research Review and Guideline for Evidence-Based Practice." Applied Nursing Research, vol. 15, no. 3, 2002, pp. 149–162.
Ogston-Tuck, Sherri. "Intramuscular Injection Technique: An Evidence-Based Approach." Nursing Standard, vol. 29, no. 4, 2014, pp. 52–59.
Sciatic Nerve Risk
Small, Sandra P. "Preventing Sciatic Nerve Injury from Intramuscular Injections: Literature Review." Journal of Advanced Nursing, vol. 47, no. 3, 2004, pp. 287–296.
Aspiration Not Required for VG & Deltoid
Sisson, Helen. "Aspirating during the Intramuscular Injection Procedure: A Systematic Literature Review." Journal of Clinical Nursing, vol. 24, no. 17–18, 2015, pp. 2368–2375.
World Health Organization. WHO Best Practices for Injections and Related Procedures Toolkit. WHO, 2010.
Centers for Disease Control and Prevention. "General Best Practice Guidelines for Immunization: Best Practices Guidance of the Advisory Committee on Immunization Practices (ACIP)." CDC, 2023.
Needle Gauge, Pain & Needle Length
Gill, Harvinder S., and Mark R. Prausnitz. "Does Needle Size Matter?" Journal of Diabetes Science and Technology, vol. 1, no. 5, 2007, pp. 725–729.
Zaybak, Ayten, et al. "Does Obesity Prevent the Needle from Reaching Muscle in Intramuscular Injections?" Journal of Advanced Nursing, vol. 58, no. 6, 2007, pp. 552–556.
Subcutaneous Testosterone
Spratt, David I., et al. "Subcutaneous Injection of Testosterone Is an Effective and Preferred Alternative to Intramuscular Injection: Demonstration in Female-to-Male Transgender Patients." Journal of Clinical Endocrinology & Metabolism, vol. 102, no. 7, 2017, pp. 2349–2355.
Lipodystrophy & Insulin Injection Technique
Blanco, Margarida, et al. "Prevalence and Risk Factors of Lipohypertrophy in Insulin-Injecting Patients with Diabetes." Diabetes & Metabolism, vol. 39, no. 5, 2013, pp. 445–453.
Frid, Anders H., et al. "New Insulin Delivery Recommendations." Mayo Clinic Proceedings, vol. 91, no. 9, 2016, pp. 1231–1255.
Air Embolism Threshold
Mirski, Marek A., et al. "Diagnosis and Treatment of Vascular Air Embolism." Anesthesiology, vol. 106, no. 1, 2007, pp. 164–177.
GLP-1 Agonist Prescribing Information
Novo Nordisk. "Ozempic® (Semaglutide) Injection: Prescribing Information." U.S. Food and Drug Administration, 2017, revised 2024.
Novo Nordisk. "Wegovy® (Semaglutide) Injection: Prescribing Information." U.S. Food and Drug Administration, 2021.
Eli Lilly and Company. "Mounjaro™ (Tirzepatide) Injection: Prescribing Information." U.S. Food and Drug Administration, 2022.
Novo Nordisk. "Saxenda® (Liraglutide) Injection: Prescribing Information." U.S. Food and Drug Administration, 2014, revised 2023.
Sterile Compounding & BAC Water
United States Pharmacopeial Convention. "USP General Chapter ⟨797⟩ Pharmaceutical Compounding—Sterile Preparations." United States Pharmacopeia, 2023.
I wrote this over the span of 3 days so if you have any questions, corrections, or suggestions, drop them below. If this helped you out, a rep, bookmark or a DNRD goes a long way.

Attachments

Last edited: