

Aqualad
Diamond
- Joined
- Dec 30, 2023
- Posts
- 1,495
- Reputation
- 1,513
The following guide is an advanced aiming guide for Brawl Stars at a competitive level. My goal is to try and put the practices I use into text, so others can practice the same methods I have used over the past 3 years. This is not a get-rich-quick guide for aiming, rather a guide on how to improve yourself, and the methods I’ve used myself to reach these goals.
#Qualifications
At the time of writing this, I have achieved 6 rank 35s, those being:
- Brock
- Nani
- Piper
- Mr. P
- Jacky
- Sprout
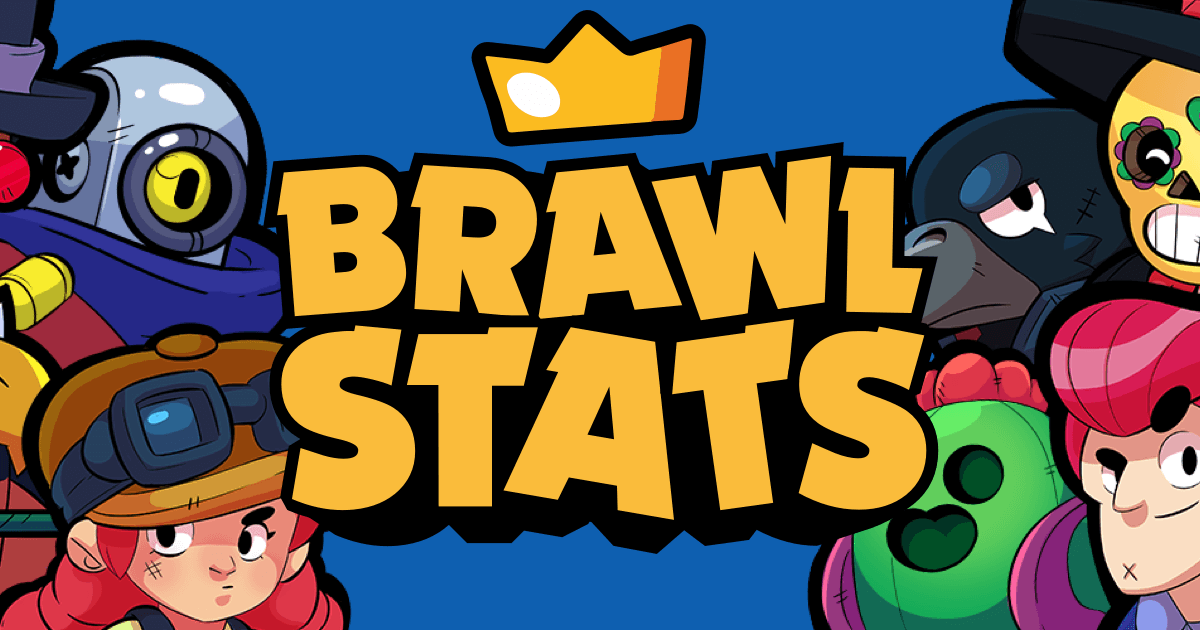
 brawlstats.com
Besides the meta brawlers (Penguin, Sprout, Jacky) it is clear that I am a sharpshooter main, and have been maining Brock since the second week of beta when he was the first character I unlocked. Most every brawler that requires aim, I have gotten to at least 1k.
Now, these numbers are in no means supposed to be a flex in anyway. Rather qualifications, so that these tips, and this guide are taken seriously, and proof that I have given hours of thought and practice to aiming. As well as how the brawlers are played.
#Overview
Aiming is arguably the #1 skill factor in determining a good player, or a bad player. Hitting your shots completely defines your skill as a sharpshooter, and how much value you get from picking the character, much more than anything else in a sniper/sharpshooters kit. But what if I were to tell you positioning, or even holding pressure was the most important factor in how many shots you are actually landing.
Putting yourself into a good position is the first part to landing your shots. A good general tip is you usually want to be at your maximum range as much as possible, as most sharpshooters have some kind of advantage if you are.
The amount of shots you hit also defines how much **pressure** you are putting out, and using this to your advantage to scare away players is something I will go over too.
I am a DSD main, but can hold my own in competitive 3v3s as well. Duos is just my preferred method of playing, and I think the skill required to be successful here is vastly underrated. I also enjoy this mode, because if you’re able to hit the majority of your shots, you WILL be able to get to 1k easily even with randoms. At the time of writing this, I have gotten Brock to 1k with randoms 5 times, Piper once and Nani once.
#Positioning
A tip I learned from playing Competitive Overwatch (3500+ SR), is your aim is limited completely to how you position yourself, and the same could be said for Brawl Stars.
Positioning x Aim = Shots Hit, is a calculation I keep in mind whenever I play, to prevent my positioning from going on autopilot.
Now, as much as I would appreciate doing a positioning guide, that would take up the majority of this post, and this is supposed to be focused on the aim mechanic itself, not positioning. Even though it has such a big factor into how many shots you do hit, and how much pressure you give off, if is not the main focus, so I will try and briefly explain how it effects aiming.
Position yourself where you think the enemy team has a reason to go. Your teammate is pinching from below? Better go and block off that chokepoint so they can’t retreat, causing a pinch, and ultimately a 2v3 scenario for your team.
Imagine the Brawl Ball map Backyard Bowl - your team is bringing the ball on the right side of the goal. Instead of stacking all 3 of you on the same side of the goal, go to the left side. Your opponents will be busy shooting your Bibi teammate with the ball, instead of focusing you who is taking shots from the opposite side of them. Simply because your Bibi has the ball, the highest priority for them is getting the ball away from Bibi as fast as possible, allowing you, as Brock, to chain multiple supers on them, and be able to score all by yourself if your teammates die.
Now, obviously, I could right a short novel about all the intricacies of positioning in this mobile game, but I will save you the time, as there are definitely more important things to cover to increase your skill as a sharpshooter. However, I think this quick write-up should be a good beginning learning point for competitive players trying to learn sharpshooters. I know positioning itself is rather vague, so let me know if you have any questions and I will answer them to my fullest ability.
#Pressure
Understanding pressure is the biggest tip for understanding how to position yourself. It can also be defined as control, but with sharpshooters and snipers, I believe pressure is a more fitting term, as you are only getting as much control depending on how many shots you are hitting, or how afraid the enemy is of you. Therefore, creating a pressure zone, instead of default control (e.g. a Penguin Porter, or Spike Curveball).
For example: Imagine aiming your reticle (aim/shot bar) and drawing a circle around yourself with the reticle. Now imagine a circle in that radius, similar to Jacky when you aim. That is your effective “pressure zone”, and anyone inside the zone should be threatened unless behind cover. This “pressure zone” increases in danger if the opponents can recognize how well you play. A Piper with a high pressure zone is one of the most threatening brawlers to face in the game, as she can two shot and eliminate half of the cast within a matter of seconds if she plays right. Understanding how to abuse this zone, and threaten people out of an area, is CRUCIAL for zoning as a sharpshooter.
For example, in Brawl Ball, you can chase enemies towards a certain part of the field to quickly get a pass and score a goal, just because the enemy team doesn’t want to take a Piper or Brock shot to the face. This is why Ambush provides so much value. Because it increases Piper’s effective pressure zone simply by just standing in a bush.
Wasting ammo and understanding how many shots you should or shouldn’t take, can also win/lose you games accordingly. For example, in DSD, even if you get a kill on someone across the map, you have used 2/3 shots. Use your intuition if that kill is worth losing your pressure zone for. If you have a low reload speed brawler, your pressure zone danger goes down SIGNIFICANTLY. If the approaching opponent knows your reload times, it can provide an opening for them depending on the brawler and/or if they have super.
This might be a bad habit of mine, but skins can also be significantly helpful to quickly determine the skill of a player until you see them shoot. If you see a Hot Rod Brock, you should assume they are going to try and predict your movements, as only Brock mains would spend 150 gems on that skin lol. So start by dodging, and adjust your movement accordingly to their aiming rhythms. Obviously, this tip is only helpful for the beginning of engagements, as skins don’t determine skill, but it is very effective in my experience, especially in DSD where you don’t know your opponents names. A Hot Rod Brock and Evil/Pirate Gene is MUCH more threatening than their no-skinned counterparts. Use this to your advantage to increase your effective pressure zone.
##Maximum Ranges
Abusing your maximum ranges, especially for snipers will also help you push even more. Besides abusing their maximum range, and out-ranging most every brawler, some brawlers actually come with a slight bonus:
- Brock has a small 1 tile “splash zone” that increases his rockets hitbox if shot at maximum range/hits a wall
- Pipers damage well… obviously increases the further away you are from the target, and makes homemade recipe feel completely bullshit
- Nani out ranges every brawler in the game with her spread and chip damage.
###Rhythms
Movement rhythms and aiming rhythms is a relatively new topic for me actually. Special thank you to Relyh for the [best aiming video on Brawl Stars I could find](https://www.youtube.com/watch?v=0lUgMfpot7o&t). Now obviously, I recommend you watch the video if you are serious about improving your aim. However, for the sake of concurrency, I am going to put a few notes up about rhythms here. If you want a more in depth look, watch the video. I don’t want to plagiarize his brilliant tips.
Aiming and movement rhythms - or patterns - are pretty self explanatory. Everyone has patterns in their movement. Your job as a sharpshooter is being able to read them.
* Try and shoot immediately after they change directions - it is hard to dodge twice consistently, and can mess with them psychologically
* Place your aim rhythms after their dodges. This puts you in control of the engagement, rather than vice versa.
* Make your shot rhythm times unpredictable. Shoot 2 shots every .4 seconds, then switch it up to .7, .2, etc. This will keep them dodging for no reason, and will make it easier to land a shot when they don’t expect you to shoot.
* If you have control over their movement rhythms, shoot 2 shots consecutively where you know they would dodge. Otherwise you are wasting 2 ammo bars, lowing your pressure zone significantly.
* Missing your shots does not mean you’re bad - it means your opponents dodging rhythms are ahead of your aiming rhythms. Stop shooting, take a breath, relax, and recenter your rhythm.
* Do not go on auto pilot, actively think about where you are aiming, and why you are shooting where you are.
* Try not to over-read. Sometimes, auto aiming is the way. Especially against micro dodge spammers. This is most effective against players who change their movements back and forth VERY often.
* 4:15 - VERY IMPORTANT - HARD TO EXPLAIN IN NOTES, BUT VERY GOOD TIP. INCREASES SHOT ACCURACY BY 33%.
* Changing with your opponents is #1 tip. They are going to adjust their movement if you are in control. Change with them to stay in control.
###MOVEMENT
Movement, as stated before, is the other end of aiming. A lot of key movement tips were stated above. Your main focus should be doing the opposite of what is stated about aiming rhythms. Keep your dodging patterns unpredictable, and ahead of your opponents. Your goal should be dodging BEFORE they shoot. Obviously, if the projectile is slow enough, you can reactively dodge consistently, but with some attacks, like Piper’s, your goal should be to keep control of the engagement, and dodge before they shoot, or by reading their shot patterns.
Also as stated before, if you don’t know a players skill level yet in the beginning of a match, the most consistent way to assume their skill level before you engage with them, are their skins.
> This might be a bad habit of mine, but skins can also be significantly helpful to quickly determine the skill of a player until you see them shoot. A Hot Rod Brock and Evil/Pirate Gene is MUCH more threatening than their no-skinned counterparts. Use this to your advantage to increase your effective pressure zone.
Movement in general is something that comes more with practice than anything else, and there isn’t any magical tips I can really share other than out-smarting your opponents. The more you play, the more you will understand how players shoot, where they will shoot, and when. Practice, practice, practice.
However, this doesn’t mean I don’t have ANY tips about movement. But still, the best way to improve your movement - as boring as it is - is practice.
#”Extended” Shot
Something you will see top players do in game a lot, is immediately backing up after they shoot. This is most useful in 1v1 interactions where you have the same range as your opponent (Brock vs. Piper/Colt 2nd sp, Bea) but it is still useful in general 1v1s. What this does is artificially “extend” your shot. It doesn’t actually increase the range of the shot, but it increases the distance travelled between you and your shot fired. Whoever backs up first after shooting in a sharpshooter 1v1, generally gets the first shot landed.
#Aim Momentum
Aim momentum is a ping/latency term that has to do with server connection, and where your white reticle is placed. I’m not sure if “aim momentum” is the appropriate term for it, but its what I’ve been calling it for years now, and it makes sense to me. Basically, your white line doesn’t shoot exactly where it is pointing. Many times, your shot will not come out immediately, rather a slight fraction of a second instead. Assuming you have a ping of 20, it will take .2 seconds for your shot to come out of where your hitbox is.
It is more difficult to explain in text, but for example, say I am trying to score a goal in brawl ball, or do a peak shot around a wall. My white reticle will appear to still be hitting the side of the wall, but when the shot comes out, it will shoot around the wall. This mainly takes practice, like everything else, as boring as that is to hear. Practice this by peak shot spamming in showdown. When mastered, you can shoot behind a wall without exposing yourself at all, due to server latency. Basically the equivalent of head glitching in Brawl Stars.
#Perpendicular Dodging
Another tip that I recently learned, is that you should never move backwards of forwards when dodging a target. Always dodge right or left perpendicular to your target. This makes your hitbox more difficult to hit, where if you were moving backwards or forwards, you are effectively increasing your hitbox size.
#Memorizing Movements
This method is easier to learn and master in 3v3s, as there are less opponents to keep in the back of your mind. It’s rather self explanatory, but less experienced players will have set movement rhythms throughout a game, that usually don’t change. Always keeping this in your head, and adjusting your aim according to the player, is key in mastering hitting all your shots.
#Practise & Improvement
Phew, wow. I know thats a lot of information. Now you’re probably wondering how do I apply these in my games, and actually get better at aiming in this overly complex mobile game. Well luckily, I have also studied the most effective way of retaining information so, if you’re REALLY dedicated to getting better, please take these into account.
My methods of practicing start with warming up in the training range. Every time before I start a grinding session, I go into the practice range and practice flick shots on the bots, only aiming my reticle for a fraction of a second to hit the bot. I do this with Brock and Piper until I can hit my shots consistently on them without aiming my reticle almost at all.
Obviously, bots are not the same as human movement. But I have found this method works when flicking in a spot you know the enemy is moving, and practicing this every time before I play has made my peakshot and flicking game excellent.
Another tip, is SOLO queue 20 games, and take into account how many you won and lost. Keyword, solo. Solo queuing puts you on an even playing field as the enemy team, as they are just as likely to have bad teammates as you are. If you are losing more than 10 games, you are the reason your team is losing. Sorry to say it, but even if your randoms are complete shit, you should be winning 50% of your games on average. A play pool of 20 is good enough to have a general idea of your win rate, but obviously you can increase or decrease it depending how dedicated you are.
Now, turn on your screen recorder and record all of those losses. Don’t cherry pick losses where you think you carried, and your team did shit. This is only going to go against you when trying to improve. Analyze where you went wrong, why you died, what opportunities you couldlve taken advantages of, places you should’ve shot instead. Write them down, and actively think about how you can fix these problems when in game. Doing this for a week, you WILL see nearly instant improvements in your play.
Another way I grind, is going onto an mini account, and going completely full aggro in showdown, and seeing how successful I can be with hitting my shots. This prevents me from getting tilted from bullshit losses, as it is a mini account, and I can fully focus on how I am aiming. Pay attention to where your TARGET is, rather than the reticle itself.
NEVER BE ON AUTOPILOT. Always be actively thinking about where you are aiming, and where your opponent is dodging, and how you can adjust your rhythms, to take control of the engagement.
With all these tips in mind, you should see very quick improvements. Doing this for months on end is how I have achieved extremely good aim.
#Final Thoughts/Misc
Some final things I thought were worth saying, but couldn’t find any place to fit into this guide:
Ladder does NOT equal competitive. Do not think this. Slapping pros on ladder doesn’t mean you are better than them. Ladder is not an effective way to measure skill, even with rank 35s. (Although a bad player cannot get rank 35, don’t get me wrong). Tourneys are the best way to measure how good of a player someone is, and how good their aiming or dodging skills truly are
PLEASE let me know if I have missed anything, I am completely open to criticism, constructive or not. I want to make this the best guide possible to help teach players how to become gods at aiming.
Thanks for reading. If this gets traction, I would love to make a part 2 if y’all are interested.
Otherwise, reach out to me on discord (rodeo#0496) and let me know where you came from.
#Qualifications
At the time of writing this, I have achieved 6 rank 35s, those being:
- Brock
- Nani
- Piper
- Mr. P
- Jacky
- Sprout
Brawl Stats - Profile 'rodeoðµ' #80CRQQQC
Profile 'rodeoðµ' #80CRQQQC rodeoðµ best brawlers, brawlers trophies graph, victories, trophies graph, performance and club history.
brawlstats.com
Besides the meta brawlers (Penguin, Sprout, Jacky) it is clear that I am a sharpshooter main, and have been maining Brock since the second week of beta when he was the first character I unlocked. Most every brawler that requires aim, I have gotten to at least 1k.
Now, these numbers are in no means supposed to be a flex in anyway. Rather qualifications, so that these tips, and this guide are taken seriously, and proof that I have given hours of thought and practice to aiming. As well as how the brawlers are played.
#Overview
Aiming is arguably the #1 skill factor in determining a good player, or a bad player. Hitting your shots completely defines your skill as a sharpshooter, and how much value you get from picking the character, much more than anything else in a sniper/sharpshooters kit. But what if I were to tell you positioning, or even holding pressure was the most important factor in how many shots you are actually landing.
Putting yourself into a good position is the first part to landing your shots. A good general tip is you usually want to be at your maximum range as much as possible, as most sharpshooters have some kind of advantage if you are.
The amount of shots you hit also defines how much **pressure** you are putting out, and using this to your advantage to scare away players is something I will go over too.
I am a DSD main, but can hold my own in competitive 3v3s as well. Duos is just my preferred method of playing, and I think the skill required to be successful here is vastly underrated. I also enjoy this mode, because if you’re able to hit the majority of your shots, you WILL be able to get to 1k easily even with randoms. At the time of writing this, I have gotten Brock to 1k with randoms 5 times, Piper once and Nani once.
#Positioning
A tip I learned from playing Competitive Overwatch (3500+ SR), is your aim is limited completely to how you position yourself, and the same could be said for Brawl Stars.
Positioning x Aim = Shots Hit, is a calculation I keep in mind whenever I play, to prevent my positioning from going on autopilot.
Now, as much as I would appreciate doing a positioning guide, that would take up the majority of this post, and this is supposed to be focused on the aim mechanic itself, not positioning. Even though it has such a big factor into how many shots you do hit, and how much pressure you give off, if is not the main focus, so I will try and briefly explain how it effects aiming.
Position yourself where you think the enemy team has a reason to go. Your teammate is pinching from below? Better go and block off that chokepoint so they can’t retreat, causing a pinch, and ultimately a 2v3 scenario for your team.
Imagine the Brawl Ball map Backyard Bowl - your team is bringing the ball on the right side of the goal. Instead of stacking all 3 of you on the same side of the goal, go to the left side. Your opponents will be busy shooting your Bibi teammate with the ball, instead of focusing you who is taking shots from the opposite side of them. Simply because your Bibi has the ball, the highest priority for them is getting the ball away from Bibi as fast as possible, allowing you, as Brock, to chain multiple supers on them, and be able to score all by yourself if your teammates die.
Now, obviously, I could right a short novel about all the intricacies of positioning in this mobile game, but I will save you the time, as there are definitely more important things to cover to increase your skill as a sharpshooter. However, I think this quick write-up should be a good beginning learning point for competitive players trying to learn sharpshooters. I know positioning itself is rather vague, so let me know if you have any questions and I will answer them to my fullest ability.
#Pressure
Understanding pressure is the biggest tip for understanding how to position yourself. It can also be defined as control, but with sharpshooters and snipers, I believe pressure is a more fitting term, as you are only getting as much control depending on how many shots you are hitting, or how afraid the enemy is of you. Therefore, creating a pressure zone, instead of default control (e.g. a Penguin Porter, or Spike Curveball).
For example: Imagine aiming your reticle (aim/shot bar) and drawing a circle around yourself with the reticle. Now imagine a circle in that radius, similar to Jacky when you aim. That is your effective “pressure zone”, and anyone inside the zone should be threatened unless behind cover. This “pressure zone” increases in danger if the opponents can recognize how well you play. A Piper with a high pressure zone is one of the most threatening brawlers to face in the game, as she can two shot and eliminate half of the cast within a matter of seconds if she plays right. Understanding how to abuse this zone, and threaten people out of an area, is CRUCIAL for zoning as a sharpshooter.
For example, in Brawl Ball, you can chase enemies towards a certain part of the field to quickly get a pass and score a goal, just because the enemy team doesn’t want to take a Piper or Brock shot to the face. This is why Ambush provides so much value. Because it increases Piper’s effective pressure zone simply by just standing in a bush.
Wasting ammo and understanding how many shots you should or shouldn’t take, can also win/lose you games accordingly. For example, in DSD, even if you get a kill on someone across the map, you have used 2/3 shots. Use your intuition if that kill is worth losing your pressure zone for. If you have a low reload speed brawler, your pressure zone danger goes down SIGNIFICANTLY. If the approaching opponent knows your reload times, it can provide an opening for them depending on the brawler and/or if they have super.
This might be a bad habit of mine, but skins can also be significantly helpful to quickly determine the skill of a player until you see them shoot. If you see a Hot Rod Brock, you should assume they are going to try and predict your movements, as only Brock mains would spend 150 gems on that skin lol. So start by dodging, and adjust your movement accordingly to their aiming rhythms. Obviously, this tip is only helpful for the beginning of engagements, as skins don’t determine skill, but it is very effective in my experience, especially in DSD where you don’t know your opponents names. A Hot Rod Brock and Evil/Pirate Gene is MUCH more threatening than their no-skinned counterparts. Use this to your advantage to increase your effective pressure zone.
##Maximum Ranges
Abusing your maximum ranges, especially for snipers will also help you push even more. Besides abusing their maximum range, and out-ranging most every brawler, some brawlers actually come with a slight bonus:
- Brock has a small 1 tile “splash zone” that increases his rockets hitbox if shot at maximum range/hits a wall
- Pipers damage well… obviously increases the further away you are from the target, and makes homemade recipe feel completely bullshit
- Nani out ranges every brawler in the game with her spread and chip damage.
###Rhythms
Movement rhythms and aiming rhythms is a relatively new topic for me actually. Special thank you to Relyh for the [best aiming video on Brawl Stars I could find](https://www.youtube.com/watch?v=0lUgMfpot7o&t). Now obviously, I recommend you watch the video if you are serious about improving your aim. However, for the sake of concurrency, I am going to put a few notes up about rhythms here. If you want a more in depth look, watch the video. I don’t want to plagiarize his brilliant tips.
Aiming and movement rhythms - or patterns - are pretty self explanatory. Everyone has patterns in their movement. Your job as a sharpshooter is being able to read them.
* Try and shoot immediately after they change directions - it is hard to dodge twice consistently, and can mess with them psychologically
* Place your aim rhythms after their dodges. This puts you in control of the engagement, rather than vice versa.
* Make your shot rhythm times unpredictable. Shoot 2 shots every .4 seconds, then switch it up to .7, .2, etc. This will keep them dodging for no reason, and will make it easier to land a shot when they don’t expect you to shoot.
* If you have control over their movement rhythms, shoot 2 shots consecutively where you know they would dodge. Otherwise you are wasting 2 ammo bars, lowing your pressure zone significantly.
* Missing your shots does not mean you’re bad - it means your opponents dodging rhythms are ahead of your aiming rhythms. Stop shooting, take a breath, relax, and recenter your rhythm.
* Do not go on auto pilot, actively think about where you are aiming, and why you are shooting where you are.
* Try not to over-read. Sometimes, auto aiming is the way. Especially against micro dodge spammers. This is most effective against players who change their movements back and forth VERY often.
* 4:15 - VERY IMPORTANT - HARD TO EXPLAIN IN NOTES, BUT VERY GOOD TIP. INCREASES SHOT ACCURACY BY 33%.
* Changing with your opponents is #1 tip. They are going to adjust their movement if you are in control. Change with them to stay in control.
###MOVEMENT
Movement, as stated before, is the other end of aiming. A lot of key movement tips were stated above. Your main focus should be doing the opposite of what is stated about aiming rhythms. Keep your dodging patterns unpredictable, and ahead of your opponents. Your goal should be dodging BEFORE they shoot. Obviously, if the projectile is slow enough, you can reactively dodge consistently, but with some attacks, like Piper’s, your goal should be to keep control of the engagement, and dodge before they shoot, or by reading their shot patterns.
Also as stated before, if you don’t know a players skill level yet in the beginning of a match, the most consistent way to assume their skill level before you engage with them, are their skins.
> This might be a bad habit of mine, but skins can also be significantly helpful to quickly determine the skill of a player until you see them shoot. A Hot Rod Brock and Evil/Pirate Gene is MUCH more threatening than their no-skinned counterparts. Use this to your advantage to increase your effective pressure zone.
Movement in general is something that comes more with practice than anything else, and there isn’t any magical tips I can really share other than out-smarting your opponents. The more you play, the more you will understand how players shoot, where they will shoot, and when. Practice, practice, practice.
However, this doesn’t mean I don’t have ANY tips about movement. But still, the best way to improve your movement - as boring as it is - is practice.
#”Extended” Shot
Something you will see top players do in game a lot, is immediately backing up after they shoot. This is most useful in 1v1 interactions where you have the same range as your opponent (Brock vs. Piper/Colt 2nd sp, Bea) but it is still useful in general 1v1s. What this does is artificially “extend” your shot. It doesn’t actually increase the range of the shot, but it increases the distance travelled between you and your shot fired. Whoever backs up first after shooting in a sharpshooter 1v1, generally gets the first shot landed.
#Aim Momentum
Aim momentum is a ping/latency term that has to do with server connection, and where your white reticle is placed. I’m not sure if “aim momentum” is the appropriate term for it, but its what I’ve been calling it for years now, and it makes sense to me. Basically, your white line doesn’t shoot exactly where it is pointing. Many times, your shot will not come out immediately, rather a slight fraction of a second instead. Assuming you have a ping of 20, it will take .2 seconds for your shot to come out of where your hitbox is.
It is more difficult to explain in text, but for example, say I am trying to score a goal in brawl ball, or do a peak shot around a wall. My white reticle will appear to still be hitting the side of the wall, but when the shot comes out, it will shoot around the wall. This mainly takes practice, like everything else, as boring as that is to hear. Practice this by peak shot spamming in showdown. When mastered, you can shoot behind a wall without exposing yourself at all, due to server latency. Basically the equivalent of head glitching in Brawl Stars.
#Perpendicular Dodging
Another tip that I recently learned, is that you should never move backwards of forwards when dodging a target. Always dodge right or left perpendicular to your target. This makes your hitbox more difficult to hit, where if you were moving backwards or forwards, you are effectively increasing your hitbox size.
#Memorizing Movements
This method is easier to learn and master in 3v3s, as there are less opponents to keep in the back of your mind. It’s rather self explanatory, but less experienced players will have set movement rhythms throughout a game, that usually don’t change. Always keeping this in your head, and adjusting your aim according to the player, is key in mastering hitting all your shots.
#Practise & Improvement
Phew, wow. I know thats a lot of information. Now you’re probably wondering how do I apply these in my games, and actually get better at aiming in this overly complex mobile game. Well luckily, I have also studied the most effective way of retaining information so, if you’re REALLY dedicated to getting better, please take these into account.
My methods of practicing start with warming up in the training range. Every time before I start a grinding session, I go into the practice range and practice flick shots on the bots, only aiming my reticle for a fraction of a second to hit the bot. I do this with Brock and Piper until I can hit my shots consistently on them without aiming my reticle almost at all.
Obviously, bots are not the same as human movement. But I have found this method works when flicking in a spot you know the enemy is moving, and practicing this every time before I play has made my peakshot and flicking game excellent.
Another tip, is SOLO queue 20 games, and take into account how many you won and lost. Keyword, solo. Solo queuing puts you on an even playing field as the enemy team, as they are just as likely to have bad teammates as you are. If you are losing more than 10 games, you are the reason your team is losing. Sorry to say it, but even if your randoms are complete shit, you should be winning 50% of your games on average. A play pool of 20 is good enough to have a general idea of your win rate, but obviously you can increase or decrease it depending how dedicated you are.
Now, turn on your screen recorder and record all of those losses. Don’t cherry pick losses where you think you carried, and your team did shit. This is only going to go against you when trying to improve. Analyze where you went wrong, why you died, what opportunities you couldlve taken advantages of, places you should’ve shot instead. Write them down, and actively think about how you can fix these problems when in game. Doing this for a week, you WILL see nearly instant improvements in your play.
Another way I grind, is going onto an mini account, and going completely full aggro in showdown, and seeing how successful I can be with hitting my shots. This prevents me from getting tilted from bullshit losses, as it is a mini account, and I can fully focus on how I am aiming. Pay attention to where your TARGET is, rather than the reticle itself.
NEVER BE ON AUTOPILOT. Always be actively thinking about where you are aiming, and where your opponent is dodging, and how you can adjust your rhythms, to take control of the engagement.
With all these tips in mind, you should see very quick improvements. Doing this for months on end is how I have achieved extremely good aim.
#Final Thoughts/Misc
Some final things I thought were worth saying, but couldn’t find any place to fit into this guide:
Ladder does NOT equal competitive. Do not think this. Slapping pros on ladder doesn’t mean you are better than them. Ladder is not an effective way to measure skill, even with rank 35s. (Although a bad player cannot get rank 35, don’t get me wrong). Tourneys are the best way to measure how good of a player someone is, and how good their aiming or dodging skills truly are
PLEASE let me know if I have missed anything, I am completely open to criticism, constructive or not. I want to make this the best guide possible to help teach players how to become gods at aiming.
Thanks for reading. If this gets traction, I would love to make a part 2 if y’all are interested.
Otherwise, reach out to me on discord (rodeo#0496) and let me know where you came from.